Microsoft has recently announced that they are moving .Net to open source and supporting Mac and Linux in addition to their Windows OS with Visual Studio Community 2013. Also, Visual Studio 2015 will support iOS and Android development.
Frankly, it's a little confusing because in some places MS mentions Mac and Linux, but very few, and they mention iOS and Android in lots of places, but not everywhere. So the support may be different than what I said.
Nevertheless, MS is opening up. Or at least seeming to.
Their timing couldn't be better, in my opinion.
Oracle is working hard to poison Java. I'm not entirely sure why, unless they think that ticking off any Java programmers and users outside those developing middleware for Oracle's products is a really great strategy. Their support for Java as a general programming language, as Sun did, has been piss-poor since day 1. Every so often they make a grand gesture to try to present themselves as interested, but the product they offer now is not something I could send someone out to install with a good conscience. What kind of an honest, large-scale company thinks that half-sneaking some crap software in under the cover of installing their own is a really great idea? Not one that really treasures the individual customers, I can tell you (and yes, Adobe is on this particular excrement list, too.)
Couple that with their poor responsiveness to security concerns, to the point where the Java language is treated as a sort of worm or virus by most software, and you've got a company that's decided to leave a hole in the cross-platform development market simply because their interests are elsewhere.
Cross Platform Alternatives
C# is Microsoft's outgrowth from their own attempt at embrace, extend, exterminate targeting Java. It's a very good language, including the good parts of Java while having a set of libraries (.Net) that don't have the Java API's less than useless historical cruft but do have everything good about the API, which made Microsoft look really cool to programmers when it came out as most were not familiar with the Java API itself.
Switching to C# from Java is an afternoon's exercise. But it and the .Net library started out wed to the Microsoft platform.
Enter Mono, a cross-platform implementation of .Net supporting the C# language based on Microsoft's ECMA standard for its products. It has been growing, at least in part on the back of the decline of Java, as well as bringing the good things about C# and .Net to Mac and Linux development. It doesn't hurt that it is the core that drives products like the Unity cross-platform game-development system, too.
Now Microsoft is combining their products with Mono, and extending their reach to Android and iOS.
There are a Couple of Ways This Could Go (and Possibly More)
In Future A, Microsoft does the excellent work they do in producing development tools, but now with a return to platform-agnosticism. This encourages programmers to develop for Windows and Windows Phone as well, since programmers who might otherwise have been targetting only iOS or Android will be selecting these tools for their intrinsic value as development tools to write programs for their favored OS, then decide to toss a Windows/WinPho version out there, too, since it's not costing them any significant extra effort and might end up fattening the coffers a bit.
Microsoft gains developers for its platforms, draws "thought leader" and technical leaders into their ecosystem, and the developers get the advantage of having good development tools for any major platform they choose.
In Future B, Microsoft uses this as a ploy to draw programmers in, but cross-platform support is sloppy, or delivered slowly, or lags behind the native capabilities of the non-MS platforms. Perhaps it doesn't play well with the various different versions of Android, or maybe the Mac and Linux native code suffers by comparison with code developed with native tools for those platforms.
It turns out to just be hype. Maybe there are forces within MS that fight the release of solid tools that are truly cross-platform, so they ensure that foreign platform support is sub-par, thinking that they're helping their own products by making it "harder" to develop for other platforms. The only point of cross-platform, to them, is to allow Windows patriots to proclaim themselves cross-platform developers without knowing anything about the competition.
In this future, Windows does not become the programmer's platform of choice, Windows has extra costs of development that make it less attractive as a development target when another platform is the one that's going to pay the bills (probably iOS), and life goes on as it does today with possibly the Microsoft touch putting some poison into Mono.
I can only hope that the upper management at MS is committed to Future A. because that's what it's going to take to keep Future B from stepping in any time it pleases.
Microsoft, Doing You Know What in Their Own Messkit for the Past Decade
Windows 7 was a boon for programmers when it came out. I and many other programmers I know had been feeling somewhat kicked about by Apple, didn't see tools with the same level of sophistication on Linux (and generally more system maintenance than the commercial OSes, and system maintenance doesn't pay bills), and Windows 7 was a viable place to go, or to at least have as a second OS on our desk for conducting development and testing.
Windows 8 added some nice stuff behind the scenes, but not without wrecking the usability of the platform, as well as making it a far less attractive target for development. In my case, I abandoned Windows as a target for native development about a decade ago, and was waiting on Windows 8 to see if I might add it to my repertoire again. The answer became "no". Windows 10 will determine whether I ever consider it a serious platform for anything at all in the future, as the professional applications that I currently use on Windows have all become multi-platform over the past several years, so I can move my licenses over to Mac OS or Linux for all of them.
If Microsoft gets it right with their development tools, and Windows 10 restores the power to the desktop that earlier versions provided--not just a false appearance of it as in Windows 8.1--then they stand to become the defacto professional desktop again.
Whither Mobile?
And given that the consumer desktop is the market that is dying in the face of mobile platforms, one would hope that they are bright enough to strategically commit to a powerful professional computer OS again. While the mass market computer is probably going away, there was a profitable professional/hobbyist market before the internet boom put a computer in practically every household. That professional market stands to be even larger than the historical one, as many professions that had nothing to do with computers now rely on them, and many new professions have arisen over the past 25 years that rely on the computer.
Also, there's a possibility that the mobile device as a computer replacement is just a flash in the pan. Most people bought their mobile devices in place of a routine upgrade to their home computer for one cycle. Now that they have tablets, the tablet market is going flat while computers are seeing a modest rise in sales. I think just about everyone has had a chance to discover that the touch interface is very limited in what it can do with current technology. It's severely error-prone and it's not well suited to complex activities. It's too soon to read now, but there's a chance the tablet may be relegated to specialty use status, with the keyboard-equipped computer regaining its status as the "real" computer behind the smartphone's limited purposes as a personal communication and light entertainment device. We'll see.
The phone isn't going to go away, though. It's going to be the most personal of personal computers, at least until it's replaced by a small tablet and a complete phone the size of an earpiece, or some other revolutionary turn that gets people to give up a screen for convenience. So supporting the mobile platforms is, for Microsoft, probably a must to their survival. At least until they can get real market share for Winpho.
Either way, if Microsoft plays their cards right, going to platform-agnosticism in their development tools could be a really good thing for everybody--including and especially Microsoft.
Showing posts with label Programming. Show all posts
Showing posts with label Programming. Show all posts
Monday, November 17, 2014

Monday, January 6, 2014
Parallel Processes on the XMOS StartKIT

XMOS sent me a free StartKIT development board just in time for Christmas. Now that the festivities are over, I've had a chance to get started with it. It's a bit frustrating because XMOS's documentation has the necessary information scattered rather broadly, and documents that you'd expect to contain certain pieces of information do not.* It's all there, just poorly organized & often hidden in long documents where you wouldn't expect it.
That said, the hardware is exciting in its potential. Once I got through the basic tutorial stuff I went to write a simple multiprocessing program--handing over the blinking of two LEDs on the board to two independent processes.
Here again I ran into documentation deficiencies. XMOS presents code examples in their docs as snippets, not full programs. This leads to misunderstandings due to lack of context. I was able to get a program going, on the third attempt. The first syntax I tried created two dependent processes. The second's syntax was not accepted even though it was copied from a sample snippet--it had a variable that needed to be declared, but I didn't know what type to declare it as, and the declarations are left out of the snippets. The third try worked, but only after enough time spent reading and time spent doing some fortunate guesswork to have gotten a lot further with another, better documented hardware platform.
Lighting a Candle While Cursing the Darkness
I still think this is the right platform for the initial ideas I had for it, though. So as I press on, step by step, in implementing those ideas, I'm going to document what I learn & hope to save others time and trouble. I've made a couple of resolutions about the code, similar to those on the code for my Begin with Java blog:
1. All examples will be presented as complete, compilable programs.
2. All examples will use multiprocessing syntax and structure.
Look for this code to appear on my website, saundby.com soon.
Until then:Don't follow the example syntax XMOS uses of writing your code inside main(). All main() should contain is channel declarations and par{} blocks. Put all your code into functions to be called inside par{} blocks.
The code for the dual process LED blinker:
/*
 * LED Tests.xc
 *
 *  Created on: Jan 5, 2014
 *      Author: saundby
 */
#include <xs1.h>

out port    p1              =   XS1_PORT_1A;    //PORT 1A for D1 LED
out port    p2              =   XS1_PORT_1D;    //PORT 1D for D2 LED

void led1(){
    while(1){ //run forever
        p1 <: 1; // LED D1 On
        delay_milliseconds(200);
        p1 <: 0; // LED D1 Off
        delay_milliseconds(200);
    }
}

void led2(){
    while(1){ // run forever
        p2 <: 0; // LED D2 Off
        delay_milliseconds(50);
        p2 <: 1; // LED D2 On
        delay_milliseconds(350);
    }
}

int main(void) {
    // Note: put the 'forever' loop in each of the
    // individual tasks, not out here.
   par{
       led1();
       led2();
   }
   return 0;
}
* It took me forever to find the electrical characteristics of the I/Os in the data sheets, but they are there. There just isn't a data sheet for the specific IC used in the StartKIT, which is a unique item not for sale separately. Personally, I consider it a major oversight to not either provide a data sheet for this specific IC or to include that information in the Hardware Manual for the StartKIT. Based on the scuttlebutt in the forums, I'm using the datasheet for the XS1-A8A-64-FB96 (PDF) as the closest analogue.
Tuesday, November 12, 2013
Ted Nelson & Computer Lib at Homebrew Computer Club Reunion
I had a great time at the Homebrew Computer Club Reunion last night, which, I learned, was made possible by a Kickstarter (thank you, KS backers!)
One of the great conversations I had there was with Ted Nelson, author of Computer Lib/Dream Machines and his wife, Marlene Mellicoat. My wife and I had a wonderful time speaking with them. Ted has published a new edition of Computer Lib. It's not a reprint from scans of the original, but a new printing from the original negatives. It's as clear and sharp as the original was back when, possibly even better. It's in the same large format, as well, not scaled down for the size of paper that happens to be cheap and convenient for most books.
 I was working so hard at being social last night it didn't even occur to me that I could probably have purchased a copy directly from him right then. I saw that he had a number of copies in his bag, too. It's little things like this that I always think of when people tell me how smart I am. Yeah, about some things, maybe, but about other things I'm not so much.
Nevertheless, I'm going to purchase it now, after the event. I read someone else's copy back when, having noticed it as a pillar on a bricks and boards bookshelf among a number of copies of The Fabulous Furry Freak Brothers (Fat Freddy's Cat was my favorite of the crew.) Now I'm looking forward to having a Computer Lib/Dream Machines book of my own.
 If you're not familiar with Ted's work, I strongly recommend correcting that. The web could be so much more than it is, and require far less human "curation" than it does, if it hadn't turned into the mishmash mess of information without proper structure that it has become. I'd say more, but rather than reading my take on what he thinks, go to the source:
Hopefully I'll have a chance to post more about last night's event in future articles. There was so much packed into so little time that my head is still spinning from it. (They managed to recreate the atmosphere of the original meetings perfectly in that regard.)
It was great that my wife got to hear Ted speak during the formal presentation portion of the evening, too. I got to hear him speak a few times back when, he's a dynamic and engaging speaker. He makes you think about how things could be, possibilities that are better than reality. Now we have hearing Ted speak as a shared experience.
Tweet
One of the great conversations I had there was with Ted Nelson, author of Computer Lib/Dream Machines and his wife, Marlene Mellicoat. My wife and I had a wonderful time speaking with them. Ted has published a new edition of Computer Lib. It's not a reprint from scans of the original, but a new printing from the original negatives. It's as clear and sharp as the original was back when, possibly even better. It's in the same large format, as well, not scaled down for the size of paper that happens to be cheap and convenient for most books.
Sorry about the fold, I only had my hip pocket as a place to put his flier last night.
Nevertheless, I'm going to purchase it now, after the event. I read someone else's copy back when, having noticed it as a pillar on a bricks and boards bookshelf among a number of copies of The Fabulous Furry Freak Brothers (Fat Freddy's Cat was my favorite of the crew.) Now I'm looking forward to having a Computer Lib/Dream Machines book of my own.
Hopefully I'll have a chance to post more about last night's event in future articles. There was so much packed into so little time that my head is still spinning from it. (They managed to recreate the atmosphere of the original meetings perfectly in that regard.)
It was great that my wife got to hear Ted speak during the formal presentation portion of the evening, too. I got to hear him speak a few times back when, he's a dynamic and engaging speaker. He makes you think about how things could be, possibilities that are better than reality. Now we have hearing Ted speak as a shared experience.
Tuesday, May 7, 2013
New Android Devices 1:A Samsung Phone Clone

I decided to finally dip my toe into the Android world a few months ago with the purchase of a new Android phone. I should have done this over a year ago, at least, but I decided to give a Blackberry phone a try, first. Boy, what a disappointment and waste of time that was!
So I went looking at different phones and their prices. I was looking for something on the economy end of the scale at first, but as time went on and my BB convinced me I really needed to just pull the trigger as even a low-spec candy bar feature phone would be less frustrating, I upped my commitment to the point where I was looking at bigger displays.
To stay within the price range I was looking at (less than $200 at the end, though originally I had been thinking less that $100), I went looking at clone phones from China.
Not My First China Phone
Those of you who've been reading here a while may recall a series of articles about a prior phone I owned, a Sciphone G2. This was a Java-based feature phone that had been skinned to look like Android. It was an excellent phone, and it's use of Java was a big advantage for me, as there were plenty of good Java phone apps and I could write my own J2ME apps as well. Calling it a mere "feature phone" was an insult, in fact, as I'd rather have one of these than any of the contemporary iPhones that were out at the time.
In fact, after mine went to the eWaste recovery site in the sky, I wished I still had it every day that I was using my Blackberry 8900.
When I went to get another, new China phone, I returned to where I'd bought my G2, hoping to find something equally good. Unfortunately, when I returned to the BlueLans site, I found more clothing than electronics. Their phone selection was ridiculously out of date. Yes, at the time, with the BB 8900 on my belt, I really did consider buying another SciPhone G2.
So I went looking for another supplier. I tried getting a phone from PandaWill. But that turned into a fiasco. It never even got past customs. I ordered a phone from them with a version of Android on a 4" display for about $80. It would have been a good deal, if it had been for real. Unfortunately, they sent me some runaround about not being labelled properly to be shipped with the shipper I chose. They wanted to change shippers, and from what they were saying it didn't sound as if the phone was what it had been represented as on their web page, as well.
Round and round we went. After over a month past the promised delivery date, still no phone. Still some incomprehensible messages from them that made no sense. I tried to cancel the deal with them. They said the phone was in transit (though they also said it wasn't, and that they wanted to change shippers. How can they change shippers if it's in transit? I know there's a logical explanation, and I can think of several possibilities, but they refused to be clear in their communications.) Finally I demanded cancellation of the deal or I'd dispute with Paypal. That did the trick. Suddenly, all their excuses for why the deal couldn't be completed as they told me it could until I actually paid my money disappeared and they cancelled it.
Stay clear of them. If they're not entirely dishonest, they're at least shady enough you don't want to have to sort out a problem with them. If there's a problem of any sort, they'll make it your problem, and my experience they'll at least lie through omission to do so.
Attempt 2
For the second try, I decided to go through a supplier on Amazon with a good track record and Amazon fulfillment. That would at least give some shielding against what I'd just been through with the first place. Initially, I looked for the phone I'd tried to order before. But, it had been a bit longer, and I decided to go with something with a newer version of Android and a larger display (there had also been several more checks deposited to the bank since my first try. I guess that's one good thing about the delay.)
The phone I finally opted for was an SIII clone. It has a display just short of 5", and claimed to be running the Jelly Bean version of Android. Fortunately for me, I didn't care if the phone had Jelly Bean or Ice Cream Sandwich.
When the phone arrived, it was running 4.0, ICS. The About This Phone page had been programmed to lie and say 4.1 (Jelly Bean), but the interface was clearly not JB, the phone reported 4.0.x when I hooked it up to my PC with the Android development software, and the "Easter Egg" on the phone is the ICS easter egg, not the one for JB.
Nevertheless, it's a great phone. The display is really good, the responsiveness was good. It had the right amount of memory and the processor and all the other technical bits were as promised on the Amazon page.
In fact, it was good enough I bought two more. I got one for my daughter about a month after I bought mine. Hers came with a version of ICS with more of JB hacked into it. The interface was more JB, and it had the JB Easter Egg. I guess someone saw my post on Amazon and updated the things I specifically mentioned. It even reported that it was 4.1.x to my PC with the Android Development System. There were still some pieces of ICS in it, though. But it still ran great.
About two months later I bought another for my wife. This time the OS really was Jelly Bean. 100%. And it was a different phone, though the mold lines were about the same. My wife's phone has a much brighter an more vibrant display. That's the first thing I noticed. Inside, the layout of SIMs and memory card is different, as is the battery. And while I had to buy the back with the flip cover screen protector as an add-on for the phones for my wife and daughter, it came in the package with my wife's phone.
One thing to note--while I ordered the same model of phone for my wife, the original supplier I bought from for myself and my daughter had stopped listing that model of phone, so I went with another source. Another source, a different phone.
I'm not disappointed, though, on any count. Everything important about each of these phones was as I wanted it.

Review
Bottom line: This is a great phone. The actual phone interface in Android isn't everything I could want in the way of usability, but that's an Android problem (and each version varies.) Once you get used to the Android Phone application, they work well as a phone. The important functions for me, beside the usual calling and logging, are speaker phone ability and good reception in marginal areas. While my old, lamented Nokia 3650 was a better phone in both these respects, the SIII clone has been better than any phone I've owned since the 3650. It certainly beats out my "name brand" Blackberry, which was purchased in large part because it was lauded on these points.
Processor:
The MTK6577 processor is really what's in it, and it's a great processor for a phone. I would say my tablet blows it away, but my tablet needs to drive a whole lot more screen, so as far as my feeble human perception is concerned, they're both fast.
Memory:
It's a phone. There's never enough, especially when you're like me, loading oodles of memory hog techie apps like the Spartacus Rex Terminal Emulator. That said, it provides easy and immediate use of the MicroSD card memory when you put one in. Unlike, say, Samsung, which treats MicroSD as "something else". If an app allows itself to be loaded on the SD card, this phone will let you put it there and execute it from there. (For those not familiar with some other Android devices, they only use the SD card as data memory, and won't execute apps off of them, or move them to them.)
Programmers take note: making your app run off an SD card takes nothing more than a single line in your manifest file for the app, unless you're doing something on a very short list of things that require the app to be on the phone's main memory. (In which case, write a small helper app that does that in the phone's memory, then put the bulk of your app in another package on the SD card, dangit!)
Display:
It's great. My wife's phone is "wipe your chin, the drool is showing" beautiful, but the ones on my phone and my daughter's are very nice and sharp. Here's an oversized image. The colors are stronger and sharper than in this image, I did my best with the camera:

I/O:
USB works great for recharging as well as for mounting the phone as a file system to Linux, Windows 7 or XP, and Mac OS X. I haven't tried Win8, nor am I likely to unless I have a powerful incentive deposited to my account.
The Wifi is also excellent. I've had several devices with disappointing Wifi, some that cost many times what I paid for this phone. It hooks up easily, and gets good reception no matter what mishandling I'm engaged in with the phone while browsing or whatever. I depend on Wifi, as I'm way too darned cheap to pay for phone-based data services ever since T-Mobile screwed me out of my grandfathered plan after lying to me when I changed service plans.
Both SIM slots work fine, and like most clones, this phone functions fine without a SIM if you're not planning on using it with a phone service. It has two SIM slots, I use one, but plan to add a second SIM card since we have a county nearby where normal phone service from outside the county doesn't operate.
The phone does not include Near Field Communications or IR, but it does have Bluetooth. This works well with headsets and for data file transfers. It's easy to set up and connect to devices, and the antenna on this phone is good enough to get it a good range (I send photos to my computer when outside and around the house without a problem.)
Accessories:
I picked up the flip cover to keep the screen protector from being scratched. My phone came with the screen protector already on, as did my wife's phone, but my daughter had to put hers on. Since mine floats around in my pocket now, and I occasionally put metal things in there before I think to pull them out and move them to the other pocket, I decided to get the flip cover.
The flip cover comes as a new back for the phone. The new back has the cover attached.

At first I found the flip cover annoying whenever I had it open and in my hand. It can get in the way of your fingers, or press into them when you're gripping the phone. After a while, the area around the hinge of the flap gets softened, and this problem becomes pretty much unnoticeable. At first, however, it's a pain in the tookus.
Covers made for the Samsung SIII don't fit, there is enough difference in the forms of the two phones that even the soft "jelly" covers don't fit this phone. So don't plan to add anything specifically designed for the SIII if you get one of these.
Needless to say (I hope), you'll also want to add a MicroSD card to the phone. It's good for up to 32GB. I've got a 16GB in mine, loaded with books and apps, but with still about 9GB free. If I put much music on, that would probably fill it. Personally I recommend the smallest size you think you can live with, as larger cards tend to respond more slowly, especially if you have lots and lots of files in a single directory. This is aside from the concern about speed of the MicroSD. Get the fastest you can find, at least Class 6, if you don't want to hate your phone because you bought a slow MicroSD (I used mine with a Class 4 until I bought a Class 10 for it, and the difference when the new card went in was like someone opening the windows in a stuffy room.)
Wrap Up
Finally, if you don't have a phone with a recent Android OS (4.0 or newer), I highly recommend getting one. It's a solid OS with plenty of tools to let your smartphone be really smart rather than just a parasite living off your PC or a toy trapped inside other people's apps. Load up a real file manager (I recommend ES File Manager, for a start, but get several as each will have its own strengths), a terminal program (several will do the trick without "rooting" your phone), one of the Scripting Languages for Android (which work through SL4A) and a cool old system emulator or two. You'll have a phone that you can really compute on.
This phone is the best pocket-sized device I've had since my old HP 200LX. Believe me, I've blown over a couple of thousand trying to replace my old 200LX with other mobile devices, trying to get something that I could do with a mobile computer from 1994. Now I'm there.
In fact, things went so well for me with this phone, that I decided I'd pick up an Android tablet, too.
But that's another story.
Wednesday, August 15, 2012
Parallax Propeller + COSMAC 1802: the Saga Continues...
Monday morning I posted about hooking up a Parallax Propeller QuickStart Board to an 1802 Microprocessor. My hopes are to make the Propeller behave as a RAM for the 1802, primarily to be able to display a bitmap of that segment of memory as video. The idea is to make it compatible software-wise with the 1861 Pixie chip (the 1802's native video adapter), which is presently unavailable.
Since then I've spent more time on this project. A lot of that time got tied up in side issues related to tying a Propeller to an 1802, as well as some time spent dealing with the test equipment I want to use to keep an eye on the circuit and see what it's up to.
First, here's how it looks tonight:

Clocking the 1802
One thing I put a fair bit of time into (too much, that is) is using the Propeller to control the clock of the 1802. There are a few reasons I think this would be nice:
The clock can be varied in software depending on the user's desire and the individual 1802's capabilities.
At some later point, the Prop can have a greater degree of control over the 1802's operation in general. With the ability to stop it, start it, and even single-step it.
On my first stab at this a couple of days ago, I just threw a repeat loop into the Prop's code to pulse an output line. I didn't have very good control of the rate, I didn't have the constants set right, and it didn't work right off the bat so I decided to drop it and just use another clock.
Let's Try a Timer, Because...That's What They're For
This time I took time to read up on using the counter/timers on the Prop. Each cog has one, and I played around with it for a while before feeding its output to the 1802's clock input. After a while I was able to get the results I wanted, and was able to fine-tune that bit of the code.
Then I hooked it up to the 1802 with a frequency of 1.25MHz...well, I should say I hooked it up to a 4049, passed it through a pair of inverters to square it up a bit and buffer it. Then I passed the signal to the 1802. Which ran just fine.
At this point I still had the data bus of the 1802 hard wired to a $C4, which is a NOP instruction for the 1802. That way I can watch LEDs on the address bus and see that the chip is running through its address space. The pulse rate of the high order LED gives me an immediate idea of how fast the 1802 is getting clocked, too.
Then I started playing with the constant for the counter's frequency to see what speeds this 1802 chip would be good at with a 5V Vdd and 3.3V Vcc (the 1802 can use split supply voltages for its core and I/O. Not bad for 1976, eh?)
Overclocking! 4.8MHz Baby! Yeah, uh, Megahertz.
This one ran up to 3.6MHz without a problem. I didn't run it up until it stopped, the other day I think I had it running at about 4MHz when I was playing with the repeat loop. Above 3.6MHz it seemed to start running hot, so I stepped it back down again.
Above 3.6MHz it was noticeably warm after a while, and seemed to be getting warmer. Between 3.2 and 3.6MHz it was warm, but maintaining its temperature just fine. At 3.2MHz it was solid as a rock and the heat was barely detectable to a calibrated fingertip. If I can get it to run at this speed reliably with the Propeller providing video then popular Elf software like Tiny Basic, Forth, CHIP-8, and the programs written in them are going to rock on this system.
Edit: I've run it up to 4.807MHz now, and it didn't seem all that hot this time. It really shouldn't have any problem with heat at these voltages, it normally runs at 5MHz at higher voltages. And now it doesn't seem to have a problem. When I tried to take it over 4.8MHz it ran sometimes but not others, or hung occasionally. So this is the limit for stable operation at this voltage for this chip (an RCA CDP1802CE.)
Getting Data to the 1802
OK, so back to the problem of making the Propeller look like a RAM. Frankly, when I did my first look at the timing involved, I figured this would be completely trivial to implement. Push in data and address bus wires, connect up /MRD (memory read signal) from the 1802 to the Prop, crank a little Spin code, and I'd have the Prop acting like a ROM.
Put in /MWR and a little more code, BAM, the Prop is a RAM.
Hook up TPA to catch the high order address byte, tweak the code, and the Prop is ready to map more than 256 bytes. All I'd have to do is add the video code then figure out how much Prop RAM was available then expand to fit.
Well, it wasn't that easy. If it had been, I'd be playing with the video now.
I tried to leap forward at first. I plugged in the address and data bus wires, plugged in /MRD, and added some code to my clock driver program. It had a 256 byte array that it set up and initialized to $C4 in every position (NOP again, but this time it would be a soft NOP rather than a hard-wired one.) Then I wrote the program to wait for the Propeller I/O line I'd selected for /MRD to go low. Once that happened, it would get the address off the address bus, look up the appropriate element in the RAM array in memory, and put it out on the data bus until /MRD came back up again.
Easy-peasy, right?
Well, it didn't work.

When I was doing my timing calcs and looking at the 1802's leisurely timing--it doesn't mind waiting just under a millisecond for its memory to come back when it's running at its normal speed (about 1.78MHz.) Hey, an 80MHz processor could be running a version of interpreted BASIC written in LISP and keep up with that, right?
I guess not. At least not the way I did it.
I clocked the 1802 at 1.25MHz for the test. This is an easy, slow speed that the Propeller can generate easily. I figured it'd work, I'd push up the frequency to 2.5MHz, check timings on the scope, and discover that I couldn't make the 1802 go too fast for the Prop.
Unfortunately the trace above shows different.
I Can Do Lots of Things Wrong, All at Once
I'm sure this is the result of something I'm doing improperly. I can think of several possibilities already:
I'm using WAITPNE and WAITPEQ to respond to the pin change. Perhaps, because they do some power-saving activity on the cog on which they're invoked, they just aren't meant to respond this quickly. Maybe if I just go to an active polling loop I'll be OK?
I'm using SPIN, an interpreted language. Perhaps I need to just insert a bit of Propeller assembly to tighten up the timing?
Perhaps there's some option or configuration thing I've not done?
Maybe this cog has to do something active with the timer/counter (I'm using the same cog as the one that's running the 1802's clock.) Perhaps if I move the RAM functions to another cog I'll be fine?
Those are just what comes off the top of my head. I'm far from being an expert on the Propeller, and I haven't picked up the books on it yet, just the free manual and datasheet downloads. But things like this create an opportunity to learn.
I also had a few other things I needed to figure out on the way, minor little things like the order you mention the output pins in when writing your code statements (I was getting $23 out instead of $C4 initially. Yeah, oops.) That and the whole thing is a rather fragile lash-up right now. I'm going to go to solder as soon as I get the RAM moving data to and from the 1802. But not before, because I hate rework, and if I don't test it on a breadboard first, there'll be rework. And this lets me do a few things like change which lines I'm using for address and data easily. I moved the data lines to P16..23 so that I can watch the data on the QuickStart board's LEDs, like a little front panel. Before, I had the address lines here, but I've already got LEDs on the breadboard showing me the address line states. So a quick change of a few constants in software, and I get a data display with no re-soldering.
Slightly Off-Task Tasks
I also took some time out to search out a line cord for the new frequency counter I got at the Ham Radio Club night before last that didn't have one (found one, after searching high and low. It's an oddball, not an HP cord.) And I checked out the two portable NonLinear Systems oscilloscopes I bought, too (one works, one doesn't, as expected.) The frequency counter was very nice to have while I was figuring out how to use the Prop's counter/timer as a numerically controlled oscillator, so the time was well spent even if it did eat into my Propeller-as-RAM time.
Looking Forward to Round 3
I'll be back at this before the end of the week (I'd like to tomorrow, but it'll be a busy day so I may not be able to.) If you have any suggestions or salient experience, your comments or emails would be much appreciated!
Edit:
I've had a look at the Propeller docs. It looks like the timing of hub instructions is my problem. I may just insert WAIT states for the 1802 and see what that does.
Tweet
Since then I've spent more time on this project. A lot of that time got tied up in side issues related to tying a Propeller to an 1802, as well as some time spent dealing with the test equipment I want to use to keep an eye on the circuit and see what it's up to.
First, here's how it looks tonight:

The second stage of the Propeller/1802 mashup circuit. Click for full size.
Clocking the 1802
One thing I put a fair bit of time into (too much, that is) is using the Propeller to control the clock of the 1802. There are a few reasons I think this would be nice:
The clock can be varied in software depending on the user's desire and the individual 1802's capabilities.
At some later point, the Prop can have a greater degree of control over the 1802's operation in general. With the ability to stop it, start it, and even single-step it.
On my first stab at this a couple of days ago, I just threw a repeat loop into the Prop's code to pulse an output line. I didn't have very good control of the rate, I didn't have the constants set right, and it didn't work right off the bat so I decided to drop it and just use another clock.
Let's Try a Timer, Because...That's What They're For
This time I took time to read up on using the counter/timers on the Prop. Each cog has one, and I played around with it for a while before feeding its output to the 1802's clock input. After a while I was able to get the results I wanted, and was able to fine-tune that bit of the code.
Then I hooked it up to the 1802 with a frequency of 1.25MHz...well, I should say I hooked it up to a 4049, passed it through a pair of inverters to square it up a bit and buffer it. Then I passed the signal to the 1802. Which ran just fine.
At this point I still had the data bus of the 1802 hard wired to a $C4, which is a NOP instruction for the 1802. That way I can watch LEDs on the address bus and see that the chip is running through its address space. The pulse rate of the high order LED gives me an immediate idea of how fast the 1802 is getting clocked, too.
Then I started playing with the constant for the counter's frequency to see what speeds this 1802 chip would be good at with a 5V Vdd and 3.3V Vcc (the 1802 can use split supply voltages for its core and I/O. Not bad for 1976, eh?)
Overclocking! 4.8MHz Baby! Yeah, uh, Megahertz.
This one ran up to 3.6MHz without a problem. I didn't run it up until it stopped, the other day I think I had it running at about 4MHz when I was playing with the repeat loop. Above 3.6MHz it seemed to start running hot, so I stepped it back down again.
Above 3.6MHz it was noticeably warm after a while, and seemed to be getting warmer. Between 3.2 and 3.6MHz it was warm, but maintaining its temperature just fine. At 3.2MHz it was solid as a rock and the heat was barely detectable to a calibrated fingertip. If I can get it to run at this speed reliably with the Propeller providing video then popular Elf software like Tiny Basic, Forth, CHIP-8, and the programs written in them are going to rock on this system.
Edit: I've run it up to 4.807MHz now, and it didn't seem all that hot this time. It really shouldn't have any problem with heat at these voltages, it normally runs at 5MHz at higher voltages. And now it doesn't seem to have a problem. When I tried to take it over 4.8MHz it ran sometimes but not others, or hung occasionally. So this is the limit for stable operation at this voltage for this chip (an RCA CDP1802CE.)
Getting Data to the 1802
OK, so back to the problem of making the Propeller look like a RAM. Frankly, when I did my first look at the timing involved, I figured this would be completely trivial to implement. Push in data and address bus wires, connect up /MRD (memory read signal) from the 1802 to the Prop, crank a little Spin code, and I'd have the Prop acting like a ROM.
Put in /MWR and a little more code, BAM, the Prop is a RAM.
Hook up TPA to catch the high order address byte, tweak the code, and the Prop is ready to map more than 256 bytes. All I'd have to do is add the video code then figure out how much Prop RAM was available then expand to fit.
Well, it wasn't that easy. If it had been, I'd be playing with the video now.
I tried to leap forward at first. I plugged in the address and data bus wires, plugged in /MRD, and added some code to my clock driver program. It had a 256 byte array that it set up and initialized to $C4 in every position (NOP again, but this time it would be a soft NOP rather than a hard-wired one.) Then I wrote the program to wait for the Propeller I/O line I'd selected for /MRD to go low. Once that happened, it would get the address off the address bus, look up the appropriate element in the RAM array in memory, and put it out on the data bus until /MRD came back up again.
Easy-peasy, right?
Well, it didn't work.

Top: Data from Propellor pretending to be a memory. Bottom: Memory Read Request. Result: Memory Too Slow! (Click for full size.)
When I was doing my timing calcs and looking at the 1802's leisurely timing--it doesn't mind waiting just under a millisecond for its memory to come back when it's running at its normal speed (about 1.78MHz.) Hey, an 80MHz processor could be running a version of interpreted BASIC written in LISP and keep up with that, right?
I guess not. At least not the way I did it.
I clocked the 1802 at 1.25MHz for the test. This is an easy, slow speed that the Propeller can generate easily. I figured it'd work, I'd push up the frequency to 2.5MHz, check timings on the scope, and discover that I couldn't make the 1802 go too fast for the Prop.
Unfortunately the trace above shows different.
I Can Do Lots of Things Wrong, All at Once
I'm sure this is the result of something I'm doing improperly. I can think of several possibilities already:
I'm using WAITPNE and WAITPEQ to respond to the pin change. Perhaps, because they do some power-saving activity on the cog on which they're invoked, they just aren't meant to respond this quickly. Maybe if I just go to an active polling loop I'll be OK?
I'm using SPIN, an interpreted language. Perhaps I need to just insert a bit of Propeller assembly to tighten up the timing?
Perhaps there's some option or configuration thing I've not done?
Maybe this cog has to do something active with the timer/counter (I'm using the same cog as the one that's running the 1802's clock.) Perhaps if I move the RAM functions to another cog I'll be fine?
Those are just what comes off the top of my head. I'm far from being an expert on the Propeller, and I haven't picked up the books on it yet, just the free manual and datasheet downloads. But things like this create an opportunity to learn.
I also had a few other things I needed to figure out on the way, minor little things like the order you mention the output pins in when writing your code statements (I was getting $23 out instead of $C4 initially. Yeah, oops.) That and the whole thing is a rather fragile lash-up right now. I'm going to go to solder as soon as I get the RAM moving data to and from the 1802. But not before, because I hate rework, and if I don't test it on a breadboard first, there'll be rework. And this lets me do a few things like change which lines I'm using for address and data easily. I moved the data lines to P16..23 so that I can watch the data on the QuickStart board's LEDs, like a little front panel. Before, I had the address lines here, but I've already got LEDs on the breadboard showing me the address line states. So a quick change of a few constants in software, and I get a data display with no re-soldering.
Slightly Off-Task Tasks
I also took some time out to search out a line cord for the new frequency counter I got at the Ham Radio Club night before last that didn't have one (found one, after searching high and low. It's an oddball, not an HP cord.) And I checked out the two portable NonLinear Systems oscilloscopes I bought, too (one works, one doesn't, as expected.) The frequency counter was very nice to have while I was figuring out how to use the Prop's counter/timer as a numerically controlled oscillator, so the time was well spent even if it did eat into my Propeller-as-RAM time.
Looking Forward to Round 3
I'll be back at this before the end of the week (I'd like to tomorrow, but it'll be a busy day so I may not be able to.) If you have any suggestions or salient experience, your comments or emails would be much appreciated!
Edit:
I've had a look at the Propeller docs. It looks like the timing of hub instructions is my problem. I may just insert WAIT states for the 1802 and see what that does.
Tuesday, July 10, 2012
Gadget Gangster QuickVGA+ for Parallax Propellor

Propeller Quickstart Add-Ons Galore
I mentioned that I picked up a Parallax Propeller Quickstart Board a while ago, and finally got around to playing with it.
Well, I've played with it a lot more now, in part thanks to a cool add-on board from an outfit called Gadget Gangster. I bought a Quickstart VGA+ board from them. It adds a nice VGA port (duh) as well a a PS/2 keyboard port (that's PS/2 as in the old IBM "Personal System/2", not Playstation 2), a stereo audio output, and a Wii Nunchuck port (or the classic controller can go here.) All on one little business card sized board, that fits right on top of the Parallax Quickstart board.
It's a nice combination of features. It's also got places for adding an SD card connector (which I've done), an IR port, and a composite video port.
There's a Pocket Mini Computer project built around this board, that's sort of a C-64 retro-clone kind of system. I look forward to trying that out some time when I get tired of playing with the Wii nunchuck as a raw sensor in software.
One note about that...
The nunchuck software that Gadget Gangster recommended didn't work right out of the box. I've posted na updated version of the nunchuck demo software at the Parallax Propeller Object Exchange, the place where Propeller users post their software for others to modify and use. I modified the demo to use the correct I/O lines for the QuickVGA+ board, and I added a bit of code to make it more clear what's going on with the accelerometers in the nunchuck.
Next, I'll be building up my Gadget Gangster QuickProto board, which came in a bundle deal with a QuickStart board (so, yes, I now have two Quickstart boards. And I ordered one for my daughter, too.
Pennies from Heaven
That's not all the Propellers running around the house, as it happens. While we were at the Parallax Robot Expo, my daughter and I picked up some stuff off the Free table. Among those items were a pair of slightly used Propeller Proto USB boards and one one-off PCB Propeller board that appears to mainly for servos. My daughter has one of the Proto boards and I have the other, as well as the one-off PCB.
I've already added PS/2 mouse and keyboard ports to my Prop Proto board, as well as a composite audio/video adapter. I have plans for this board...
I also found an early rev of the Parallax QuickStart Proto board in my bag of goodies, which I'm planning to use to put a sort of Elf II I/O interface on a Quickstart board. A hex keyboard, a pair of hex displays, some control switches, and hey-ho it's 1977 all over again. :)
Bottom line on the Propeller: It's heaps of fun to play with. Quick and easy. I keep thinking I ought to stop and read the documentation, but it hasn't been necessary, yet.
Monday, June 4, 2012
Parallax Propellor Quickstart Board
When I was at the Parallax Robotics Expo back in April, I picked up a P8X32A Quickstart Board. I've had my eye on the Propeller chip for a long time, I first heard of it before release. But to date, time spent on other things kept me from getting started with it.

The Time Window Opens
Finally, last Friday afternoon, I had a chunk of time open up as a result of being too ill to make a prior commitment. (I can't help but think of how many important things in my life have happened because of time made available through being too sick to do what I was supposed to do, or because I was stranded somewhere without transportation.) The tiny box for the Quickstart board had been living next to one of my computer keyboards for over a month, so I didn't even have to go looking for it. There was a USB cable of the correct type sitting in the drawer next to me. So I started in.
To keep it simple I decided to start out with the Parallax programming environment, Propeller Tool on my Windows 7 machine. I expect to try out Brad's Spin Tool, the other major development tool for Propeller, on my Mac and Linux machines a bit later.
I was pleased to see that it installed everything, the driver for the USB interface chip on the Quickstart board, the IDE, and the serial terminal tool for the Propellor. It says it does that before you download and install, but I was a bit unsure of whether the Terminal program would actually be in there before I actually installed the program.
Once the software was installed, I started it up then plugged in the Quickstart board. I got a ding-dong from Windows telling me it saw the hardware. I was able to find a menu item to report what chip version the software saw, and it saw my chip. I didn't get the message I expected from the documentation at first, a dialog pop-up. That appeared later, the first time I tried to send a program to the board.
About that...
Parallax has a tutorial that runs you through the initial steps of programming the Quickstart board. Aside from the fact that to get to each of the several pages you follow a link from the product page (the pages aren't linked together--that is, when you get to the bottom of one page there's no link to the next one) there's another oversight on these pages as well.
The page gives a short, simple program, describes what it does, then goes on to a slightly more sophisticated program. It tells you about how the editor behaves. But it doesn't tell you how to actually get the code on the chip.
Now, I'm not exactly a first timer here. I looked at the menu and saw "Run" at the top of the screen. But when I chose that I got a list of items, none of which were clearly "compile and run". So I started selecting things at random. I also didn't know whether to expect a simulation environment to start, or how to select between a simulator and the real hardware. I scanned the tutorial web page up to the third program in it, and found no specific instructions.
This is one of those things of which Sherlock Holmes remarked, "the answer is perfectly obvious, once you know it." There is no simulation environment in the free tool, that costs extra (I wish Parallax could follow Atmel's example in providing it with the free tool, the first job I applied an AVR to happened because I was able to use the simulation tool to verify the software timings I needed). And the Run=>Compile Current=>Load EEPROM or Run=>Compile Current=>Load RAM would either have done enough to let me get what I wanted--the sample code running on the target hardware.
But that wasn't clear. I was doing a quick try it and see, so I hadn't spent time with the chip's datasheet yet to learn about how it loads and runs software, what facilities it has for storage, what the implications are of loading EEPROM vs. loading RAM (I didn't even know if they were both program storage, for all I knew one was program storage and the other was for loading an initial state for testing.)
So I was a bit stymied until I just decided to try things at random and see what happened.
At the bottom of the tutorial page is a short table describing the shortcut keys and what they do. Below the actual step-by-step examples that omit instructions for how to compile and run the code. There they describe F10 and F11, for example, and the implications of each choice (RAM or EEPROM).
I managed to get the short initial program (which lights an LED) loaded and running. The LED lit up. There was much rejoicing.
Demo, Demo, Who's Got the Demo?
The next thing I started to wonder about was the demo that showed off the touchpads by lighting up the LEDs when the pads are touched. This hadn't appeared to be pre-loaded like demos often are on other processors. Nor did there appear to be anything obvious among the Propeller code that came with the IDE (another thing I fouond by spelunking, rather than as a result of documentation.) There were no projects with names like "Quickstart Board Demo" or "Touchpad Demo" or whatever. Nearly all the demos appeared to be for hardware I didn't have.
At first I went back to the Quickstart tutorials on the web. I did searches for the demo on the Parallax website and through Google, but the closest I came up with was modified versions of the demo listed in a forum thread. I did find the demo later, but it was only by going back and looking for it time after time that I finally located it today, my fourth day trying, here, on the Parallax Semiconductor Quickstart product page, not on the Propeller downloads page or the Parallax store product page, where there are lots of other downloads but not this one. The location is so subtle, that even after I found it earlier today it just took me five minutes of backtracking to find the right page over again. It's on the linked page, at the end of the list of downloads at the bottom. Direct Link to P8X32A Quickstart LED-Touchpad Demo Software Download
Well, back to last Friday. The demo was interesting to me, but while I was looking for it I came across information about the video capabilities of the Propeller. Frankly, while I'd heard the Propeller did video I just figured it was something along the lines of bit-bashed video like what I've done with several other microcontrollers. I've even generated video from a little Atmel AVR ATTiny12 with nothing more than a software loop and a resistor divider-no fancy shift registers or anything.
Needless to say, it was pretty simple video. No colorburst, no color. But it got some data out of the chip on a two-pin interface nicely (three levels are needed for even black and white video to get the sync signals for timing in addition to the black and white pixel data.)
The Propeller goes way, way beyond this. It's got both NTSC and VGA signal generation hardware on board. And it's not just single bit video, either. It can generate full color at a number of resolutions. This I had to try. But my little Quickstart board doesn't have a video output on it. I looked at the Propeller Demo Board and saw that it had a video interface. It was just a 3-resistor DAC and an RCA jack, so I decided to make one.

At first, the video was pretty wonky. Then I realized I had the resistor that's supposed to go to P13 going to P15. Once I fixed that, it was better, but still not good. The graphics demo ran OK, but one of the text demos wouldn't even sync properly, the other had poor contrast. The thought crossed my mind that either the timing in the Propeller wasn't much better than my old Atari Pong or that the provided 5MHz crystal meant that the timing wasn't right on. But I've learned the hard way, time and time again, to suspect user error first.
I took another look at my too-quick and too-dirty video interface and found that the resistors that were supposed to go between P12 and P13 were swapped. A moment later I had pulled the pins from the plastic IDC header and moved them to the correct positions. This is why doing electronics when you're under the weather is not always a good idea. Fortunately this wasn't a mistake that'd let the smoke out.
Once that was done, the video looked great on all the demos. I then had to make a batter adapter so that I could try it out on the big screen TV in my living room. A quad-AA battery pack came to hand quickly enough, one of the ones with the 9V snap connector on the end. Then I soldered a 9V snap connector pigtail to another IDC header and spliced in an IDC socket pigtail. That way I'd still have a place to put my ground pin from the Q&D video interface without soldering it to the battery connector. As a final refinement, I put a slider switch in line on the positive battery wire to act as a power switch.
Once that and the video adapter were plugged into the Quickstart board, I took it out to the living room and hooked up to a free composite video input. It looked great.
I spent the rest of my time mucking around with the code of the various NTSC video demos. Spin is a really easy language to learn, if you've got any programming experience it'll come easily. It's even simple enough I could easily see teaching it as a first language to new programmers (with a Propellor board on hand, of course, to get the full hardware + software experience!)
Cleaning Up Shop
As mentioned, I have now been playing with my new board for four days. In spite of a couple of minor snags (figuring out what to choose to compile and run my programs, finding the demo for the Quickstart board itself) it's been a very rewarding use of my time. I can see now why people who've been raving about this controller for five or six years are excited about it.
After my first night playing with the board, I learned while reading the Parallax forums that the Propeller could also do RF-modulated video. That's what I spent mid-day Saturday playing with. I put rabbit ears on my big screen (talk about incongruity!) and a pair of jumpers on the RCA jack and managed to receive video from the Propeller from about 25 feet away. What worked even better was an LCD handheld television left over from the analog TV transmission days. I was able to get as far as 10 feet from my back door, a total distance of about 50 feet, and still get good reception. I don't think it's making it as far as the neighbor's house, though (fortunately.)
Yesterday I buckled down to some more structured learning of the Spin language, reading the Propeller Manual and Datasheet, and so on. Today I'm continuing that, working my way through tutorials and such. I also took a look in the goodie bag I filled at the Free tables at the Robotics Expo--there are a couple of Propeller boards in there that I can't wait to find a use for now.
Tweet
The P8X32A Quickstart Board, in the obligatory Altoids tin for scale.
The Time Window Opens
Finally, last Friday afternoon, I had a chunk of time open up as a result of being too ill to make a prior commitment. (I can't help but think of how many important things in my life have happened because of time made available through being too sick to do what I was supposed to do, or because I was stranded somewhere without transportation.) The tiny box for the Quickstart board had been living next to one of my computer keyboards for over a month, so I didn't even have to go looking for it. There was a USB cable of the correct type sitting in the drawer next to me. So I started in.
To keep it simple I decided to start out with the Parallax programming environment, Propeller Tool on my Windows 7 machine. I expect to try out Brad's Spin Tool, the other major development tool for Propeller, on my Mac and Linux machines a bit later.
I was pleased to see that it installed everything, the driver for the USB interface chip on the Quickstart board, the IDE, and the serial terminal tool for the Propellor. It says it does that before you download and install, but I was a bit unsure of whether the Terminal program would actually be in there before I actually installed the program.
Once the software was installed, I started it up then plugged in the Quickstart board. I got a ding-dong from Windows telling me it saw the hardware. I was able to find a menu item to report what chip version the software saw, and it saw my chip. I didn't get the message I expected from the documentation at first, a dialog pop-up. That appeared later, the first time I tried to send a program to the board.
About that...
Parallax has a tutorial that runs you through the initial steps of programming the Quickstart board. Aside from the fact that to get to each of the several pages you follow a link from the product page (the pages aren't linked together--that is, when you get to the bottom of one page there's no link to the next one) there's another oversight on these pages as well.
The page gives a short, simple program, describes what it does, then goes on to a slightly more sophisticated program. It tells you about how the editor behaves. But it doesn't tell you how to actually get the code on the chip.
Now, I'm not exactly a first timer here. I looked at the menu and saw "Run" at the top of the screen. But when I chose that I got a list of items, none of which were clearly "compile and run". So I started selecting things at random. I also didn't know whether to expect a simulation environment to start, or how to select between a simulator and the real hardware. I scanned the tutorial web page up to the third program in it, and found no specific instructions.
This is one of those things of which Sherlock Holmes remarked, "the answer is perfectly obvious, once you know it." There is no simulation environment in the free tool, that costs extra (I wish Parallax could follow Atmel's example in providing it with the free tool, the first job I applied an AVR to happened because I was able to use the simulation tool to verify the software timings I needed). And the Run=>Compile Current=>Load EEPROM or Run=>Compile Current=>Load RAM would either have done enough to let me get what I wanted--the sample code running on the target hardware.
But that wasn't clear. I was doing a quick try it and see, so I hadn't spent time with the chip's datasheet yet to learn about how it loads and runs software, what facilities it has for storage, what the implications are of loading EEPROM vs. loading RAM (I didn't even know if they were both program storage, for all I knew one was program storage and the other was for loading an initial state for testing.)
So I was a bit stymied until I just decided to try things at random and see what happened.
At the bottom of the tutorial page is a short table describing the shortcut keys and what they do. Below the actual step-by-step examples that omit instructions for how to compile and run the code. There they describe F10 and F11, for example, and the implications of each choice (RAM or EEPROM).
I managed to get the short initial program (which lights an LED) loaded and running. The LED lit up. There was much rejoicing.
Demo, Demo, Who's Got the Demo?
The next thing I started to wonder about was the demo that showed off the touchpads by lighting up the LEDs when the pads are touched. This hadn't appeared to be pre-loaded like demos often are on other processors. Nor did there appear to be anything obvious among the Propeller code that came with the IDE (another thing I fouond by spelunking, rather than as a result of documentation.) There were no projects with names like "Quickstart Board Demo" or "Touchpad Demo" or whatever. Nearly all the demos appeared to be for hardware I didn't have.
At first I went back to the Quickstart tutorials on the web. I did searches for the demo on the Parallax website and through Google, but the closest I came up with was modified versions of the demo listed in a forum thread. I did find the demo later, but it was only by going back and looking for it time after time that I finally located it today, my fourth day trying, here, on the Parallax Semiconductor Quickstart product page, not on the Propeller downloads page or the Parallax store product page, where there are lots of other downloads but not this one. The location is so subtle, that even after I found it earlier today it just took me five minutes of backtracking to find the right page over again. It's on the linked page, at the end of the list of downloads at the bottom. Direct Link to P8X32A Quickstart LED-Touchpad Demo Software Download
Well, back to last Friday. The demo was interesting to me, but while I was looking for it I came across information about the video capabilities of the Propeller. Frankly, while I'd heard the Propeller did video I just figured it was something along the lines of bit-bashed video like what I've done with several other microcontrollers. I've even generated video from a little Atmel AVR ATTiny12 with nothing more than a software loop and a resistor divider-no fancy shift registers or anything.
Needless to say, it was pretty simple video. No colorburst, no color. But it got some data out of the chip on a two-pin interface nicely (three levels are needed for even black and white video to get the sync signals for timing in addition to the black and white pixel data.)
The Propeller goes way, way beyond this. It's got both NTSC and VGA signal generation hardware on board. And it's not just single bit video, either. It can generate full color at a number of resolutions. This I had to try. But my little Quickstart board doesn't have a video output on it. I looked at the Propeller Demo Board and saw that it had a video interface. It was just a 3-resistor DAC and an RCA jack, so I decided to make one.
It doesn't get much quicker and dirtier. It took longer to pull the parts than to assemble.
At first, the video was pretty wonky. Then I realized I had the resistor that's supposed to go to P13 going to P15. Once I fixed that, it was better, but still not good. The graphics demo ran OK, but one of the text demos wouldn't even sync properly, the other had poor contrast. The thought crossed my mind that either the timing in the Propeller wasn't much better than my old Atari Pong or that the provided 5MHz crystal meant that the timing wasn't right on. But I've learned the hard way, time and time again, to suspect user error first.
I took another look at my too-quick and too-dirty video interface and found that the resistors that were supposed to go between P12 and P13 were swapped. A moment later I had pulled the pins from the plastic IDC header and moved them to the correct positions. This is why doing electronics when you're under the weather is not always a good idea. Fortunately this wasn't a mistake that'd let the smoke out.
Once that was done, the video looked great on all the demos. I then had to make a batter adapter so that I could try it out on the big screen TV in my living room. A quad-AA battery pack came to hand quickly enough, one of the ones with the 9V snap connector on the end. Then I soldered a 9V snap connector pigtail to another IDC header and spliced in an IDC socket pigtail. That way I'd still have a place to put my ground pin from the Q&D video interface without soldering it to the battery connector. As a final refinement, I put a slider switch in line on the positive battery wire to act as a power switch.
Once that and the video adapter were plugged into the Quickstart board, I took it out to the living room and hooked up to a free composite video input. It looked great.
I spent the rest of my time mucking around with the code of the various NTSC video demos. Spin is a really easy language to learn, if you've got any programming experience it'll come easily. It's even simple enough I could easily see teaching it as a first language to new programmers (with a Propellor board on hand, of course, to get the full hardware + software experience!)
Cleaning Up Shop
As mentioned, I have now been playing with my new board for four days. In spite of a couple of minor snags (figuring out what to choose to compile and run my programs, finding the demo for the Quickstart board itself) it's been a very rewarding use of my time. I can see now why people who've been raving about this controller for five or six years are excited about it.
After my first night playing with the board, I learned while reading the Parallax forums that the Propeller could also do RF-modulated video. That's what I spent mid-day Saturday playing with. I put rabbit ears on my big screen (talk about incongruity!) and a pair of jumpers on the RCA jack and managed to receive video from the Propeller from about 25 feet away. What worked even better was an LCD handheld television left over from the analog TV transmission days. I was able to get as far as 10 feet from my back door, a total distance of about 50 feet, and still get good reception. I don't think it's making it as far as the neighbor's house, though (fortunately.)
Yesterday I buckled down to some more structured learning of the Spin language, reading the Propeller Manual and Datasheet, and so on. Today I'm continuing that, working my way through tutorials and such. I also took a look in the goodie bag I filled at the Free tables at the Robotics Expo--there are a couple of Propeller boards in there that I can't wait to find a use for now.
Saturday, April 14, 2012
Parallax Robot Expo
My daughter and I went to the Parallax Robot Expo today and had a great time. It's neat having an event like this only about 45 minutes from home. My daughter has a couple of BOE-Bot robots and a bunch of additional bits she enjoys working with. I'm into anything microprocessor or microcontroller, and I think Parallax is a neat company that makes great products.
We were a bit worried about the effects of the weather. We left home with snow falling and drove through a rainstorm on the way. When we got there it was only raining lightly. Even if it had been raining, everything was either under tents or inside. It wouldn't have been necessary to do more than duck across a few feet of open sky in any case.
As it happened, things only got better as the day went on.
We had a really good time checking out the various demos. They had one tent with activities, laptops set up with boards hooked up to them, where people could get their feet wet in programming the boards to blink lights, run servos, sound off on piezos, etc. We didn't check that out too closely since we can do that at home.
Alongside it was a "Learn to Solder" area with several tables. You get to build an S-2 Robot LED badge. Not an actual S-2 robot, mind you, but a little hang around your neck badge shaped like the Scribbler 2. It's got a 7 color LED on it, a switch, a battery, and some embedded logic. It's a neat little thing and it's entirely free.
I made one though I'm no newcomer to soldering. I had a very helpful young man making sure I prepped the parts properly and oriented them correctly. He was also able to answer my question about whether there was logic embedded in the printed circuit board.
The factory tour was also very nice. They've got some automation they're justifiably proud of. I'm surprised that it appears they actually use a CNC to make production parts. I'd have expected higher volume processes for them.
Also inside was a display and presentation area. They had various talks through the day by very approachable people with experience directly relevant to the attendees. It was interesting hearing them talk about their technical work and their work to develop their businesses. We weren't able to hear all the talks we would have liked.
Back outside there was a tent for vendors--the show prices on Parallax products were amazingly great and there were some other great vendors there, too. There was a show area for other companies, Panavise was among the companies showing there (IMO, yes, their products are worth every dime!)
Maxi Swag
One of the coolest things there, a real unexpected treat, was the Free Stuff tables. There were all sorts of free parts and boards and what I assume was discontinued product. I got a book on programming the SX microcontroller, a Javelin Stamp, some sort of Propellor board, and some other fun electronic "Junque Box" goodies, as did my daughter (I think I'll be showing her how to wire up a CCFL this weekend, there were packs of them on the tables.)
We both had a great time. My daughter got really excited and couldn't wait to get back home to her electronics. We picked up some great project books for her, cheap.
If you get a chance to go on Saturday, I recommend it highly.
Tweet
We were a bit worried about the effects of the weather. We left home with snow falling and drove through a rainstorm on the way. When we got there it was only raining lightly. Even if it had been raining, everything was either under tents or inside. It wouldn't have been necessary to do more than duck across a few feet of open sky in any case.
As it happened, things only got better as the day went on.
We had a really good time checking out the various demos. They had one tent with activities, laptops set up with boards hooked up to them, where people could get their feet wet in programming the boards to blink lights, run servos, sound off on piezos, etc. We didn't check that out too closely since we can do that at home.
Alongside it was a "Learn to Solder" area with several tables. You get to build an S-2 Robot LED badge. Not an actual S-2 robot, mind you, but a little hang around your neck badge shaped like the Scribbler 2. It's got a 7 color LED on it, a switch, a battery, and some embedded logic. It's a neat little thing and it's entirely free.
I made one though I'm no newcomer to soldering. I had a very helpful young man making sure I prepped the parts properly and oriented them correctly. He was also able to answer my question about whether there was logic embedded in the printed circuit board.
The factory tour was also very nice. They've got some automation they're justifiably proud of. I'm surprised that it appears they actually use a CNC to make production parts. I'd have expected higher volume processes for them.
Also inside was a display and presentation area. They had various talks through the day by very approachable people with experience directly relevant to the attendees. It was interesting hearing them talk about their technical work and their work to develop their businesses. We weren't able to hear all the talks we would have liked.
Back outside there was a tent for vendors--the show prices on Parallax products were amazingly great and there were some other great vendors there, too. There was a show area for other companies, Panavise was among the companies showing there (IMO, yes, their products are worth every dime!)
Maxi Swag
One of the coolest things there, a real unexpected treat, was the Free Stuff tables. There were all sorts of free parts and boards and what I assume was discontinued product. I got a book on programming the SX microcontroller, a Javelin Stamp, some sort of Propellor board, and some other fun electronic "Junque Box" goodies, as did my daughter (I think I'll be showing her how to wire up a CCFL this weekend, there were packs of them on the tables.)
We both had a great time. My daughter got really excited and couldn't wait to get back home to her electronics. We picked up some great project books for her, cheap.
If you get a chance to go on Saturday, I recommend it highly.
Wednesday, February 29, 2012
Installing Pygame on Mac OS X Lion (10.7)
I managed to trick pygame into installing on Leopard some time ago. Now, I've had the challenge of installing pygame on OS X Lion.
On my first several tries to install pygame on Lion, I got various errors. It couldn't find any such thing as pygame, at first, then when I installed a 32/64 bit version of Python 2.7 (Pygame doesn't work with Python 3.X out of the box) I got the more encouraging error that, while it could find pygaame, it couldn't find a matching architecture in pygame for it to use.
I tried about 5 different combinations of install with no luck. Today I finally hit on a working combination of Python and Pygame. These were installed on new, up-to-date Mac Minis of the present generation (only run Lion.)
Install the Wrong Python
First, install the 32-bit only Python that says that it's for i386/PPC, OS X versions 10.3 to 10.6:
http://python.org/ftp/python/2.7.2/python-2.7.2-macosx10.3.dmg
Then, install the Pygame for Python 2.7 for OS X 10.3:
http://pygame.org/ftp/pygame-1.9.1release-python.org-32bit-py2.7-macosx10.3.dmg
You should now be able to start IDLE (for the version of Python above) and enter "import pygame" at the prompt without getting any complaints in return.
Celebrate with a Hat
Now make yourself a hat that says "Lion Tamer" and celebrate.
Notes:
It appears to be possible to use pygame with Python 3, if you install the files in the right locations yourself--no easy install package here. You'll still need the 32 bit only version of Python if you use the precompiled binary files for pygame, above.
Compiling pygame for your system should solve the problem with the architecture mismatch error. But I didn't feel like opening that particular can of worms: installing Mac devtools on one of the 12 systems I'm installing on in our school's lab, not my personal system, hoping it would compile cleanly, then having to set up and test it with the installed version of Python. Etc.
I'm saving my feelings on this for my other blog that's Python-specific.
Tweet
On my first several tries to install pygame on Lion, I got various errors. It couldn't find any such thing as pygame, at first, then when I installed a 32/64 bit version of Python 2.7 (Pygame doesn't work with Python 3.X out of the box) I got the more encouraging error that, while it could find pygaame, it couldn't find a matching architecture in pygame for it to use.
I tried about 5 different combinations of install with no luck. Today I finally hit on a working combination of Python and Pygame. These were installed on new, up-to-date Mac Minis of the present generation (only run Lion.)
Install the Wrong Python
First, install the 32-bit only Python that says that it's for i386/PPC, OS X versions 10.3 to 10.6:
http://python.org/ftp/python/2.7.2/python-2.7.2-macosx10.3.dmg
Then, install the Pygame for Python 2.7 for OS X 10.3:
http://pygame.org/ftp/pygame-1.9.1release-python.org-32bit-py2.7-macosx10.3.dmg
You should now be able to start IDLE (for the version of Python above) and enter "import pygame" at the prompt without getting any complaints in return.
Celebrate with a Hat
Now make yourself a hat that says "Lion Tamer" and celebrate.
Notes:
It appears to be possible to use pygame with Python 3, if you install the files in the right locations yourself--no easy install package here. You'll still need the 32 bit only version of Python if you use the precompiled binary files for pygame, above.
Compiling pygame for your system should solve the problem with the architecture mismatch error. But I didn't feel like opening that particular can of worms: installing Mac devtools on one of the 12 systems I'm installing on in our school's lab, not my personal system, hoping it would compile cleanly, then having to set up and test it with the installed version of Python. Etc.
I'm saving my feelings on this for my other blog that's Python-specific.
Tuesday, May 24, 2011
My GCode Gets a Bit Tricker: Working with the microCarve A4 CNC
We collect souvenir spoons when we travel. Unfortunately, we overflowed the little wooden rack that holds our spoons several years ago:

We have almost twice as many little spoons as will fit on the rack. So I decided that a good CNC project would be making some additional racks that will hold the additional spoons, plus any extras we acquire in the near future.
Building the Toolchain
I've been using this project as a sort of pilot for putting together an automated toolchain for my CNC. You know, draw the object in CAD, convert it to gcode, and cut on the CNC. In the past I've just used image maps as depth maps and hand-written gcode to produce things. This project seemed to have about the right level of complexity for an initial project with a new set of tools.
At first, I had already designed the rack for the spoons themselves by hand on paper, and written gcode to match. But I laid this aside and tried out several CAD tools. The CAD tool that I ended up with a decent file from in the least time was Google Sketchup, running on my Mac. Unfortunately, Sketchup doesn't write in the CAM-friendly file formats. So I pulled MeshLab, which converted a Sketchup Collabra file to STL for CAM.

The next step was CAM. After spending over a week trying out different free CAD packages (see below for why I'm starting with no-cost software), I was getting antsy to start cutting something. After three goes with different CAM packages on three OSes, and still no results worth cutting, I just decided to pull out the gcode and give it a once-over.
GCode FTW
I did a quick third pass over my gcode program on paper, then typed it in on my EMC2 system with gedit. The EMC2 preview was, as always, very helpful. It let me catch a bogus Z-value. Once that was fixed, I plunked down a piece of MDF for the trial run and let 'er rip.

The piece cut out very nicely. I ran it in three passes, the support for the piece was pretty minimal, so you can see where each pass cut across. A bit of sandpaper would fix this well enough.
However, I think I'd rather do the little shelf out of 1/4" stock. I used 1/2" because my prototype uses that thickness. But it's not like there's a lot of stress on the part from the spoons. So I'm going to re-build my code for a 1/4" thick piece before making the "production" units (probably three of them.) Then I may try to use the automated toolchain again for the backs of the spoon racks (all I have in gcode at this point is the little shelf.)
Why Free?
I don't have any aversion to spending money for quality software. In fact, much the opposite. However, I've already spent the money I had budgeted for the CNC. Plus I've tread on my money set aside for travel this summer because of some unexpected household expenses.
For the time being, I'm being a bit hairshirt when it comes to software.
I'm very happy with EMC2 for my CNC software at this point.
Sketchup is pretty well doing OK for me for CAD right now, though there are things I will want to do later that I'm not sure it does easily or well. When money permits, what I'd really like to do is pick up ZBrush. Hopefully within a year or so. Sooner if possible.
For CAM, I'm thinking that I'll want to pick up something like Cut3D from Vectric. It seems to have the functions I want. Cut2D is a possibility, too. I'll be doing the free trial on each in the not-too-distant future.
In the meanwhile, if you know of some free CAM software that doesn't just treat an STL object as something to be rastered over, drop me a note. I'm completely OS-agnostic. Most recently I was doing CAD in MacOS, running CAM (FreeMill, a good package but didn't do what I needed) on Windows, and I'm driving the CNC with EMC2 on Linux.
Tweet
We have almost twice as many little spoons as will fit on the rack. So I decided that a good CNC project would be making some additional racks that will hold the additional spoons, plus any extras we acquire in the near future.
Building the Toolchain
I've been using this project as a sort of pilot for putting together an automated toolchain for my CNC. You know, draw the object in CAD, convert it to gcode, and cut on the CNC. In the past I've just used image maps as depth maps and hand-written gcode to produce things. This project seemed to have about the right level of complexity for an initial project with a new set of tools.
At first, I had already designed the rack for the spoons themselves by hand on paper, and written gcode to match. But I laid this aside and tried out several CAD tools. The CAD tool that I ended up with a decent file from in the least time was Google Sketchup, running on my Mac. Unfortunately, Sketchup doesn't write in the CAM-friendly file formats. So I pulled MeshLab, which converted a Sketchup Collabra file to STL for CAM.
Close-Up of the Item that Inspired my Project
The next step was CAM. After spending over a week trying out different free CAD packages (see below for why I'm starting with no-cost software), I was getting antsy to start cutting something. After three goes with different CAM packages on three OSes, and still no results worth cutting, I just decided to pull out the gcode and give it a once-over.
GCode FTW
I did a quick third pass over my gcode program on paper, then typed it in on my EMC2 system with gedit. The EMC2 preview was, as always, very helpful. It let me catch a bogus Z-value. Once that was fixed, I plunked down a piece of MDF for the trial run and let 'er rip.
My first go at the spoon rack's shelf, the back is another piece. But I've got an idea for improving on this...
The piece cut out very nicely. I ran it in three passes, the support for the piece was pretty minimal, so you can see where each pass cut across. A bit of sandpaper would fix this well enough.
However, I think I'd rather do the little shelf out of 1/4" stock. I used 1/2" because my prototype uses that thickness. But it's not like there's a lot of stress on the part from the spoons. So I'm going to re-build my code for a 1/4" thick piece before making the "production" units (probably three of them.) Then I may try to use the automated toolchain again for the backs of the spoon racks (all I have in gcode at this point is the little shelf.)
Why Free?
I don't have any aversion to spending money for quality software. In fact, much the opposite. However, I've already spent the money I had budgeted for the CNC. Plus I've tread on my money set aside for travel this summer because of some unexpected household expenses.
For the time being, I'm being a bit hairshirt when it comes to software.
I'm very happy with EMC2 for my CNC software at this point.
Sketchup is pretty well doing OK for me for CAD right now, though there are things I will want to do later that I'm not sure it does easily or well. When money permits, what I'd really like to do is pick up ZBrush. Hopefully within a year or so. Sooner if possible.
For CAM, I'm thinking that I'll want to pick up something like Cut3D from Vectric. It seems to have the functions I want. Cut2D is a possibility, too. I'll be doing the free trial on each in the not-too-distant future.
In the meanwhile, if you know of some free CAM software that doesn't just treat an STL object as something to be rastered over, drop me a note. I'm completely OS-agnostic. Most recently I was doing CAD in MacOS, running CAM (FreeMill, a good package but didn't do what I needed) on Windows, and I'm driving the CNC with EMC2 on Linux.
Wednesday, May 4, 2011
First Attempt at Engraving an IC with my CNC
I decided to try doing a smaller, more precise job with my microCarve A4 CNC today. I took some of my GCode program from yesterday, scaled it down (fortunately I provided variables to do all that automatically for me) and added a chip number in characters that I hoped would show with the bit I'm using.
Here's what I got:

The cut widths are about 35 thousandths. Too large for the level of detail in the smaller key pattern. The single large key above is scaled three times larger than the smaller keys. The base leg length for the small keys (the smallest segment size) is 25 thousandths. So it's easy to see why it didn't quite come out.
Still, the accuracy would have been plenty good, if I'd had a sharp enough bit.
Onward and upward! :)
Tweet
Here's what I got:
My first shot at engraving an IC top. It's not really an 8085 microprocessor, it's a dead ROM I happened to have hanging around.
The cut widths are about 35 thousandths. Too large for the level of detail in the smaller key pattern. The single large key above is scaled three times larger than the smaller keys. The base leg length for the small keys (the smallest segment size) is 25 thousandths. So it's easy to see why it didn't quite come out.
Still, the accuracy would have been plenty good, if I'd had a sharp enough bit.
Onward and upward! :)
Learning GCode with EMC2
I'm spending a lot of time with my new microCarve A4 CNC router this week. My first couple of items were made using a handy image to gcode converter that's built into the EMC2 control software I'm using.
But the image converter simply treats the image as a depth map which is cut by raster-scanning with the cutting head. For the designs I used, this was slow, and produced rougher results than would be produced using vector cuts.
So I looked at a couple of approaches to improve things. One is using CAD software that works well with a CAM package to covert the CAD design into machine control instructions to cut out the CAD shapes. The other is to go straight to writing my own machine control programs by hand. I know that I'll want to have both methods in my toolkit, but which to use first?
After a bit of back and forth yesterday morning, I decided to start with programming by hand first. So I dove into the EMC2 documentation for gcode, the programming language more properly called RS-274-NGC. What a catchy name, eh? You can bet that the folks who picked programming language names like "python" and "Java" are kicking themselves after seeing how "RS-274-NGC" rolls off the tongue.

Well, the EMC2 site has a link for a gcode tutorial, but what's there is...not much. Maybe I'll pitch in, since that's what wikis are for, right? The I went an read the EMC2 documentation, which has the standard cart-before-horse format of discussing details before generalities. Then I found the excellent LumenLabs GCode Tutorial. Much better!
I read some bits, scanned others, then hit the keyboard on my CNC control system. It's an old Athlon 800 with 768MB of RAM loaded up with the EMC2 LiveCD install for Ubuntu Hardy Heron, with EMC2 upgraded to the current version after install.
I fired up EMC2 with the SIM-Axis configuration for developing the gcode. I've got three different configurations of EMC2 on my desktop. I've got the SIM-Axis setup, and two different configurations for my microCarve A4, each with different origins for the axes.
I used gedit to create an initial gcode file, then opened it in EMC2. The gcode preview window is great. Whenever I edited the gcode file and saved, I'd click the reload button in EMC2 and immediately see the changes. Likewise, the error messages were good enough to let me find my problems, though the problems were usually typos rather than what was reported.
I used iterative development, of course. No sense writing too much code before finding out that I didn't understand some element of syntax. I started with initializing the mode settings, lifting the head to a safe traversal height, traversing to a point in space, then returning to machine zero. After fixing a couple of problems, I got what I wanted. Then I added a few additional move commands, and got the simulated CNC to follow them. At that point I could see that things would get out of hand pretty quick if I didn't learn some basic flow control.
So I read up on subroutines in gcode. I laid out a simple key pattern on graph paper, and wrote the necessary routines. That's the border you see in the picture above. That was the easy part. It's all straight lines.
Next was curves. I read up on G2 and G3. I hadn't thought about the ability to shift the depth of cut across the curve when I started reading, but by the time I was done I was thinking, "Hmmm, if I vary the depth of the cut with a V groove bit, I can vary the width of the cut just as I would vary the width of a line with a calligraphy pen."
So I broke out a fresh sheet of graph paper, and started drawing some letters. Well, it took me about three times as long to lay out the letters as it took me to lay out the key pattern, but I managed that. Not only that, but I set things up with scaling factors and variable settings that allow me to easily scale and move the letters.
Results
The results you see above are what I got from the first "live" run of my first gcode program. The cuts are a bit deeper than I'd like, and the 90 degree bit I'm using right now doesn't help. Also, the cutting was a bit fast for the plywood, causing the wood to be frayed on the cross-grain cuts. Still, the varying of "line weight" on the letters turned out well. Overall I'm happy with it, and the defects should be easy to fix when I run it again. I'm planning on building a complete alphabet for this font and throwing it into a file for later use.
Tweet
But the image converter simply treats the image as a depth map which is cut by raster-scanning with the cutting head. For the designs I used, this was slow, and produced rougher results than would be produced using vector cuts.
So I looked at a couple of approaches to improve things. One is using CAD software that works well with a CAM package to covert the CAD design into machine control instructions to cut out the CAD shapes. The other is to go straight to writing my own machine control programs by hand. I know that I'll want to have both methods in my toolkit, but which to use first?
After a bit of back and forth yesterday morning, I decided to start with programming by hand first. So I dove into the EMC2 documentation for gcode, the programming language more properly called RS-274-NGC. What a catchy name, eh? You can bet that the folks who picked programming language names like "python" and "Java" are kicking themselves after seeing how "RS-274-NGC" rolls off the tongue.
Results of My First GCode Program.
Well, the EMC2 site has a link for a gcode tutorial, but what's there is...not much. Maybe I'll pitch in, since that's what wikis are for, right? The I went an read the EMC2 documentation, which has the standard cart-before-horse format of discussing details before generalities. Then I found the excellent LumenLabs GCode Tutorial. Much better!
I read some bits, scanned others, then hit the keyboard on my CNC control system. It's an old Athlon 800 with 768MB of RAM loaded up with the EMC2 LiveCD install for Ubuntu Hardy Heron, with EMC2 upgraded to the current version after install.
I fired up EMC2 with the SIM-Axis configuration for developing the gcode. I've got three different configurations of EMC2 on my desktop. I've got the SIM-Axis setup, and two different configurations for my microCarve A4, each with different origins for the axes.
I used gedit to create an initial gcode file, then opened it in EMC2. The gcode preview window is great. Whenever I edited the gcode file and saved, I'd click the reload button in EMC2 and immediately see the changes. Likewise, the error messages were good enough to let me find my problems, though the problems were usually typos rather than what was reported.
I used iterative development, of course. No sense writing too much code before finding out that I didn't understand some element of syntax. I started with initializing the mode settings, lifting the head to a safe traversal height, traversing to a point in space, then returning to machine zero. After fixing a couple of problems, I got what I wanted. Then I added a few additional move commands, and got the simulated CNC to follow them. At that point I could see that things would get out of hand pretty quick if I didn't learn some basic flow control.
So I read up on subroutines in gcode. I laid out a simple key pattern on graph paper, and wrote the necessary routines. That's the border you see in the picture above. That was the easy part. It's all straight lines.
Next was curves. I read up on G2 and G3. I hadn't thought about the ability to shift the depth of cut across the curve when I started reading, but by the time I was done I was thinking, "Hmmm, if I vary the depth of the cut with a V groove bit, I can vary the width of the cut just as I would vary the width of a line with a calligraphy pen."
So I broke out a fresh sheet of graph paper, and started drawing some letters. Well, it took me about three times as long to lay out the letters as it took me to lay out the key pattern, but I managed that. Not only that, but I set things up with scaling factors and variable settings that allow me to easily scale and move the letters.
Results
The results you see above are what I got from the first "live" run of my first gcode program. The cuts are a bit deeper than I'd like, and the 90 degree bit I'm using right now doesn't help. Also, the cutting was a bit fast for the plywood, causing the wood to be frayed on the cross-grain cuts. Still, the varying of "line weight" on the letters turned out well. Overall I'm happy with it, and the defects should be easy to fix when I run it again. I'm planning on building a complete alphabet for this font and throwing it into a file for later use.
Friday, April 22, 2011
8085 Microprocessor Reference Card Posted
I put up a downloadable PDF of my own 8085 reference card on my website:
8085 Microprocessor Reference Card
I've added a bunch of information that I often use that's not on the original Intel reference card. This includes the undocumented 8085 instructions, timing for all instructions in T-States, a pinout and basic electrical reference, and a little more detail on the additional interrupts the 8085 adds to the 8080A design. Such as the fact that they're off by default, which I've forgotten at least a couple of times when writing test routines.
The card is laid out so that it can be printed on either a single-sided sheet or double sided to make two cards laid out with a front and back. The finished card looks great on a good cover stock paper, and folds to fit nicely into a pocket.
Monday, February 7, 2011
Coding Forms for Hand-Made Programs

I've posted some of the coding forms I use on my website.
For me, hand coding and hand assembling software is pleasant and relaxing. It's like crochet or embroidery (I do both of those as well as programming.) Something as simple as a printed form makes it nicer, neater, and faster.
The forms of my own I've posted are generic assembly language forms. I've also posted a TI 960/980 assembly language form as well as some programming forms for the HP-41C, HP-67 and HP-97 that I use with all of my programmable calculators (like my HP-35S.)
Friday, February 4, 2011
MAG-85: 8085 Microprocessor Project Software Progress
With the hardware work on my 8085 microprocessor trainer project about 99% complete, most of my effort over the past month or so has been developing a simple monitor program (a sort of mini-OS) for it.
The biggest part of that OS deals with the user interface (go figure), specifically the routines for controlling the LCD. The most demanding of the routines have been done for well over a year now, ever since I finished testing the LCD display with the breadboard version of the MAG-85.
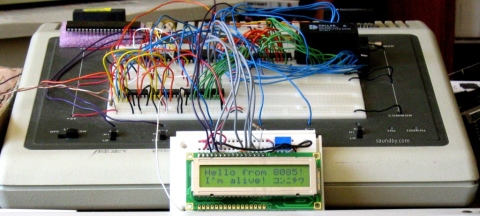
When writing my own software while playing with the LCD (i.e. goofing off rather than writing code for the monitor), I've been writing lots of ad-hoc software to write to the LCD or control it whenever I wanted something more sophisticated than "write this character to the screen" or "send this string to the screen". Character out and string out routines were in my early test software. What I needed were things like automatic wrapping at the end of the displayed line and some terminal control commands.
Coding Rule: Make One to Throw Away
The display controller for the LCD has a larger "display" area than the LCD actually displays. Its buffer holds two lines of 40 characters. That's really nice on my other display which has a 40x2 LCD display on it. But the MAG-85 uses a 16x2 display. This means you can send characters to it, and it'll happily accept them and put them into the buffer in places that the LCD doesn't show. So you don't see over half of what you write. Or you need to keep track of how many characters you've written since the start of the line and wrap to the start of line 2 yourself. And so on.
In my first shot at a set of LCD routines for the system monitor, I wrote a bunch of stand alone cursor position tracking and movement routines. Then I had to invoke them from all over to keep track of stuff. And since the software had to do its own tracking, stuff would get missed, the LCD would get out of sync, and it became standard practice to re-home the cursor and display every so often to keep things from going off track for too long.
Plus the number of routines was getting out of hand, along with the size of the software. I'd intended the software to come in somewhere around a page in length, and I was at about twice that with only about half the software implemented! For comparison sake, a system that uses a hardware approach to display control (e.g. LED or other simple segmented displays with data buffers and select logic) rather than software like the LCD uses fits the whole monitor into about 1K of memory. I was looking at my LCD routines taking up as much room as the whole rest of the monitor.
Frankly, I felt that I was going the wrong way, and it slowed me down in getting the monitor done.
Coding Rule: Make Another to Keep
I decided to strip the code back to my original tight routines. All they do is initialize the LCD, send out a character or a command byte, or a string of characters. First, I dressed up my initialization routine by moving out some recurring code for delays into subroutines. This not only reduced the size of that routine, but made those subroutines available elsewhere.
Then I looked at my character out routine, and decided to put the intelligence about where the cursor was in there. After all, if it gets written this is where it happens. I built in an automatic wrap. It seemed to fit well, and it took a lot of heat off the user code. Suddenly things were looking a lot better.
Once I got to rewriting some of the other added functionality, it turned out smaller and simpler. It went so well, that I'm much farther along in implementing everything I want than I got with the old code. And at present I'm only just over a page in length, without having gone back to look for optimizations (repeated code and so on.) That'll come next, after which I'll be desk=checking my stack handling as I jump around between different routines.
But I'm much happier, and I've got a lot more to show for my time this time. It's nothing revolutionary, but there are times when it's a breakthrough just to step back and see the obvious.
Tweet
The biggest part of that OS deals with the user interface (go figure), specifically the routines for controlling the LCD. The most demanding of the routines have been done for well over a year now, ever since I finished testing the LCD display with the breadboard version of the MAG-85.
The Early MAG-85 with LCD Demo Program
When writing my own software while playing with the LCD (i.e. goofing off rather than writing code for the monitor), I've been writing lots of ad-hoc software to write to the LCD or control it whenever I wanted something more sophisticated than "write this character to the screen" or "send this string to the screen". Character out and string out routines were in my early test software. What I needed were things like automatic wrapping at the end of the displayed line and some terminal control commands.
Coding Rule: Make One to Throw Away
The display controller for the LCD has a larger "display" area than the LCD actually displays. Its buffer holds two lines of 40 characters. That's really nice on my other display which has a 40x2 LCD display on it. But the MAG-85 uses a 16x2 display. This means you can send characters to it, and it'll happily accept them and put them into the buffer in places that the LCD doesn't show. So you don't see over half of what you write. Or you need to keep track of how many characters you've written since the start of the line and wrap to the start of line 2 yourself. And so on.
In my first shot at a set of LCD routines for the system monitor, I wrote a bunch of stand alone cursor position tracking and movement routines. Then I had to invoke them from all over to keep track of stuff. And since the software had to do its own tracking, stuff would get missed, the LCD would get out of sync, and it became standard practice to re-home the cursor and display every so often to keep things from going off track for too long.
Plus the number of routines was getting out of hand, along with the size of the software. I'd intended the software to come in somewhere around a page in length, and I was at about twice that with only about half the software implemented! For comparison sake, a system that uses a hardware approach to display control (e.g. LED or other simple segmented displays with data buffers and select logic) rather than software like the LCD uses fits the whole monitor into about 1K of memory. I was looking at my LCD routines taking up as much room as the whole rest of the monitor.
Frankly, I felt that I was going the wrong way, and it slowed me down in getting the monitor done.
Coding Rule: Make Another to Keep
I decided to strip the code back to my original tight routines. All they do is initialize the LCD, send out a character or a command byte, or a string of characters. First, I dressed up my initialization routine by moving out some recurring code for delays into subroutines. This not only reduced the size of that routine, but made those subroutines available elsewhere.
Then I looked at my character out routine, and decided to put the intelligence about where the cursor was in there. After all, if it gets written this is where it happens. I built in an automatic wrap. It seemed to fit well, and it took a lot of heat off the user code. Suddenly things were looking a lot better.
Once I got to rewriting some of the other added functionality, it turned out smaller and simpler. It went so well, that I'm much farther along in implementing everything I want than I got with the old code. And at present I'm only just over a page in length, without having gone back to look for optimizations (repeated code and so on.) That'll come next, after which I'll be desk=checking my stack handling as I jump around between different routines.
But I'm much happier, and I've got a lot more to show for my time this time. It's nothing revolutionary, but there are times when it's a breakthrough just to step back and see the obvious.
Thursday, September 2, 2010
Installing Pygame on Mac OS X Leopard
In my ongoing campaign to broaden my programming abilities I decided to install
Pygame and play around with it. I want to try it out as something to present to my students this year. I've decided to add a small programming segment to the first semester of my high school computer class this year where we do a quick survey of several languages by doing tutorials in them before we go into Java programming in spring semester.
Pygame is an add-on package for python that makes it easy to develop games using Python. Python has no built-in support for native graphics, sound, etc.--Pygame adds that to Python.
When I went to install Pygame on my Mac, I ran into a couple of hitches. I managed to work around them without too much problem, but I thought what I did to get things going was worth sharing.
First, Pygame requires the python.org version of Python. Even though my Mac already came with Python installed (hurray for Apple for that), the version isn't one that Pygame is happy with. So I went out to python.org, clicked on downloads, and pulled the first thing I saw for my OS version. This turned out to be Python 2.7 for Mac OS X 10.5 or later. Yeah, I could have gone with 3.1, but to be honest I didn't look that far down the page at first.
Once I had it downloaded, I started the download of Pygame. I installed Python 2.7 from the Mac installer while that was going.
Once the Python install finished, I did python -V at the command line in Terminal. My answer:
Hmmm. That's the Mac preinstalled version, not the new one. OK, fine:
Aha! I needed to set up the appropriate links to make the new Python the current one.
Hurray! Next I went to install Pygame. I unzip the zip, then run the installer.
No Install
Pygame then complained that it wanted Python 2.6! Python 2.7 wasn't good enough for it. I took a look at the dependency settings by right clicking on the Pygame installer in Finder, selecting "Show Package Contents", then opening "Contents" and double-clicking on info.plist there to open it in the Property List Editor. I expanded the Root item (the only top level item), then expanding "IFRequirementDicts" and expanding item "0". There I saw the Python version requirements properties. I considered changing it to require Python 2.7 by editing the SpecArgument field to 2.7 instead of 2.6.
But, it's not like my hard disk is mine to control, so I wimped out and installed Python 2.6 by going back to the Python All Releases download page, finding the 2.6 version, downloading and installing it.
Once it was in place, I went back to Terminal:
Now Pygame will install just fine.
Tweet
Pygame and play around with it. I want to try it out as something to present to my students this year. I've decided to add a small programming segment to the first semester of my high school computer class this year where we do a quick survey of several languages by doing tutorials in them before we go into Java programming in spring semester.
Pygame is an add-on package for python that makes it easy to develop games using Python. Python has no built-in support for native graphics, sound, etc.--Pygame adds that to Python.
When I went to install Pygame on my Mac, I ran into a couple of hitches. I managed to work around them without too much problem, but I thought what I did to get things going was worth sharing.
First, Pygame requires the python.org version of Python. Even though my Mac already came with Python installed (hurray for Apple for that), the version isn't one that Pygame is happy with. So I went out to python.org, clicked on downloads, and pulled the first thing I saw for my OS version. This turned out to be Python 2.7 for Mac OS X 10.5 or later. Yeah, I could have gone with 3.1, but to be honest I didn't look that far down the page at first.
Once I had it downloaded, I started the download of Pygame. I installed Python 2.7 from the Mac installer while that was going.
Once the Python install finished, I did python -V at the command line in Terminal. My answer:
#python -V
Python 2.5.1
Hmmm. That's the Mac preinstalled version, not the new one. OK, fine:
#whereis python
/usr/bin/python
#ls -l /usr/bin/python
lrwxr-xr-x 1 root wheel 72 Feb 21 2008 /usr/bin/python -> ../../System/Library/Frameworks/Python.framework/Versions/2.5/bin/python
Aha! I needed to set up the appropriate links to make the new Python the current one.
#cd /System/Library/Framework/Python.framework/Versions/
#ls
2.3 2.5 Current
#ls -l Current
lrwxr-xr-x 1 root wheel 3 Feb 21 2008 Current -> 2.5
#ls /Library/Frameworks/Python.framework/Versions/
2.7
#ln -s /Library/Frameworks/Python.framework/Versions/2.7 ./2.7
#ls
2.3 2.5 2.7 Current
#rm Current
#ln -s 2.7 Current
#ls -l Current
lrwxr-xr-x 1 root wheel 3 Sep 2 12:45 Current -> 2.7
#python -V
Python 2.7
Hurray! Next I went to install Pygame. I unzip the zip, then run the installer.
No Install
Pygame then complained that it wanted Python 2.6! Python 2.7 wasn't good enough for it. I took a look at the dependency settings by right clicking on the Pygame installer in Finder, selecting "Show Package Contents", then opening "Contents" and double-clicking on info.plist there to open it in the Property List Editor. I expanded the Root item (the only top level item), then expanding "IFRequirementDicts" and expanding item "0". There I saw the Python version requirements properties. I considered changing it to require Python 2.7 by editing the SpecArgument field to 2.7 instead of 2.6.
But, it's not like my hard disk is mine to control, so I wimped out and installed Python 2.6 by going back to the Python All Releases download page, finding the 2.6 version, downloading and installing it.
Once it was in place, I went back to Terminal:
#cd /System/Library/Framework/Python.framework/Versions/
#ls
2.3 2.5 2.7 Current
#ln -s /Library/Frameworks/Python.framework/Versions/2.6 ./2.6
#ls
2.3 2.5 2.6 2.7 Current
Now Pygame will install just fine.
Thursday, August 26, 2010
Making the Mac Speak in Java
The Mac "say" program is an endless source of fun and mischief. In class, I like to make the Macs talk to the students sometimes using the say command from an ssh login from across the room.
While preparing an article on calling system commands in Java, I decided to combine that with the Mac "say" command in my Simple Video Game Kernel.
I'm posting this here, since I avoid posting platform-specific code at my Java programming blog.
Give it a try, if you've got a Mac handy, and enjoy.
The funny looking [[pbas +18]] type things in the "say" commands are inline commands to the Mac speech synthesizer to change the characteristics of the voice. You can omit these if you want to make the commands easier to read, then add them back in to see what affect they have (or play with the numbers.) You can find out more about using the Mac speech synthesizer at Apple's developer site.
Tweet
While preparing an article on calling system commands in Java, I decided to combine that with the Mac "say" command in my Simple Video Game Kernel.
I'm posting this here, since I avoid posting platform-specific code at my Java programming blog.
Give it a try, if you've got a Mac handy, and enjoy.
/* A simple video game style kernel
   by Mark Graybill, August 2010
   Uses the Timer Class to move a ball on a playfield
   30 times per second. Add additional "players" to
   the playfield with appropriate control routines to
   make a full game.

  This version adds speech to the poor little ball getting
  bounced off the walls. Mac-only, I'm afraid.
*/

// Import Timer and other useful stuff:
import java.util.*;
// Import the basic graphics classes.
import java.awt.*;
import javax.swing.*;
// import java.lang.Math;

public class VGKernel extends JPanel{

// This is not a recommended coding practice, just a shortcut.
public Rectangle screen, ball; // The screen area and ball location/size.
public Rectangle bounds;  // The boundaries of the drawing area.
public JFrame frame; // A JFrame to put the graphics into.
public VGTimerTask vgTask; // The TimerTask that runs the game.
public boolean down, right; // Direction of ball's travel.

// Create a constructor method:
  public VGKernel(){
    super();
    screen = new Rectangle(0, 0, 600, 400);
    ball   = new Rectangle(0, 0, 20, 20);
    bounds = new Rectangle(0, 0, 600, 400); // Give some temporary values.
    frame = new JFrame("VGKernel");
    vgTask = new VGTimerTask();
}

  // Create an inner TimerTask class that has access to the
  // members of the VGKernel.
  class VGTimerTask extends TimerTask{
    public void run(){
      moveBall();
      frame.repaint();
    }
  }

// Now the instance methods:
  public void paintComponent(Graphics g){
    // Get the drawing area bounds for game logic.
    bounds = g.getClipBounds();
    // Clear the drawing area, then draw the ball.
    g.clearRect(screen.x, screen.y, screen.width, screen.height);
    g.fillRect(ball.x, ball.y, ball.width, ball.height);
  }

  public void moveBall(){
  // Ball should really be its own class.
    if (right) ball.x+=ball.width/4; // If right is true, move ball right,
    else ball.x-=ball.width/4;       // otherwise move left.
    if (down)  ball.y+=ball.height/4; // Same for up/down.
    else ball.y-=ball.width/4;
    if (ball.x > (bounds.width - ball.width)) // Detect edges and bounce.
      { right = false; ball.x = bounds.width -  ball.width;
        try { Process p = new ProcessBuilder("say", "-v", "Ralph",
                         "[[pbas +18]] [[rate +70]] Ow").start();}
        catch(java.io.IOException io){}
      }
    if (ball.y > (bounds.height - ball.height))
      { down  = false; ball.y = bounds.height - ball.height;
        try { Process p = new ProcessBuilder("say", "-v", "Ralph",
                          "[[pbas +18]] [[rate +70]] uh").start();}
        catch(java.io.IOException io){}
      }
    if (ball.x <= 0) { right = true; ball.x = 0;
        try { Process p = new ProcessBuilder("say", "-v", "Ralph",
                         "[[pbas +18]] [[rate +70]] arg").start();}
        catch(java.io.IOException io){}
    }
    if (ball.y <= 0) { down  = true; ball.y = 0;
        try { Process p = new ProcessBuilder("say", "-v", "Ralph",
                          "[[pbas +18]] [[rate +70]] uh").start();}
        catch(java.io.IOException io){}
    }
  }

  public static void main(String arg[]){

    // Create a Timer object and an instance of VGKernel
    java.util.Timer vgTimer = new java.util.Timer();
    VGKernel panel = new VGKernel();

    panel.down = true;
    panel.right = true;
    panel.frame.setDefaultCloseOperation(JFrame.EXIT_ON_CLOSE);
    panel.frame.setSize(panel.screen.width, panel.screen.height);

    panel.frame.setContentPane(panel);
    panel.frame.setVisible(true);

    // Set up a timer to do the vgTask regularly.
    vgTimer.schedule(panel.vgTask, 0, 20);
  }
}
The funny looking [[pbas +18]] type things in the "say" commands are inline commands to the Mac speech synthesizer to change the characteristics of the voice. You can omit these if you want to make the commands easier to read, then add them back in to see what affect they have (or play with the numbers.) You can find out more about using the Mac speech synthesizer at Apple's developer site.
Friday, August 13, 2010
Greenfoot's Greenroom: What a Bonanza!
I finally got around to registering for The Greenroom, a support area for teachers using the Greenfoot framework for Java in their classes. All I have to say is, Wow!

If you're a teacher using Greenfoot, or thinking about it, take the time to sign up for access. Access is limited to those who can show some bona fides to show that they're teachers, not sneaky students trying to wreck the teacher's lesson plan. ;)
That's what kept me from signing up for some time, I just didn't take the time to dig up something with my name on it at my school's website to show my status. Well, I finally took the time to do it, and now I wish I'd bothered a long time ago!
The resources available include a wide selection of very well presented lessons, exercises, and information on using Greenfoot with Eclipse, etc., etc. Then there's the discussion boards. I follow the Greenfoot and BlueJ mailing lists, but the Greenroom discussions have an extra dimension to them, particularly from the teacher's perspective.
If that's not enough, that's also where to find the announcement of the forthcoming Greenfoot 2.0! My excitement about Greenfoot 2.0 is the new editor, with syntax highlighting and code completion. I can't wait to get my hands on it, I'll post about it when I do.
Tweet
If you're a teacher using Greenfoot, or thinking about it, take the time to sign up for access. Access is limited to those who can show some bona fides to show that they're teachers, not sneaky students trying to wreck the teacher's lesson plan. ;)
That's what kept me from signing up for some time, I just didn't take the time to dig up something with my name on it at my school's website to show my status. Well, I finally took the time to do it, and now I wish I'd bothered a long time ago!
The resources available include a wide selection of very well presented lessons, exercises, and information on using Greenfoot with Eclipse, etc., etc. Then there's the discussion boards. I follow the Greenfoot and BlueJ mailing lists, but the Greenroom discussions have an extra dimension to them, particularly from the teacher's perspective.
If that's not enough, that's also where to find the announcement of the forthcoming Greenfoot 2.0! My excitement about Greenfoot 2.0 is the new editor, with syntax highlighting and code completion. I can't wait to get my hands on it, I'll post about it when I do.
Thursday, August 12, 2010
Class Projects: The Good, the Bad, and the Future Value
In my prior post about the student projects posted from Cornell's ECE 4760 program, I mentioned how nice it is, as a teacher, to see these reports and get a sense of how what I do with my classes compares. Class projects have their limitations, but they're tremendously valuable for the students.
I say "sort of" bad, because these are the same sorts of problems that are encountered outside the classroom. In the classroom, the cost of failure is a less than sterling grade--and not even necessarily that. Failure in the classroom is not the same as commercial failure. A non-working project does not necessarily result in a poor grade (though one that works as planned will usually garner a better grade.) The classroom is a good place to be pushed and challenged.
The road to a finished product is seldom traveled to its end in a class project. There just isn't time in most class schedules, even if the students spend time outside class working on the project. However, a sense of the length of that road is obtained, I find. And a new appreciation for the effort that goes into the "second 90%" of work on a product is developed.
In my class, the teams get a chance to see what happens when actual users lay hands on the project results as well. The developers of a program have to watch silently as members of another team try to use their product. They get to learn more in 20 minutes than I could give them in hours of lecture.
The best part of class projects, in my opinion? It's a lot more fun than limiting a class to assigned classwork. I try to spend as little time on teaching the necessary material as possible before setting my students loose to discover on their own. It's something that not only do I enjoy more, but my students, so long as they keep the project in perspective, can enjoy a lot more than assigned work. It's very jarring for some to be set loose this way, but once they're helped over the hump everyone has a really good time with it.
Plus, they get to have an actual thing out there with their name on it. Something they can point to and say
"I did that."
Tweet
The Good Parts:
- Allows students to develop and build on their own ideas.
- Lets them exercise the knowledge they've gained.
- Gives opportunities to discover gaps in their knowledge.
- Introduces time and resource constraints to practical work.
- Teaches teamwork skills.
- Opens up "teachable moments" not accessible through regular classwork.
The (sort of) Bad Parts:
- Time and resources are never sufficient.
- Substantial amounts of effort can be expended on fruitless effort.
- Non-self starters can falter easily.
- Much of the class grade rests on work patterns with which many students are unskilled.
- Teams don't always gel.
I say "sort of" bad, because these are the same sorts of problems that are encountered outside the classroom. In the classroom, the cost of failure is a less than sterling grade--and not even necessarily that. Failure in the classroom is not the same as commercial failure. A non-working project does not necessarily result in a poor grade (though one that works as planned will usually garner a better grade.) The classroom is a good place to be pushed and challenged.
The Future Value:
- Lessons learned when doing projects are often more valuable outside the classroom, in terms of time spent, than much else that is done in the classroom.
- Recognition of the value of people and communications skills alongside technical skills.
- Understanding that technical work must be accomplished to have success, even in the face of uncertainty.
- Learning to build on strengths, rather than be halted by shortcomings.
- Experiencing how great the gap is between a technically successful demonstration and a finished product.
The road to a finished product is seldom traveled to its end in a class project. There just isn't time in most class schedules, even if the students spend time outside class working on the project. However, a sense of the length of that road is obtained, I find. And a new appreciation for the effort that goes into the "second 90%" of work on a product is developed.
In my class, the teams get a chance to see what happens when actual users lay hands on the project results as well. The developers of a program have to watch silently as members of another team try to use their product. They get to learn more in 20 minutes than I could give them in hours of lecture.
The best part of class projects, in my opinion? It's a lot more fun than limiting a class to assigned classwork. I try to spend as little time on teaching the necessary material as possible before setting my students loose to discover on their own. It's something that not only do I enjoy more, but my students, so long as they keep the project in perspective, can enjoy a lot more than assigned work. It's very jarring for some to be set loose this way, but once they're helped over the hump everyone has a really good time with it.
Plus, they get to have an actual thing out there with their name on it. Something they can point to and say
Subscribe to:
Posts (Atom)


 Posts
Posts


 Webomator.com: Backward into the