Well, I've lost a chunk of my life to a really stupid problem with Age of Mythology for the Macintosh.
My family and I like to play network games on the home LAN around the holidays. We have several old favorites, most of them were bought when they were old, too. We save dollars that way, plus we can buy enough for everyone's system without going broke.
One of those is Age of Mythology, from MacSoft.
Unfortunately, it tries to be intelligent with its network configuration. To simplify things, ya know? And it simplifies things to the point where you can't configure which network it uses, or any other network settings.
We have it on four systems. Two worked just fine right away. The third we saw was choosing its wired ethernet address over its wireless address. Unplug the wired network and hey, presto, it works. Number four, my own system, didn't respond to that.
I poked around through config files and tried editing them by hand, scanned the file system (find does more than Spotlight), and so on. All four games had been installed the same. They'd patched up to version 2.01, which fixes problems with an "out of sync" error in versions of OS X of Leopard and above. I looked on the internet, went many pages deep into various Google searches, and spelunked my computer's file system, hoping that I wouldn't wreck anything.
Nothing was working for me.
Finally, after chewing at it for literally hours, I stumbled into it.
Mamas Don't Let Your Babies Grow Up to Share Internet
Under System Preferences, there's a setting for Internet Sharing. I have it turned on, so that my beige G3 can reach the internet though my iMac's wireless connection.
Age of Mythology hates me for it.
Once I turned Internet Sharing off, and unplugged the wired Ethernet, I was able to connect to the other three computers with the game.
Sheesh!
Wednesday, December 19, 2012
Wednesday, December 5, 2012
Programming a Chinese Handheld Radio:Feidaxin FD-150A
My daughter passed the test for her amateur radio license about a year ago (she's KJ6TFT.) Once she got her license, she wanted a handheld 2m radio, but she wanted one with some extra pizazz.
Make Mine RED
She wasn't happy with the standard, dumpy looking, little black box that all we old dudes hitch on to our belts. She wanted something with some color.
Her preference was red, but almost anything that wasn't black would do.
We heard rumors of colored HTs, but it took us a while to find them. After a fair bit of searching, I turned up the Feidaxin FD-150A in red, as well as the Baofeng UV-3R and 5R models in red.
I decided to get her an FD-150A for her birthday in February. I chose it over the Baofeng for a couple of reasons. First, it was single-band. For her first HT, I wanted something a bit simpler and less confusing. Next, it was rated at 5W rather than 4. Since we live in an area where hitting the local repeaters on even 5W is pretty iffy, I figured the extra watt was going to be beneficial (and I was aware that the extra watt may not be really there, but then again, maybe it was.)
Once she got it, we did some simplex contacts between our HTs and all seemed well. When she went out to the county fair this summer, the club had a booth she helped out at. Someone there programmed the repeater in for her, and she was using that to talk to a buddy at the fair and later, on the college campus in Grass Valley.
All seemed to be well.
Where's the Radio?
This fall, though, I started to notice that the radio wasn't going out with her like it had before. I asked about it, and she said something that made sense at the time. But I still noticed the radio wasn't going places. In fact, when I asked her to bring it out once, she couldn't find it until the next day.
Then we went on a trip a couple of weeks ago to visit my uncle. (After we got our licenses we learned that he is KF7MCI.) I had her bring her radio so that we could talk to him on the repeaters along I-80 when we started to get close. She tried to make contact, but we didn't manage it. Unfortunately, there was enough inexperience going around between us, and some assumptions on my part, that it didn't work out.
She'd seemed to have a lot of trouble setting her radio to talk to the repeaters as we were driving, once we got the info from my uncle.
Taking a Breath, Looking Things Over
After the trip, we finally got together with the radio last night. I'd just gone through and programmed a number of new channels into my FT-250R's memory--all the local simplex channels as well as the repeaters we'd tried to hit on our trip. So I was already in a "programming mode", ready to go.
She pulled out her radio and one of the better translations of its manual. We sat down to have a look at the book, then get her radio set up.
My first surprise was that the radio didn't have the repeater offsets for different frequencies programmed in to the radio's firmware. In retrospect I'm not surprised, but it surprised me at the time--I'd been pampered by my new Yaesu. I found that it does have the ability to program an offset. Hers was set at -600kHz, and apparently if it's set it's on. I recall having some trouble hearing her replies when we tried to work simplex once late in the summer, I think I know why now.
So...
I decided to start by programming in the local simplex frequencies. I put them in the same memory locations as I had them in my HT, so that it'd be easy for me to call off channels for her along with frequencies. She had stepped away while I did this to take care of something school-related.
Then I programmed in one of our local repeaters. Because we can't really hit it from an HT at our house, I wasn't able to test it. But after going through the settings twice, I was pretty confident.
Then she got back, and we went through the remaining repeaters together. I ran her through how to tell if she's in VFO or memory mode, changing channels, and I think she understood what I was doing as we got the last two repeaters in memory, too (though whether it will stick is something else.) But she can at least switch between memory channels to get to where she wants to be now.
Not So Bad, Once You Know It
There are a lot of little fiddly bits to set for a repeater, it seems. Even though my old IC-230 (my first rig) was rockbound, it was at least easier, and more obvious, to set up an operate on repeaters or an any given frequency. There was a button to turn on duplex, and to reverse it for positive offset repeaters. The crystals in it were chosen for local repeater frequencies, and it had a PLL that gave me every other local simplex frequency in a stretch of them (because of the different spacing used locally vs. in Japan when it was made.)
If the FD-150A had a few more indicators on screen, it would help a lot. Like a +/- that shows up when an offset is active. With the old IC-230, looking at the switch positions did this for me.
But, I can't complain now that I know the drill.
If I understand correctly, the Baofeng isn't much different. I'll be learning more about these soon, as I'm considering picking one up for working satellites.
I'll also probably get with my daughter about once a month to review things for a few months, till it sinks in, too.
Tweet
Make Mine RED
She wasn't happy with the standard, dumpy looking, little black box that all we old dudes hitch on to our belts. She wanted something with some color.
Her preference was red, but almost anything that wasn't black would do.
We heard rumors of colored HTs, but it took us a while to find them. After a fair bit of searching, I turned up the Feidaxin FD-150A in red, as well as the Baofeng UV-3R and 5R models in red.
I decided to get her an FD-150A for her birthday in February. I chose it over the Baofeng for a couple of reasons. First, it was single-band. For her first HT, I wanted something a bit simpler and less confusing. Next, it was rated at 5W rather than 4. Since we live in an area where hitting the local repeaters on even 5W is pretty iffy, I figured the extra watt was going to be beneficial (and I was aware that the extra watt may not be really there, but then again, maybe it was.)
Once she got it, we did some simplex contacts between our HTs and all seemed well. When she went out to the county fair this summer, the club had a booth she helped out at. Someone there programmed the repeater in for her, and she was using that to talk to a buddy at the fair and later, on the college campus in Grass Valley.
All seemed to be well.
Where's the Radio?
This fall, though, I started to notice that the radio wasn't going out with her like it had before. I asked about it, and she said something that made sense at the time. But I still noticed the radio wasn't going places. In fact, when I asked her to bring it out once, she couldn't find it until the next day.
Then we went on a trip a couple of weeks ago to visit my uncle. (After we got our licenses we learned that he is KF7MCI.) I had her bring her radio so that we could talk to him on the repeaters along I-80 when we started to get close. She tried to make contact, but we didn't manage it. Unfortunately, there was enough inexperience going around between us, and some assumptions on my part, that it didn't work out.
She'd seemed to have a lot of trouble setting her radio to talk to the repeaters as we were driving, once we got the info from my uncle.
Taking a Breath, Looking Things Over
After the trip, we finally got together with the radio last night. I'd just gone through and programmed a number of new channels into my FT-250R's memory--all the local simplex channels as well as the repeaters we'd tried to hit on our trip. So I was already in a "programming mode", ready to go.
She pulled out her radio and one of the better translations of its manual. We sat down to have a look at the book, then get her radio set up.
My first surprise was that the radio didn't have the repeater offsets for different frequencies programmed in to the radio's firmware. In retrospect I'm not surprised, but it surprised me at the time--I'd been pampered by my new Yaesu. I found that it does have the ability to program an offset. Hers was set at -600kHz, and apparently if it's set it's on. I recall having some trouble hearing her replies when we tried to work simplex once late in the summer, I think I know why now.
So...
I decided to start by programming in the local simplex frequencies. I put them in the same memory locations as I had them in my HT, so that it'd be easy for me to call off channels for her along with frequencies. She had stepped away while I did this to take care of something school-related.
Then I programmed in one of our local repeaters. Because we can't really hit it from an HT at our house, I wasn't able to test it. But after going through the settings twice, I was pretty confident.
Then she got back, and we went through the remaining repeaters together. I ran her through how to tell if she's in VFO or memory mode, changing channels, and I think she understood what I was doing as we got the last two repeaters in memory, too (though whether it will stick is something else.) But she can at least switch between memory channels to get to where she wants to be now.
Not So Bad, Once You Know It
There are a lot of little fiddly bits to set for a repeater, it seems. Even though my old IC-230 (my first rig) was rockbound, it was at least easier, and more obvious, to set up an operate on repeaters or an any given frequency. There was a button to turn on duplex, and to reverse it for positive offset repeaters. The crystals in it were chosen for local repeater frequencies, and it had a PLL that gave me every other local simplex frequency in a stretch of them (because of the different spacing used locally vs. in Japan when it was made.)
If the FD-150A had a few more indicators on screen, it would help a lot. Like a +/- that shows up when an offset is active. With the old IC-230, looking at the switch positions did this for me.
But, I can't complain now that I know the drill.
If I understand correctly, the Baofeng isn't much different. I'll be learning more about these soon, as I'm considering picking one up for working satellites.
I'll also probably get with my daughter about once a month to review things for a few months, till it sinks in, too.
Saturday, November 3, 2012
Ham Radio: A 2m Base Station Set Up
I posted some general information about my most recent work to get an amateur radio station up and running yesterday. Now I'll go into some specific detail on my 2m set up, which is up and running in a good enough state to get me through winter (I think.)
Interleaved Effort
The work I describe here happened in parallel with work on my HF station work. While I was up on the roof running antenna cables, I was running both sets of cables. While I was clearing shelf space for placing rigs and power supplies, I was clearing room for both. Fortunately it's worked out, even if it meant being a little less focused at times than I would have liked.
Building a Solid Station
Since I live in a gulch, with 100+ foot tall trees all around, getting a VHF signal from my house to anywhere is a challenge. While I managed to check into a net with a handie-talkie and a ground plane on a broomstick, this is not a plan for routine operation. I managed to check into a couple of nets with this configuration, but the signal reports were less than sterling, I had to chase around with the broomstick to try to find the best places for contact, which changed each time I tried. And having to go out into weather wasn't an appealing prospect.
To get a signal out of here, it was obvious I needed a few things. Like a rig with more power, a proper antenna, and, of course, a good low-loss feedline to tie them together. In other words, everything.
The Antenna
My initial thoughts were to mount the home-made ground plane on something better than a broomstick. But then further help came from a visit to the home of Bill, W6WEM, to have a look at his ground loop antenna (which I still hope to reproduce on my property, though it may wait till next spring.)
He had an unused pair of J-Pole antennas, one for 2m and the other for 440MHz. I don't have a rig for 440 yet, so it's laid aside (my daughter Amaryllis may have plans for it, we'll see.) But the 2m J-Pole I had immediate use for.
I scared up an extensible fiberglass pole that's about 10 feet long, and managed to attach it to a high eave on my garage good enough to stay through good weather. First, I connected to the J-Pole with an RG-58AU stub and an adaptor to go between the PL-259 on the antenna and the BNC on the cable. That went to a BNC to SMC adapter on my Handie-Talkie. I stood on the roof, with the HT just a little too high up to be comfortable, and managed to get into one of the two nearby repeaters I'd hit before with the broomstick groundplane.
With a new feedline, I would be able to raise the antenna higher, and who knows, maybe even talk from inside the house!
The Feedline
The 40m dipole I'd put up before hadn't gotten me any contacts yet. And it had my best piece of feedline for VHF, about 60 feet of RG-8 cable. I also had about 75 feet of some double-shielded 50 ohm cable, some Belden CATV cable on a par with the best RG-58. I could use the Belden cable on the 2m antenna, but its losses at 147MHz would be a lot higher than the RG-8. And the losses of the Belden would be not much more than the RG-8 at the lower frequencies that the 40m dipole would be used at.
So I decided to put the Belden cable on the 40m dipole, take off the RG-8 and put it on the 2m J-Pole.
I then used a collection of adaptors to get from the RG-8 to my HT without breaking the antenna connector (hopefully, though it may of weakened it, as it now needs repair, but I blame it getting caught under the car seat for the likely cause of the actual break.)
The Rig
Next was getting more watts. I bought a new rig, a Yaesu FT-2900R on sale at Ham Radio Outlet. It goes up to 75 watts. Almost certainly overkill, but then it would also have some value if I hooked up a beam and tried to get some DX over FM. Too bad it's not all mode. But that can happen later. Maybe I can even get somewhere with my old Kenwood TS-700A someday, with the other modes.
But for now, I decided to get the FT-2900R. I could have added PL to the old Kenwood and had 20W out, but it's receiver isn't very sensitive. By the time I've added PL and added hardware to compensate for the Kenwood's receiver, I'm within kissing range of the price of a new rig that just does the job for FM. So I went with the new rig. A new all-mode rig would have been nice, but wasn't available at the price of FM-only.
And the Rest
I managed to make out like a bandit at the SFARC annual white elephant sale (as well as getting some bucks into the club treasuring for the pleasure.) I got an MFJ-941C antenna tuner, a couple of nice power supplies (one still in the box), and some other fun bits.
Right now my HF rig and the FT-2900R are sharing a single power supply. The new one in the box is going to become my 2m rig's dedicated power supply.
I also have a place I've made in my in-home office, near my computers, that I've set the rig. I went up on the roof and moved the antenna cable to the other side of the house to meet up with the rig. I used the same feedthrough I made for the living room window in my office to bring it in, though the long-term plan is to bring it in through the crawlspace of the house.
All Together Now
Last week I went up on the roof and did something about the wobbly mount I had the J-Pole on. I put a proper antenna bracket pair on the house, and set the fiberglass pole, at full extension, into it. It's good for winter. The other setup lasted through a couple of windstorms, but frankly, I was surprised it did.
Last Thursday I got all the bits put together and checked out. I managed to check in that night to a regular 2m net for SFARC. Woohoo!
Everything is in a state that it can stay that way all winter, if need be. I'm planning some more minor changes to make things nicer, but it's all usable as is. Nothing is balanced precariously, or too fussy. I'm cleaning out a corner of the room to make space for a dedicated table for amateur radio now, and planning to reroute the antenna cable and put in a disconnect switch for lightning safety (I manually disconnect it when it's not in use, now.)
So I can say that for the first time I've got a real station set up. It's taken almost a year since I got my license to do so. But it's done.
Tweet
Interleaved Effort
The work I describe here happened in parallel with work on my HF station work. While I was up on the roof running antenna cables, I was running both sets of cables. While I was clearing shelf space for placing rigs and power supplies, I was clearing room for both. Fortunately it's worked out, even if it meant being a little less focused at times than I would have liked.
Building a Solid Station
Since I live in a gulch, with 100+ foot tall trees all around, getting a VHF signal from my house to anywhere is a challenge. While I managed to check into a net with a handie-talkie and a ground plane on a broomstick, this is not a plan for routine operation. I managed to check into a couple of nets with this configuration, but the signal reports were less than sterling, I had to chase around with the broomstick to try to find the best places for contact, which changed each time I tried. And having to go out into weather wasn't an appealing prospect.
To get a signal out of here, it was obvious I needed a few things. Like a rig with more power, a proper antenna, and, of course, a good low-loss feedline to tie them together. In other words, everything.
The Antenna
My initial thoughts were to mount the home-made ground plane on something better than a broomstick. But then further help came from a visit to the home of Bill, W6WEM, to have a look at his ground loop antenna (which I still hope to reproduce on my property, though it may wait till next spring.)
He had an unused pair of J-Pole antennas, one for 2m and the other for 440MHz. I don't have a rig for 440 yet, so it's laid aside (my daughter Amaryllis may have plans for it, we'll see.) But the 2m J-Pole I had immediate use for.
I scared up an extensible fiberglass pole that's about 10 feet long, and managed to attach it to a high eave on my garage good enough to stay through good weather. First, I connected to the J-Pole with an RG-58AU stub and an adaptor to go between the PL-259 on the antenna and the BNC on the cable. That went to a BNC to SMC adapter on my Handie-Talkie. I stood on the roof, with the HT just a little too high up to be comfortable, and managed to get into one of the two nearby repeaters I'd hit before with the broomstick groundplane.
With a new feedline, I would be able to raise the antenna higher, and who knows, maybe even talk from inside the house!
The Feedline
The 40m dipole I'd put up before hadn't gotten me any contacts yet. And it had my best piece of feedline for VHF, about 60 feet of RG-8 cable. I also had about 75 feet of some double-shielded 50 ohm cable, some Belden CATV cable on a par with the best RG-58. I could use the Belden cable on the 2m antenna, but its losses at 147MHz would be a lot higher than the RG-8. And the losses of the Belden would be not much more than the RG-8 at the lower frequencies that the 40m dipole would be used at.
So I decided to put the Belden cable on the 40m dipole, take off the RG-8 and put it on the 2m J-Pole.
I then used a collection of adaptors to get from the RG-8 to my HT without breaking the antenna connector (hopefully, though it may of weakened it, as it now needs repair, but I blame it getting caught under the car seat for the likely cause of the actual break.)
The Rig
Next was getting more watts. I bought a new rig, a Yaesu FT-2900R on sale at Ham Radio Outlet. It goes up to 75 watts. Almost certainly overkill, but then it would also have some value if I hooked up a beam and tried to get some DX over FM. Too bad it's not all mode. But that can happen later. Maybe I can even get somewhere with my old Kenwood TS-700A someday, with the other modes.
But for now, I decided to get the FT-2900R. I could have added PL to the old Kenwood and had 20W out, but it's receiver isn't very sensitive. By the time I've added PL and added hardware to compensate for the Kenwood's receiver, I'm within kissing range of the price of a new rig that just does the job for FM. So I went with the new rig. A new all-mode rig would have been nice, but wasn't available at the price of FM-only.
And the Rest
I managed to make out like a bandit at the SFARC annual white elephant sale (as well as getting some bucks into the club treasuring for the pleasure.) I got an MFJ-941C antenna tuner, a couple of nice power supplies (one still in the box), and some other fun bits.
Right now my HF rig and the FT-2900R are sharing a single power supply. The new one in the box is going to become my 2m rig's dedicated power supply.
I also have a place I've made in my in-home office, near my computers, that I've set the rig. I went up on the roof and moved the antenna cable to the other side of the house to meet up with the rig. I used the same feedthrough I made for the living room window in my office to bring it in, though the long-term plan is to bring it in through the crawlspace of the house.
All Together Now
Last week I went up on the roof and did something about the wobbly mount I had the J-Pole on. I put a proper antenna bracket pair on the house, and set the fiberglass pole, at full extension, into it. It's good for winter. The other setup lasted through a couple of windstorms, but frankly, I was surprised it did.
Last Thursday I got all the bits put together and checked out. I managed to check in that night to a regular 2m net for SFARC. Woohoo!
Everything is in a state that it can stay that way all winter, if need be. I'm planning some more minor changes to make things nicer, but it's all usable as is. Nothing is balanced precariously, or too fussy. I'm cleaning out a corner of the room to make space for a dedicated table for amateur radio now, and planning to reroute the antenna cable and put in a disconnect switch for lightning safety (I manually disconnect it when it's not in use, now.)
So I can say that for the first time I've got a real station set up. It's taken almost a year since I got my license to do so. But it's done.
Friday, November 2, 2012
Ham Radio-Continued Incremental Improvements
It's been a while since I've posted an amateur radio update.
I had my rigs set up temporarily in my living room when I last posted. They got ousted over the summer, for the sake of letting visitors feel that they're not in imminent danger of electrocution when they come over. ;)
That was fine, my intention was always to move them out into a dedicated space in the garage. My plan for the summer was to clear out a section of the garage, put in some flooring and walls and build a little sound studio in a corner. Then reality struck.
Robbers Fire
First, we had a wildfire. That had me putting my effort into outdoor work. I'd already taken care of the normal maintenance for the property, but when a wildfire is within a mile of your home, suddenly you start seeing a lot more that can be done. So the work in the garage was deferred for the duration.
A number of our friends came over one day to help out, by the time we'd finished the property was in good shape. The hardest part there was, once the chainsaws got fired up, getting them to stop while there are still some trees standing on the property. ;)
Home Repairs
Next was some planned home repairs. Which turned out to be more extensive than planned. I started expecting to replace the sill plate on our patio. That work grew significantly once I got started, and it ate up all the time and money I expected to put into both the original repair and building up my ham shack in the garage.
Meanwhile, my radios were stacked in a location where I couldn't use them, and the antenna cables were run to a part of the house where there weren't any radios.
After the home repairs were complete, I tried to continue with the original ham shack plan, but it just wasn't going to happen. The money for lumber and all was spent, and I just wanted to get back on the air. Also, there's a good likelyhood we're going to be moving out of this house within the next year or two, so the more elaborate set up I'd planned is looking less reasonable.
Fallback Plan
Instead, I decided to come up with another idea. But first, I moved over the cable for my 2m antenna to where I could hook it up to the radio in its current location on the other side of the house. I started to plan a new HF antenna (I still have zero contacts with the original 40m dipole I put up, mostly because I've been off the air all summer because of the points listed above.) The new antenna idea oscillated between an 80m dipole, a 40m loop, and an 80m loop. My daughter (KJ6TFT) and I went out and measured tree locations on our property. It was a low-energy activity that let me start getting my ham mindset going again.
Among the things I was looking for was an antenna that would tune up on more bands. My coax-fed 40m dipole would do 40m and 15m, but after a couple of near-but-not-quite contacts on 10m I wanted something that could radiate more efficiently on other bands. There are a number of ways to manage that, and I've gotten halfway there on more than one. :)
And there was still the issue of having a place to put my radios.
Well, the further along I got, the clearer it became that if I was going to get anywhere, I would have to divide my work into two lots: stuff that had to happen before the winter weather set in, and stuff that could be done regardless of weather.
The end result was that after playing around with fishing line and a bow and arrow for some hours, while seeing the first storm coming in on the weather reports, that I dropped the new antenna project for the time being and focused on making improvements in my present antennas to change them from the "get on the air, quick" configuration from last spring into a "likely to stay operational all winter" configuration.
As it happens, that turned out to be the right decision.
Upshot
I'm running long, so I'll save details for later. But last night I was able to check into a 2m net for the first time in months. I'm using a set-up that can keep me on the air all winter, at least. There are a couple of tweaks I still want to make before there's snow on the ground, but none of them are critical, just things to make the setup nicer.
Also, I've made some changes to the 40m antenna and I should be able to get on the HF bands again with a temporary set-up this weekend, and I should have things settled into something I can run with all winter within the next week. The antenna looks better than ever to my antenna analyzer, and I'm hoping it gets some signal out. I expect to be putting a call out to some locals over 2m to see if I can arrange my first HF contact within the next few days. At worst, I'll fall back to making some 2m simplex contacts and start collecting grid squares. I may only have a J-Pole, but so far I've only got one square (CM99mb), so anything is a step up.
Tweet
I had my rigs set up temporarily in my living room when I last posted. They got ousted over the summer, for the sake of letting visitors feel that they're not in imminent danger of electrocution when they come over. ;)
That was fine, my intention was always to move them out into a dedicated space in the garage. My plan for the summer was to clear out a section of the garage, put in some flooring and walls and build a little sound studio in a corner. Then reality struck.
Robbers Fire
First, we had a wildfire. That had me putting my effort into outdoor work. I'd already taken care of the normal maintenance for the property, but when a wildfire is within a mile of your home, suddenly you start seeing a lot more that can be done. So the work in the garage was deferred for the duration.
A number of our friends came over one day to help out, by the time we'd finished the property was in good shape. The hardest part there was, once the chainsaws got fired up, getting them to stop while there are still some trees standing on the property. ;)
Home Repairs
Next was some planned home repairs. Which turned out to be more extensive than planned. I started expecting to replace the sill plate on our patio. That work grew significantly once I got started, and it ate up all the time and money I expected to put into both the original repair and building up my ham shack in the garage.
Meanwhile, my radios were stacked in a location where I couldn't use them, and the antenna cables were run to a part of the house where there weren't any radios.
After the home repairs were complete, I tried to continue with the original ham shack plan, but it just wasn't going to happen. The money for lumber and all was spent, and I just wanted to get back on the air. Also, there's a good likelyhood we're going to be moving out of this house within the next year or two, so the more elaborate set up I'd planned is looking less reasonable.
Fallback Plan
Instead, I decided to come up with another idea. But first, I moved over the cable for my 2m antenna to where I could hook it up to the radio in its current location on the other side of the house. I started to plan a new HF antenna (I still have zero contacts with the original 40m dipole I put up, mostly because I've been off the air all summer because of the points listed above.) The new antenna idea oscillated between an 80m dipole, a 40m loop, and an 80m loop. My daughter (KJ6TFT) and I went out and measured tree locations on our property. It was a low-energy activity that let me start getting my ham mindset going again.
Among the things I was looking for was an antenna that would tune up on more bands. My coax-fed 40m dipole would do 40m and 15m, but after a couple of near-but-not-quite contacts on 10m I wanted something that could radiate more efficiently on other bands. There are a number of ways to manage that, and I've gotten halfway there on more than one. :)
And there was still the issue of having a place to put my radios.
Well, the further along I got, the clearer it became that if I was going to get anywhere, I would have to divide my work into two lots: stuff that had to happen before the winter weather set in, and stuff that could be done regardless of weather.
The end result was that after playing around with fishing line and a bow and arrow for some hours, while seeing the first storm coming in on the weather reports, that I dropped the new antenna project for the time being and focused on making improvements in my present antennas to change them from the "get on the air, quick" configuration from last spring into a "likely to stay operational all winter" configuration.
As it happens, that turned out to be the right decision.
Upshot
I'm running long, so I'll save details for later. But last night I was able to check into a 2m net for the first time in months. I'm using a set-up that can keep me on the air all winter, at least. There are a couple of tweaks I still want to make before there's snow on the ground, but none of them are critical, just things to make the setup nicer.
Also, I've made some changes to the 40m antenna and I should be able to get on the HF bands again with a temporary set-up this weekend, and I should have things settled into something I can run with all winter within the next week. The antenna looks better than ever to my antenna analyzer, and I'm hoping it gets some signal out. I expect to be putting a call out to some locals over 2m to see if I can arrange my first HF contact within the next few days. At worst, I'll fall back to making some 2m simplex contacts and start collecting grid squares. I may only have a J-Pole, but so far I've only got one square (CM99mb), so anything is a step up.
Thursday, November 1, 2012
Raising Money and Beautifying Public Libraries

Brad Schenck is an old friend of mine, and a great artist. He and I are both lovers of literature, and of places that bring literature to people, like public libraries. I spent my childhood ransacking any nearby library's collections of science fiction, fantasy, and science books. I would never have been able to read and learn so much if I'd had to track down and buy those books.
At one point, everything I had to read came from a Public Library Bookmobile that stopped in my neighborhood every week. That's how I first read George Orwell's 1984 and Animal Farm, as well as Richard Adam's Watership Down.
Even in the age of the internet, books hold a unique place. Libraries provide resources both for getting information to people, and for helping people learn what information they need to acquire knowledge they seek. And libraries mean a lot more than books these days. They are also an entrance to the information that is on the internet, helping people get information past the confusion of advertisements, unreliable web sites, and social media noise.
Brad's started an IndieGoGo campaign to produce promotional posters for public libraries--his own as well as those of contributors. And to raise funds for libraries. Plus, you can get copies of the magnificent posters for yourself.
Brad's Own Words
Have a look at what Brad says, then consider throwing in a few bucks. Or a few more.
A Larger View of the Posters
Thursday, October 11, 2012
Introducing ZBrush by Eric Keller
This is the book that Pixologic should have included with ZBrush. It explains ZBrush in a clear fashion with common pitfalls clearly pointed out and described. If I'd had this book from day 1, I'd have spent less time being confused and confounded by the interface and its way of working.
As it is, I'm still learning new things from this book. Plus, I'm getting the reassurance that those things I've sort of figured out on my own are correct.
Then, once I started to come to grips with some of the basics of object creation and editing, it became a game of "how do I do this simple task?" Obvious, simple operations in 3D modelling were possible, but performed in mysterious ways. The searches for information done against Pixologic's online documentation were frequently fruitless. But gradually I built up a repertoire of actions I could perform, and remember the processes for, to build models.
But some things remained a mystery. I have no idea how much time I spent watching videos, screaming at the screen "How did you do that?" as they blipped casually past a whole series of critical operations that I needed to learn how to do in a few milliseconds. Note to Pixologic: in tutorial videos use something that shows keypresses and mouse clicks on screen. At least then I can go back frame by frame and find out what sort of finger gymnastics went into the quick and spiffy operation that just flashed by.
The next stage was gathering confidence in what I could do, while trying to gradually expand the envelope on that. While trying to produce models to my prior concept, rather than just sitting down and seeing what happens. Here I had many pieces of work come to a halt because of some simple operation that I didn't know how to perform. How to cut a piece into multiple pieces? How to match colors? How to control dimensions tightly? And so on.
After a while in this phase, I started to get a sense of how ZBrush "thinks", and I started to learn more of the program ever faster. There were still lots of mysteries, including a lot of the buttons in the standard interface, but I was able to do most of the things that ZBrush was good at, and make some of the things that I'd bought ZBrush to model.
That's the point was at where I got Eric Keller's book. It might seem that I was past the point of needing an introductory-level book at that point. But I needed it in the worst way. A lot of the most basic elements of ZBrush that I needed to know, to go from sort of working my way through ZBrush to being really productive with it and using my time effectively was what I needed and what this book delivered. Two chapters in I had a handle on the entire standard interface, now I'm going through the rest of the book, learning different sections in detail.
When is a Button not a Button?
One of the really important things I learned was why a number of the "buttons" around the canvas don't seem to do anything. There are a number of buttons, they look just like the other buttons above and below them. The other buttons do something when you click on them. They turn on the wireframe, or make other parts you're not editing transparent, or whatever.
But these buttons show your click, but do nothing. Seemingly.
That's because they're not really buttons. They're something else.
It's UI, Jim, but not UI as We Know It
These "buttons" are like some throwback to the early days of the Atari ST or Amiga, when intrepid programmers ignored the Human Interface recommendations made by earlier pioneers and rolled their own visual interface components.
They work like this: You click on them, then drag off of them to perform some action.
There are a number of these scattered around ZBrush. That's how color picking works. The color selection tool, which Pixologic calls a "Color Picker" (which is why searches on how to pick a color in ZBrush will be frustrated), has this method of operation as a secondary function (secondary, at least from what it apparent.) Clicking in the Color Picker's central area, then dragging to the Canvas and releasing over some color there will match the color of the object on the Canvas or being edited above the Canvas. Holding Alt while doing this will select the displayed color (including shading) rather than the actual color of the object.
Clear as mud, eh?
Well, Eric Keller makes it clear. That and the other buttons that operate this way.
If you've got ZBrush, no matter what your experience level, I highly recommend this book. The info in it might be elsewhere, but it's not as clear, concise, or as well organized.
Pixologic should provide a copy of this book with every license they sell.
Tweet
As it is, I'm still learning new things from this book. Plus, I'm getting the reassurance that those things I've sort of figured out on my own are correct.
Then, once I started to come to grips with some of the basics of object creation and editing, it became a game of "how do I do this simple task?" Obvious, simple operations in 3D modelling were possible, but performed in mysterious ways. The searches for information done against Pixologic's online documentation were frequently fruitless. But gradually I built up a repertoire of actions I could perform, and remember the processes for, to build models.
But some things remained a mystery. I have no idea how much time I spent watching videos, screaming at the screen "How did you do that?" as they blipped casually past a whole series of critical operations that I needed to learn how to do in a few milliseconds. Note to Pixologic: in tutorial videos use something that shows keypresses and mouse clicks on screen. At least then I can go back frame by frame and find out what sort of finger gymnastics went into the quick and spiffy operation that just flashed by.
The next stage was gathering confidence in what I could do, while trying to gradually expand the envelope on that. While trying to produce models to my prior concept, rather than just sitting down and seeing what happens. Here I had many pieces of work come to a halt because of some simple operation that I didn't know how to perform. How to cut a piece into multiple pieces? How to match colors? How to control dimensions tightly? And so on.
After a while in this phase, I started to get a sense of how ZBrush "thinks", and I started to learn more of the program ever faster. There were still lots of mysteries, including a lot of the buttons in the standard interface, but I was able to do most of the things that ZBrush was good at, and make some of the things that I'd bought ZBrush to model.
That's the point was at where I got Eric Keller's book. It might seem that I was past the point of needing an introductory-level book at that point. But I needed it in the worst way. A lot of the most basic elements of ZBrush that I needed to know, to go from sort of working my way through ZBrush to being really productive with it and using my time effectively was what I needed and what this book delivered. Two chapters in I had a handle on the entire standard interface, now I'm going through the rest of the book, learning different sections in detail.
When is a Button not a Button?
One of the really important things I learned was why a number of the "buttons" around the canvas don't seem to do anything. There are a number of buttons, they look just like the other buttons above and below them. The other buttons do something when you click on them. They turn on the wireframe, or make other parts you're not editing transparent, or whatever.
But these buttons show your click, but do nothing. Seemingly.
That's because they're not really buttons. They're something else.
It's UI, Jim, but not UI as We Know It
These "buttons" are like some throwback to the early days of the Atari ST or Amiga, when intrepid programmers ignored the Human Interface recommendations made by earlier pioneers and rolled their own visual interface components.
They work like this: You click on them, then drag off of them to perform some action.
There are a number of these scattered around ZBrush. That's how color picking works. The color selection tool, which Pixologic calls a "Color Picker" (which is why searches on how to pick a color in ZBrush will be frustrated), has this method of operation as a secondary function (secondary, at least from what it apparent.) Clicking in the Color Picker's central area, then dragging to the Canvas and releasing over some color there will match the color of the object on the Canvas or being edited above the Canvas. Holding Alt while doing this will select the displayed color (including shading) rather than the actual color of the object.
Clear as mud, eh?
Well, Eric Keller makes it clear. That and the other buttons that operate this way.
If you've got ZBrush, no matter what your experience level, I highly recommend this book. The info in it might be elsewhere, but it's not as clear, concise, or as well organized.
Pixologic should provide a copy of this book with every license they sell.
Tuesday, September 25, 2012
Starting to "Get" ZBrush
It's taken a while to get here, but I figured that there had to be a "here" so I kept at it.
I think I'm finally at the point where I "get it" with ZBrush. I'm not just struggling with basics and wondering where my mesh went when I do something any more. Instead, I have a number of modelling skills well in hand, I can pretty well control my projects and know what's going on while I work, and I'm expanding what I can do without too much trouble.
Prior posts expressing some of my frustration when learning ZBrush:
Trying to Learn ZBrush, Hitting Lots of Landmines
ZBrush: Finding the Hidden Spotlight
Subtleties of ZBrush
One of the things it takes time to learn are subtle little indications in the interface that let you know what's going on if you already know them and are sufficiently sensitive to notice them. It takes time to get to the point where they work for you, even when the docs tell you they are there (which they often don't, or at least not in the places you'll typically end up when searching at pixologic.com for information on what you're doing.)
After a while you notice little things, though. Like a thin white line around the border of the canvas when you're in Edit mode. So you begin to learn (in about the same way as an animal hit with a cattle prod when it does something "wrong") that you have to turn on Edit before doing something to a mesh if you don't see the border.
The same goes for subtle changes in the pointer. A very small + changes to a minus, subtle changes in shading and color occur, and so on. After a while it becomes obvious, and knowing that it's there helps.
Where is My Mesh?
There are some big things that are far too subtle that it takes too much trial and error to learn.
One of them is knowing what's going to happen to your mesh and when. There are operations that take your current mesh, or other meshes you presently have in work but aren't doing something to right now, and remove them from the work area. They go poof.
Sometimes they're still available, in the tool menu. Other times, it appears, they go poof, because they were in some transitional state and you should have saved them. Until you know what's going to happen when, it becomes a matter of saving your work with practically every brush stroke, because you never know when it's just going to disappear and no Undo will bring it back.
Because sometimes it warns you that you can't undo, other times it doesn't. When it doesn't warn you, it's usually just putting the objects in the tool menu. But if you can't distinguish them from other objects there (you haven't changed the name, a small picture doesn't distinguish them), or you just plain don't know to go looking there, you're going to end up very frustrated.
There's Hope
I'm here to tell you that perseverance can pay off. After a while, you start to get a feel for what's going on. The best way is to pick some part of ZBrush and try to learn to use it, even if it's not directly tied to the type of modelling you're most interested in. For me it was ZSpheres. They're most useful for soft-body modelling, like most of ZBrush, and most of what I hope to use ZBrush for is hard body modelling (combined with soft objects, later, which is why I'm using ZBrush and not Lightwave or something, but I need hard or hardish objects at the core), but learning to use them taught me a lot of things about ZBrush and how it "thinks".
For me, the next breakthrough came with the new solid modelling features in ZBrush version 4R4. I saw what looked like symbols for additive, subtractive, and intersection geometry in the Subtool palette of ZBrush 4R3. But I couldn't find docs for them anywhere, with a wide variety of searches on the pixologic site, or by reading the docs for the Subtool palette straight through. They were there, but not documented as far as I could tell.
Finally, I saw a video on the new ZBrush that showed them being used for solid geometry operations with Dynamesh, and now I'm able to do the solid geometry stuff I need to do to set up properly proportioned hard shape objects as starting points for the work I want to do.
Now I'm trying to learn the new Transform tool. It looks like it solves some problems I was having before, as well.
Tweet
I think I'm finally at the point where I "get it" with ZBrush. I'm not just struggling with basics and wondering where my mesh went when I do something any more. Instead, I have a number of modelling skills well in hand, I can pretty well control my projects and know what's going on while I work, and I'm expanding what I can do without too much trouble.
Prior posts expressing some of my frustration when learning ZBrush:
Trying to Learn ZBrush, Hitting Lots of Landmines
ZBrush: Finding the Hidden Spotlight
Subtleties of ZBrush
One of the things it takes time to learn are subtle little indications in the interface that let you know what's going on if you already know them and are sufficiently sensitive to notice them. It takes time to get to the point where they work for you, even when the docs tell you they are there (which they often don't, or at least not in the places you'll typically end up when searching at pixologic.com for information on what you're doing.)
After a while you notice little things, though. Like a thin white line around the border of the canvas when you're in Edit mode. So you begin to learn (in about the same way as an animal hit with a cattle prod when it does something "wrong") that you have to turn on Edit before doing something to a mesh if you don't see the border.
The same goes for subtle changes in the pointer. A very small + changes to a minus, subtle changes in shading and color occur, and so on. After a while it becomes obvious, and knowing that it's there helps.
Where is My Mesh?
There are some big things that are far too subtle that it takes too much trial and error to learn.
One of them is knowing what's going to happen to your mesh and when. There are operations that take your current mesh, or other meshes you presently have in work but aren't doing something to right now, and remove them from the work area. They go poof.
Sometimes they're still available, in the tool menu. Other times, it appears, they go poof, because they were in some transitional state and you should have saved them. Until you know what's going to happen when, it becomes a matter of saving your work with practically every brush stroke, because you never know when it's just going to disappear and no Undo will bring it back.
Because sometimes it warns you that you can't undo, other times it doesn't. When it doesn't warn you, it's usually just putting the objects in the tool menu. But if you can't distinguish them from other objects there (you haven't changed the name, a small picture doesn't distinguish them), or you just plain don't know to go looking there, you're going to end up very frustrated.
There's Hope
I'm here to tell you that perseverance can pay off. After a while, you start to get a feel for what's going on. The best way is to pick some part of ZBrush and try to learn to use it, even if it's not directly tied to the type of modelling you're most interested in. For me it was ZSpheres. They're most useful for soft-body modelling, like most of ZBrush, and most of what I hope to use ZBrush for is hard body modelling (combined with soft objects, later, which is why I'm using ZBrush and not Lightwave or something, but I need hard or hardish objects at the core), but learning to use them taught me a lot of things about ZBrush and how it "thinks".
For me, the next breakthrough came with the new solid modelling features in ZBrush version 4R4. I saw what looked like symbols for additive, subtractive, and intersection geometry in the Subtool palette of ZBrush 4R3. But I couldn't find docs for them anywhere, with a wide variety of searches on the pixologic site, or by reading the docs for the Subtool palette straight through. They were there, but not documented as far as I could tell.
Finally, I saw a video on the new ZBrush that showed them being used for solid geometry operations with Dynamesh, and now I'm able to do the solid geometry stuff I need to do to set up properly proportioned hard shape objects as starting points for the work I want to do.
Now I'm trying to learn the new Transform tool. It looks like it solves some problems I was having before, as well.
Wednesday, August 15, 2012
Parallax Propeller + COSMAC 1802: the Saga Continues...
Monday morning I posted about hooking up a Parallax Propeller QuickStart Board to an 1802 Microprocessor. My hopes are to make the Propeller behave as a RAM for the 1802, primarily to be able to display a bitmap of that segment of memory as video. The idea is to make it compatible software-wise with the 1861 Pixie chip (the 1802's native video adapter), which is presently unavailable.
Since then I've spent more time on this project. A lot of that time got tied up in side issues related to tying a Propeller to an 1802, as well as some time spent dealing with the test equipment I want to use to keep an eye on the circuit and see what it's up to.
First, here's how it looks tonight:

Clocking the 1802
One thing I put a fair bit of time into (too much, that is) is using the Propeller to control the clock of the 1802. There are a few reasons I think this would be nice:
The clock can be varied in software depending on the user's desire and the individual 1802's capabilities.
At some later point, the Prop can have a greater degree of control over the 1802's operation in general. With the ability to stop it, start it, and even single-step it.
On my first stab at this a couple of days ago, I just threw a repeat loop into the Prop's code to pulse an output line. I didn't have very good control of the rate, I didn't have the constants set right, and it didn't work right off the bat so I decided to drop it and just use another clock.
Let's Try a Timer, Because...That's What They're For
This time I took time to read up on using the counter/timers on the Prop. Each cog has one, and I played around with it for a while before feeding its output to the 1802's clock input. After a while I was able to get the results I wanted, and was able to fine-tune that bit of the code.
Then I hooked it up to the 1802 with a frequency of 1.25MHz...well, I should say I hooked it up to a 4049, passed it through a pair of inverters to square it up a bit and buffer it. Then I passed the signal to the 1802. Which ran just fine.
At this point I still had the data bus of the 1802 hard wired to a $C4, which is a NOP instruction for the 1802. That way I can watch LEDs on the address bus and see that the chip is running through its address space. The pulse rate of the high order LED gives me an immediate idea of how fast the 1802 is getting clocked, too.
Then I started playing with the constant for the counter's frequency to see what speeds this 1802 chip would be good at with a 5V Vdd and 3.3V Vcc (the 1802 can use split supply voltages for its core and I/O. Not bad for 1976, eh?)
Overclocking! 4.8MHz Baby! Yeah, uh, Megahertz.
This one ran up to 3.6MHz without a problem. I didn't run it up until it stopped, the other day I think I had it running at about 4MHz when I was playing with the repeat loop. Above 3.6MHz it seemed to start running hot, so I stepped it back down again.
Above 3.6MHz it was noticeably warm after a while, and seemed to be getting warmer. Between 3.2 and 3.6MHz it was warm, but maintaining its temperature just fine. At 3.2MHz it was solid as a rock and the heat was barely detectable to a calibrated fingertip. If I can get it to run at this speed reliably with the Propeller providing video then popular Elf software like Tiny Basic, Forth, CHIP-8, and the programs written in them are going to rock on this system.
Edit: I've run it up to 4.807MHz now, and it didn't seem all that hot this time. It really shouldn't have any problem with heat at these voltages, it normally runs at 5MHz at higher voltages. And now it doesn't seem to have a problem. When I tried to take it over 4.8MHz it ran sometimes but not others, or hung occasionally. So this is the limit for stable operation at this voltage for this chip (an RCA CDP1802CE.)
Getting Data to the 1802
OK, so back to the problem of making the Propeller look like a RAM. Frankly, when I did my first look at the timing involved, I figured this would be completely trivial to implement. Push in data and address bus wires, connect up /MRD (memory read signal) from the 1802 to the Prop, crank a little Spin code, and I'd have the Prop acting like a ROM.
Put in /MWR and a little more code, BAM, the Prop is a RAM.
Hook up TPA to catch the high order address byte, tweak the code, and the Prop is ready to map more than 256 bytes. All I'd have to do is add the video code then figure out how much Prop RAM was available then expand to fit.
Well, it wasn't that easy. If it had been, I'd be playing with the video now.
I tried to leap forward at first. I plugged in the address and data bus wires, plugged in /MRD, and added some code to my clock driver program. It had a 256 byte array that it set up and initialized to $C4 in every position (NOP again, but this time it would be a soft NOP rather than a hard-wired one.) Then I wrote the program to wait for the Propeller I/O line I'd selected for /MRD to go low. Once that happened, it would get the address off the address bus, look up the appropriate element in the RAM array in memory, and put it out on the data bus until /MRD came back up again.
Easy-peasy, right?
Well, it didn't work.

When I was doing my timing calcs and looking at the 1802's leisurely timing--it doesn't mind waiting just under a millisecond for its memory to come back when it's running at its normal speed (about 1.78MHz.) Hey, an 80MHz processor could be running a version of interpreted BASIC written in LISP and keep up with that, right?
I guess not. At least not the way I did it.
I clocked the 1802 at 1.25MHz for the test. This is an easy, slow speed that the Propeller can generate easily. I figured it'd work, I'd push up the frequency to 2.5MHz, check timings on the scope, and discover that I couldn't make the 1802 go too fast for the Prop.
Unfortunately the trace above shows different.
I Can Do Lots of Things Wrong, All at Once
I'm sure this is the result of something I'm doing improperly. I can think of several possibilities already:
I'm using WAITPNE and WAITPEQ to respond to the pin change. Perhaps, because they do some power-saving activity on the cog on which they're invoked, they just aren't meant to respond this quickly. Maybe if I just go to an active polling loop I'll be OK?
I'm using SPIN, an interpreted language. Perhaps I need to just insert a bit of Propeller assembly to tighten up the timing?
Perhaps there's some option or configuration thing I've not done?
Maybe this cog has to do something active with the timer/counter (I'm using the same cog as the one that's running the 1802's clock.) Perhaps if I move the RAM functions to another cog I'll be fine?
Those are just what comes off the top of my head. I'm far from being an expert on the Propeller, and I haven't picked up the books on it yet, just the free manual and datasheet downloads. But things like this create an opportunity to learn.
I also had a few other things I needed to figure out on the way, minor little things like the order you mention the output pins in when writing your code statements (I was getting $23 out instead of $C4 initially. Yeah, oops.) That and the whole thing is a rather fragile lash-up right now. I'm going to go to solder as soon as I get the RAM moving data to and from the 1802. But not before, because I hate rework, and if I don't test it on a breadboard first, there'll be rework. And this lets me do a few things like change which lines I'm using for address and data easily. I moved the data lines to P16..23 so that I can watch the data on the QuickStart board's LEDs, like a little front panel. Before, I had the address lines here, but I've already got LEDs on the breadboard showing me the address line states. So a quick change of a few constants in software, and I get a data display with no re-soldering.
Slightly Off-Task Tasks
I also took some time out to search out a line cord for the new frequency counter I got at the Ham Radio Club night before last that didn't have one (found one, after searching high and low. It's an oddball, not an HP cord.) And I checked out the two portable NonLinear Systems oscilloscopes I bought, too (one works, one doesn't, as expected.) The frequency counter was very nice to have while I was figuring out how to use the Prop's counter/timer as a numerically controlled oscillator, so the time was well spent even if it did eat into my Propeller-as-RAM time.
Looking Forward to Round 3
I'll be back at this before the end of the week (I'd like to tomorrow, but it'll be a busy day so I may not be able to.) If you have any suggestions or salient experience, your comments or emails would be much appreciated!
Edit:
I've had a look at the Propeller docs. It looks like the timing of hub instructions is my problem. I may just insert WAIT states for the 1802 and see what that does.
Tweet
Since then I've spent more time on this project. A lot of that time got tied up in side issues related to tying a Propeller to an 1802, as well as some time spent dealing with the test equipment I want to use to keep an eye on the circuit and see what it's up to.
First, here's how it looks tonight:

The second stage of the Propeller/1802 mashup circuit. Click for full size.
Clocking the 1802
One thing I put a fair bit of time into (too much, that is) is using the Propeller to control the clock of the 1802. There are a few reasons I think this would be nice:
The clock can be varied in software depending on the user's desire and the individual 1802's capabilities.
At some later point, the Prop can have a greater degree of control over the 1802's operation in general. With the ability to stop it, start it, and even single-step it.
On my first stab at this a couple of days ago, I just threw a repeat loop into the Prop's code to pulse an output line. I didn't have very good control of the rate, I didn't have the constants set right, and it didn't work right off the bat so I decided to drop it and just use another clock.
Let's Try a Timer, Because...That's What They're For
This time I took time to read up on using the counter/timers on the Prop. Each cog has one, and I played around with it for a while before feeding its output to the 1802's clock input. After a while I was able to get the results I wanted, and was able to fine-tune that bit of the code.
Then I hooked it up to the 1802 with a frequency of 1.25MHz...well, I should say I hooked it up to a 4049, passed it through a pair of inverters to square it up a bit and buffer it. Then I passed the signal to the 1802. Which ran just fine.
At this point I still had the data bus of the 1802 hard wired to a $C4, which is a NOP instruction for the 1802. That way I can watch LEDs on the address bus and see that the chip is running through its address space. The pulse rate of the high order LED gives me an immediate idea of how fast the 1802 is getting clocked, too.
Then I started playing with the constant for the counter's frequency to see what speeds this 1802 chip would be good at with a 5V Vdd and 3.3V Vcc (the 1802 can use split supply voltages for its core and I/O. Not bad for 1976, eh?)
Overclocking! 4.8MHz Baby! Yeah, uh, Megahertz.
This one ran up to 3.6MHz without a problem. I didn't run it up until it stopped, the other day I think I had it running at about 4MHz when I was playing with the repeat loop. Above 3.6MHz it seemed to start running hot, so I stepped it back down again.
Above 3.6MHz it was noticeably warm after a while, and seemed to be getting warmer. Between 3.2 and 3.6MHz it was warm, but maintaining its temperature just fine. At 3.2MHz it was solid as a rock and the heat was barely detectable to a calibrated fingertip. If I can get it to run at this speed reliably with the Propeller providing video then popular Elf software like Tiny Basic, Forth, CHIP-8, and the programs written in them are going to rock on this system.
Edit: I've run it up to 4.807MHz now, and it didn't seem all that hot this time. It really shouldn't have any problem with heat at these voltages, it normally runs at 5MHz at higher voltages. And now it doesn't seem to have a problem. When I tried to take it over 4.8MHz it ran sometimes but not others, or hung occasionally. So this is the limit for stable operation at this voltage for this chip (an RCA CDP1802CE.)
Getting Data to the 1802
OK, so back to the problem of making the Propeller look like a RAM. Frankly, when I did my first look at the timing involved, I figured this would be completely trivial to implement. Push in data and address bus wires, connect up /MRD (memory read signal) from the 1802 to the Prop, crank a little Spin code, and I'd have the Prop acting like a ROM.
Put in /MWR and a little more code, BAM, the Prop is a RAM.
Hook up TPA to catch the high order address byte, tweak the code, and the Prop is ready to map more than 256 bytes. All I'd have to do is add the video code then figure out how much Prop RAM was available then expand to fit.
Well, it wasn't that easy. If it had been, I'd be playing with the video now.
I tried to leap forward at first. I plugged in the address and data bus wires, plugged in /MRD, and added some code to my clock driver program. It had a 256 byte array that it set up and initialized to $C4 in every position (NOP again, but this time it would be a soft NOP rather than a hard-wired one.) Then I wrote the program to wait for the Propeller I/O line I'd selected for /MRD to go low. Once that happened, it would get the address off the address bus, look up the appropriate element in the RAM array in memory, and put it out on the data bus until /MRD came back up again.
Easy-peasy, right?
Well, it didn't work.

Top: Data from Propellor pretending to be a memory. Bottom: Memory Read Request. Result: Memory Too Slow! (Click for full size.)
When I was doing my timing calcs and looking at the 1802's leisurely timing--it doesn't mind waiting just under a millisecond for its memory to come back when it's running at its normal speed (about 1.78MHz.) Hey, an 80MHz processor could be running a version of interpreted BASIC written in LISP and keep up with that, right?
I guess not. At least not the way I did it.
I clocked the 1802 at 1.25MHz for the test. This is an easy, slow speed that the Propeller can generate easily. I figured it'd work, I'd push up the frequency to 2.5MHz, check timings on the scope, and discover that I couldn't make the 1802 go too fast for the Prop.
Unfortunately the trace above shows different.
I Can Do Lots of Things Wrong, All at Once
I'm sure this is the result of something I'm doing improperly. I can think of several possibilities already:
I'm using WAITPNE and WAITPEQ to respond to the pin change. Perhaps, because they do some power-saving activity on the cog on which they're invoked, they just aren't meant to respond this quickly. Maybe if I just go to an active polling loop I'll be OK?
I'm using SPIN, an interpreted language. Perhaps I need to just insert a bit of Propeller assembly to tighten up the timing?
Perhaps there's some option or configuration thing I've not done?
Maybe this cog has to do something active with the timer/counter (I'm using the same cog as the one that's running the 1802's clock.) Perhaps if I move the RAM functions to another cog I'll be fine?
Those are just what comes off the top of my head. I'm far from being an expert on the Propeller, and I haven't picked up the books on it yet, just the free manual and datasheet downloads. But things like this create an opportunity to learn.
I also had a few other things I needed to figure out on the way, minor little things like the order you mention the output pins in when writing your code statements (I was getting $23 out instead of $C4 initially. Yeah, oops.) That and the whole thing is a rather fragile lash-up right now. I'm going to go to solder as soon as I get the RAM moving data to and from the 1802. But not before, because I hate rework, and if I don't test it on a breadboard first, there'll be rework. And this lets me do a few things like change which lines I'm using for address and data easily. I moved the data lines to P16..23 so that I can watch the data on the QuickStart board's LEDs, like a little front panel. Before, I had the address lines here, but I've already got LEDs on the breadboard showing me the address line states. So a quick change of a few constants in software, and I get a data display with no re-soldering.
Slightly Off-Task Tasks
I also took some time out to search out a line cord for the new frequency counter I got at the Ham Radio Club night before last that didn't have one (found one, after searching high and low. It's an oddball, not an HP cord.) And I checked out the two portable NonLinear Systems oscilloscopes I bought, too (one works, one doesn't, as expected.) The frequency counter was very nice to have while I was figuring out how to use the Prop's counter/timer as a numerically controlled oscillator, so the time was well spent even if it did eat into my Propeller-as-RAM time.
Looking Forward to Round 3
I'll be back at this before the end of the week (I'd like to tomorrow, but it'll be a busy day so I may not be able to.) If you have any suggestions or salient experience, your comments or emails would be much appreciated!
Edit:
I've had a look at the Propeller docs. It looks like the timing of hub instructions is my problem. I may just insert WAIT states for the 1802 and see what that does.
Monday, August 13, 2012
Parallax Propeller + Cosmac Elf = ?
I've started working on one implementation of an idea I've had for a while...
There's this neat old 70's computer system called the COSMAC Elf. It's like a lot of the microprocessor trainer systems of the time, but it's got some unique abilities that make it a bit more interesting to build, and expand on, than some of the others.
Video output being one of the biggies.
Step One
Before I go further, here's a look at an early step in implementing my idea:

Here I've gotten to the point of getting clock and two levels of power from the Quickstart board to the 1802 CPU. First, I had a crystal oscillator circuit providing a clock to the 1802. Only 5V power came from the Vin on the Quickstart board.
Then, I split the voltages. The crystal oscillator, the inverter for the clock signal, and Vdd for the 1802 were split off with 5V power, and the rest of the circuit was put on the 3.3V power from the Quickstart board. At this point, I'd been running the 1802 at 1MHz, slow enough I could easily watch the LEDs on the address lines changing as it ran.
Then I moved up to a 2MHz oscillator. The 1802 was still good with that, with its Vdd at 5V and Vcc at 3.3V.
Then I tried to get fancy.
I took an output off the Prop and tried to use a repeat-wait structure to clock the 1802. It worked, up to a point. But I got to where I was unsure of my actual frequency, and the 1802 stopped running at a slower speed than I expected (I thought.) In fact, I was getting too clever and messing myself up. Looking back, I was probably somewhere above 4MHz when the 1802 refused to run any more!
After a while I realized that, and just decided to put the crystal oscillator back in.
Then I took another look, and decided that a 5MHz XI off of the QS board could be used as a clock base. A 2.5MHz clock would be fine (actually, anything from 1.76MHz on up would be fine.) Most Elf computers run somewhere around 1.76 to 1.79MHz to accommodate the clock for the video IC they use. Getting at least that speed is pretty much a must for me to feel like this project is going where I want it to. But getting a faster clock would be even better, as we'll see.
First I dropped in a CMOS part--a 4013--to act as a divider for the 5MHz clock to drop it to 2.5MHz for the 1802. I forgot that at 5V the 4013 only really works up to 4MHz on its input. So that turned out to be a waste of time.
Then I dug out a small supply of 74AC74 ICs, which work fine at well 5MHz and above. It worked fine, dividing the 5MHz down to 2.5MHz. In fact, just to be a little conservative, I used both flip flops to divide the clock down to 1.25MHz, then ran that to the inverter I'd had the crystal oscillator going to.
That worked, so I tried the 2.5MHz output. At first the 1802 wouldn't run, I pushed the Reset switch, and noticed the clock took off when I bumped the Ground wire. Once the ground wire was back in its place securely, the 1802 ran just fine at 2.5MHz.
Then I bypassed the 4049 inverter, the signal from the 74AC74 is plenty strong enough to drive the 1802 by itself.
That was step one. Time for a break before step two.
The Plan
So why hook up an old CPU to a fast modern CPU like the Propeller?
Because of a problem with getting chips for the old Elf computer.
People still like building the old Elf computer. It's a complete computer system that can be built in an afternoon if you've got all the parts and tools at hand (I built my first in about four hours.) It's a computer that pretty well exposes all of its parts to examination, so it's easy to learn how it works, and to understand all the bits of the system.
The video IC, called the CDP1861 Pixie chip, is one of the simplest video ICs ever made. It's basically some timing and control signals wrapped around a shift register that works with the DMA mode of the 1802 to produce a really nifty one chip video interface.
It's not exactly workstation graphics, being monochrome with resolutions ranging from 64 x 32 to 64 x 128. But it does the job. People program the system using this quality of video. And you thought the Vic-20 was low-res!
Well, the problem is that in the past few years Pixie chips have pretty well become Unobtanium (a term that goes way back before the movie Avatar, by the way.) In other words, you can't get 'em. There have been a couple of less than optimal replacements (from the perspective of new ELf builders who have to make them up themselves rather than just buy one pre-made.)
I'm trying to come up with something slightly less suboptimal. And solve a problem that the Pixie chip has.
The Third Cycle...of DOOM
The Pixie's problem is that its timing only deals well with 1802 programs that use instructions that take two instruction cycles or less to complete. There are two instructions, Long Branch and Long Skip, that take 3 cycles. They create jitter in the video by throwing its timing off.
Since the Elf's video is basically just a straight bitmap of a chunk of memory on the screen (the lowest resolution, 64 x 32, is a map of the Elf's base 256 Bytes of memory straight to video.) So, if some other circuit could just read a relatively new, fast RAM in the time when the 1802 isn't reading it, then the other circuit could just pull the data then run it to video, and leave the Elf none the wiser.
That way all the Elf has to do is manipulate the data in the section of memory on the screen. And a 3-cycle instruction won't cause any problems. And the 1802 gets about 40% of its time back, during which it would otherwise have been doing DMA of that memory data to the Pixie chip's shift register.
So:
Video that doesn't need the unobtainable Pixie,
No 3-cycle instruction timing issues,
No loss of 40% processing time to video DMA, and
Able to run at higher clock speeds.
Sounds like a winner, right?
Implementation Details
Next was how to actually implement it. I've looked at several ways, with various advantages and disadvantages.
Using faster RAMs was a first building block I looked at. For example, a static RAM pulled out of a 486 motherboard's cache RAM would be more than fast enough. Both 20nS and 15nS are readily available. Plenty fast to grab a byte once every 1802 instruction cycle for the external video system.
Then, came my initial thought, maybe use an Atmel AVR microcontroller to do the grabbing, put the data into its internal RAM, use that as a frame buffer for some bit-bashed monochrome video. No big deal.
No big deal if you've already got the ability to program AVRs or are prepared to supply them preprogrammed. Still, not a bad solution. Just not likely to be popular as I'd like because of the hurdle of programming the chip. The idea wasn't just considered with an AVR, any of a number of uC families could work. But they had the same problem.
Another idea was to build a circuit from random logic. Not as appealing, with my schedule, but if I could be the pioneer on this and put something together then anyone could order the parts and start wiring. It would probably add about 1/3 to double the work to assembling an Elf computer. Again, not perfect, but possible.
Then I thought about taking the AVR idea and putting in a Propeller board. The advantage here is that, rather than getting a bare microcontroller and having to get the infrastructure to program it to do the One Job that that user may ever use it for, the board itself is all the infrastructure needed. (Yes, Arduino occurred to me, too.)
A download on a computer, a USB cable of the correct type (I'm using a cell phone charging cable), and you're in business. Even if the user never does anything with a Propeller again (what an unfortunate thought!) then they wouldn't be out anything but a bit of their time to get the "part" they need programmed for the job.
And it's less time than hand-wiring random logic on a perf board, no matter how you look at it.
It Just Keeps Getting Better
So, I started with the idea that the speedy (80MHz) Propeller would have no problem sneaking in and reading bytes out of the Elf's RAM during those long, lazy ~200nS slack periods. Then it could put the data into an internal frame buffer.
And, what hey!, the Propeller has built-in video. I could make it so that the final Propellor program puts out Composite baseband, Composite broadcast, and VGA all at once. What a deal! The user doesn't even have to pick between different programs based on what sort of video they want right now.
Then came the next idea. Replace a chunk of the Elf's RAM entirely. Let the Propeller be a chunk of RAM.
It can't replace all the possible RAM of an Elf in its present version. It's only got 32K of RAM in it, and it needs some of that for any applications it's running.
But, it can replace a chunk of the Elf's RAM. Enough for Pixie-quality video. And with some lines used for control, the video resolution and frame buffer location within that memory can be changed. I don't know yet, but it seems like mapping somewhere from 2K to 4K wouldn't be that difficult.
Pixie Compatibility
At first, I'm going to concentrate on a limited memory map, and on replicating the basic Pixie mode of 64 across by 32 high. In spite of the fact that there won't be any actual DMA transfer needed, it should be able to display video from the basic Pixie video programs like the iconic Starship Enterprise video from 1977 without modification. They'll just run faster as a result of no DMA overhead. I think.
Then looking at the exact details of how an expanded Elf uses the other modes (if it does, I've never done so myself) will let me look at expanding the Propeller's memory map area and responding to the Elf's control to do that.
So, if I can do what the Pixie does without requiring DMA, I'm already getting a system that's about 40% faster even if I don't move up the clock speed from ~1.79MHz. (The 1802 was the original overclocker's chip, way back in the 70's, but that's another story.) If I can increase the clock speed even more, with no effect on the video (since a hard-clocked Pixie chip isn't there any more), then I've got a system that'll run such things as Chip-8 and Tiny Basic that much faster than an original Elf with a Pixie.
If the 2.5MHz setup turns out to work (I see no obstacles at present, but that just means I haven't run into them yet), then I'm getting a system that should run about 2.3x faster than the stock Elf. It'll still be no speed demon (that's not the point), but it'll be nicer to use.
Next Steps, Baby Steps
I'm going to write a program for the Prop to make it pretend to be a RAM for the 1802. It will be a simple 256 byte memory. That avoids the multiplexed signals for the address. It'll (hopefully) receive and store data bytes from the 1802, and deliver data from its store on request.
The first pass is going to be really, really simple. I'm going to set up an array, put in a short program to blink an LED on the 1802's 'Q' output, and set it up to respond to the 1802's memory read requests. No writes required. If that works, then I'll add write capability and put in a program to test that (again using Q as an output.)
If that works, I'll proceed to give the 1802 some more sophisticated output and input capability and see where it goes from there. But best not to plan in too detailed a fashion too far ahead until the immediate problems are solved.
Tweet
There's this neat old 70's computer system called the COSMAC Elf. It's like a lot of the microprocessor trainer systems of the time, but it's got some unique abilities that make it a bit more interesting to build, and expand on, than some of the others.
Video output being one of the biggies.
Step One
Before I go further, here's a look at an early step in implementing my idea:

A first step: Power and Clock from the QS Board to the 1802. (Click for bigger image.)
Here I've gotten to the point of getting clock and two levels of power from the Quickstart board to the 1802 CPU. First, I had a crystal oscillator circuit providing a clock to the 1802. Only 5V power came from the Vin on the Quickstart board.
Then, I split the voltages. The crystal oscillator, the inverter for the clock signal, and Vdd for the 1802 were split off with 5V power, and the rest of the circuit was put on the 3.3V power from the Quickstart board. At this point, I'd been running the 1802 at 1MHz, slow enough I could easily watch the LEDs on the address lines changing as it ran.
Then I moved up to a 2MHz oscillator. The 1802 was still good with that, with its Vdd at 5V and Vcc at 3.3V.
Then I tried to get fancy.
I took an output off the Prop and tried to use a repeat-wait structure to clock the 1802. It worked, up to a point. But I got to where I was unsure of my actual frequency, and the 1802 stopped running at a slower speed than I expected (I thought.) In fact, I was getting too clever and messing myself up. Looking back, I was probably somewhere above 4MHz when the 1802 refused to run any more!
After a while I realized that, and just decided to put the crystal oscillator back in.
Then I took another look, and decided that a 5MHz XI off of the QS board could be used as a clock base. A 2.5MHz clock would be fine (actually, anything from 1.76MHz on up would be fine.) Most Elf computers run somewhere around 1.76 to 1.79MHz to accommodate the clock for the video IC they use. Getting at least that speed is pretty much a must for me to feel like this project is going where I want it to. But getting a faster clock would be even better, as we'll see.
First I dropped in a CMOS part--a 4013--to act as a divider for the 5MHz clock to drop it to 2.5MHz for the 1802. I forgot that at 5V the 4013 only really works up to 4MHz on its input. So that turned out to be a waste of time.
Then I dug out a small supply of 74AC74 ICs, which work fine at well 5MHz and above. It worked fine, dividing the 5MHz down to 2.5MHz. In fact, just to be a little conservative, I used both flip flops to divide the clock down to 1.25MHz, then ran that to the inverter I'd had the crystal oscillator going to.
That worked, so I tried the 2.5MHz output. At first the 1802 wouldn't run, I pushed the Reset switch, and noticed the clock took off when I bumped the Ground wire. Once the ground wire was back in its place securely, the 1802 ran just fine at 2.5MHz.
Then I bypassed the 4049 inverter, the signal from the 74AC74 is plenty strong enough to drive the 1802 by itself.
That was step one. Time for a break before step two.
The Plan
So why hook up an old CPU to a fast modern CPU like the Propeller?
Because of a problem with getting chips for the old Elf computer.
People still like building the old Elf computer. It's a complete computer system that can be built in an afternoon if you've got all the parts and tools at hand (I built my first in about four hours.) It's a computer that pretty well exposes all of its parts to examination, so it's easy to learn how it works, and to understand all the bits of the system.
The video IC, called the CDP1861 Pixie chip, is one of the simplest video ICs ever made. It's basically some timing and control signals wrapped around a shift register that works with the DMA mode of the 1802 to produce a really nifty one chip video interface.
It's not exactly workstation graphics, being monochrome with resolutions ranging from 64 x 32 to 64 x 128. But it does the job. People program the system using this quality of video. And you thought the Vic-20 was low-res!
Well, the problem is that in the past few years Pixie chips have pretty well become Unobtanium (a term that goes way back before the movie Avatar, by the way.) In other words, you can't get 'em. There have been a couple of less than optimal replacements (from the perspective of new ELf builders who have to make them up themselves rather than just buy one pre-made.)
I'm trying to come up with something slightly less suboptimal. And solve a problem that the Pixie chip has.
The Third Cycle...of DOOM
The Pixie's problem is that its timing only deals well with 1802 programs that use instructions that take two instruction cycles or less to complete. There are two instructions, Long Branch and Long Skip, that take 3 cycles. They create jitter in the video by throwing its timing off.
Since the Elf's video is basically just a straight bitmap of a chunk of memory on the screen (the lowest resolution, 64 x 32, is a map of the Elf's base 256 Bytes of memory straight to video.) So, if some other circuit could just read a relatively new, fast RAM in the time when the 1802 isn't reading it, then the other circuit could just pull the data then run it to video, and leave the Elf none the wiser.
That way all the Elf has to do is manipulate the data in the section of memory on the screen. And a 3-cycle instruction won't cause any problems. And the 1802 gets about 40% of its time back, during which it would otherwise have been doing DMA of that memory data to the Pixie chip's shift register.
So:
Video that doesn't need the unobtainable Pixie,
No 3-cycle instruction timing issues,
No loss of 40% processing time to video DMA, and
Able to run at higher clock speeds.
Sounds like a winner, right?
Implementation Details
Next was how to actually implement it. I've looked at several ways, with various advantages and disadvantages.
Using faster RAMs was a first building block I looked at. For example, a static RAM pulled out of a 486 motherboard's cache RAM would be more than fast enough. Both 20nS and 15nS are readily available. Plenty fast to grab a byte once every 1802 instruction cycle for the external video system.
Then, came my initial thought, maybe use an Atmel AVR microcontroller to do the grabbing, put the data into its internal RAM, use that as a frame buffer for some bit-bashed monochrome video. No big deal.
No big deal if you've already got the ability to program AVRs or are prepared to supply them preprogrammed. Still, not a bad solution. Just not likely to be popular as I'd like because of the hurdle of programming the chip. The idea wasn't just considered with an AVR, any of a number of uC families could work. But they had the same problem.
Another idea was to build a circuit from random logic. Not as appealing, with my schedule, but if I could be the pioneer on this and put something together then anyone could order the parts and start wiring. It would probably add about 1/3 to double the work to assembling an Elf computer. Again, not perfect, but possible.
Then I thought about taking the AVR idea and putting in a Propeller board. The advantage here is that, rather than getting a bare microcontroller and having to get the infrastructure to program it to do the One Job that that user may ever use it for, the board itself is all the infrastructure needed. (Yes, Arduino occurred to me, too.)
A download on a computer, a USB cable of the correct type (I'm using a cell phone charging cable), and you're in business. Even if the user never does anything with a Propeller again (what an unfortunate thought!) then they wouldn't be out anything but a bit of their time to get the "part" they need programmed for the job.
And it's less time than hand-wiring random logic on a perf board, no matter how you look at it.
It Just Keeps Getting Better
So, I started with the idea that the speedy (80MHz) Propeller would have no problem sneaking in and reading bytes out of the Elf's RAM during those long, lazy ~200nS slack periods. Then it could put the data into an internal frame buffer.
And, what hey!, the Propeller has built-in video. I could make it so that the final Propellor program puts out Composite baseband, Composite broadcast, and VGA all at once. What a deal! The user doesn't even have to pick between different programs based on what sort of video they want right now.
Then came the next idea. Replace a chunk of the Elf's RAM entirely. Let the Propeller be a chunk of RAM.
It can't replace all the possible RAM of an Elf in its present version. It's only got 32K of RAM in it, and it needs some of that for any applications it's running.
But, it can replace a chunk of the Elf's RAM. Enough for Pixie-quality video. And with some lines used for control, the video resolution and frame buffer location within that memory can be changed. I don't know yet, but it seems like mapping somewhere from 2K to 4K wouldn't be that difficult.
Pixie Compatibility
At first, I'm going to concentrate on a limited memory map, and on replicating the basic Pixie mode of 64 across by 32 high. In spite of the fact that there won't be any actual DMA transfer needed, it should be able to display video from the basic Pixie video programs like the iconic Starship Enterprise video from 1977 without modification. They'll just run faster as a result of no DMA overhead. I think.
Then looking at the exact details of how an expanded Elf uses the other modes (if it does, I've never done so myself) will let me look at expanding the Propeller's memory map area and responding to the Elf's control to do that.
So, if I can do what the Pixie does without requiring DMA, I'm already getting a system that's about 40% faster even if I don't move up the clock speed from ~1.79MHz. (The 1802 was the original overclocker's chip, way back in the 70's, but that's another story.) If I can increase the clock speed even more, with no effect on the video (since a hard-clocked Pixie chip isn't there any more), then I've got a system that'll run such things as Chip-8 and Tiny Basic that much faster than an original Elf with a Pixie.
If the 2.5MHz setup turns out to work (I see no obstacles at present, but that just means I haven't run into them yet), then I'm getting a system that should run about 2.3x faster than the stock Elf. It'll still be no speed demon (that's not the point), but it'll be nicer to use.
Next Steps, Baby Steps
I'm going to write a program for the Prop to make it pretend to be a RAM for the 1802. It will be a simple 256 byte memory. That avoids the multiplexed signals for the address. It'll (hopefully) receive and store data bytes from the 1802, and deliver data from its store on request.
The first pass is going to be really, really simple. I'm going to set up an array, put in a short program to blink an LED on the 1802's 'Q' output, and set it up to respond to the 1802's memory read requests. No writes required. If that works, then I'll add write capability and put in a program to test that (again using Q as an output.)
If that works, I'll proceed to give the 1802 some more sophisticated output and input capability and see where it goes from there. But best not to plan in too detailed a fashion too far ahead until the immediate problems are solved.
Friday, July 20, 2012
Ace of Aces Game Reprint on Kickstarter

My Ace of Aces Book Sets from Back in the Day...
Today Could Be "The Day" All Over Again!
Ace of Aces Rotary Edition Kickstarter
One of my favorite games of all time has been out of print for over 25 years. Ace of Aces is a game that uses pairs of books to show different locations of two dogfighting WWI aircraft. You look at where your opponent is, try to anticipate their maneuver, then pick your own maneuver. Once once you decide what you're going to do, you call off the page number under your maneuver to your opponent. They call off a number to you. You then go to the page number they called, and look up your own maneuver. They do the same. You both get a final page number, and turn to that page (they'll both be the same, so you can cross-check to avoid errors.)
There you have your new position relative to each other.

On the pages above, you can see two different positions. The page on the left has your opponent out past your left wingtip, approaching at an angle. Aha! Time to simple pitch into a stall maneuver and let him come right in line with your guns! (Unless you think they're going to stall and wing-over to put you in line with theirs.)
On the right hand page, we're being fired on! Dangit! Score one for the other guy.
Fortunately, all those little squares you see below the big pictures are your choices of manuever. There are a lot of them, so if you find yourself in the position of the page on the right you have a lot of crafty things you can do to get out of the line of fire and save the day.
This game is quick and easy to learn, and can be expanded as much as you care to expand it. It has optional rules for different models of aircraft, hit locations, etc. Plus, I and some friends turned it into a campaign-level RPG in high school. We added rules for pilot recruitment and skill levels, organizing squadrons, procuring and repairing aircraft, and so on.
But I have to say I've played it as a casual pick-up five minute game with a lot more people. It takes less than 5 minutes to learn the basic game, and you can play the games up to number of hits, first blood, or whatever you wish to make it quick and light.
Ace of Aces Kickstarter
Now there's a Kickstarter Project to reprint the first set of books from the game. It's very nearly funded as I write this (about $500 away), and you want to get in on it!
This project is for the "Handy Rotary" books, which recreate the aircraft with rotary engines and high torque and maneuverability. These were the first original books, and they're a lot of fun. I have this set and the Powerhouse set. If this Kickstarter goes well, we'll be seeing the other book sets coming in future Kickstarters.
There are also some really neat Ace of Aces T-Shirts as swag. Read the updates, you'll see.
Enjoy.
Thursday, July 19, 2012
8085 Monitor Code and Other Distractions
I've been working on an 8085 microprocessor project for about 3 years now. It started with a simple circuit on a breadboard, moved to my HP Logic Lab, where it became a real computer, then got built into a permanent version on a prototyping PC board.
I've been documenting the thing since it moved to the Logic Lab on my web site, posting how-to articles on building both versions (the hardware is identical, only the construction method is different), as well as software to control the hardware.
Where I've come up short is putting together a sort of unified OS for the system online that allows software to be developed right on the system itself, as well as any high level languages. I've been writing lots of software for my own use with the system, mostly hand-coded using my assembly coding forms and my 8085 Pocket Reference Card. But I keep either getting distracted from or otherwise dodging the job of integrating all the software bits I've already got into a simple "monitor" program (sort of a mini-OS for machine language) for the system.
Part of it is the usual life distractions. I've been sitting next to a wild fire this past week, for example. And then I've got lots of other electronic toys I like to spend some time with. Each one has its own appeal.
Before the fire, and a bit during (when I was taking a break from cutting ever more brush around my property) I've gotten back to work on putting it together. The biggest part is the part that reads the keyboard, determines the current system state, and dispatches keystrokes and execution to the right place. All the hardware interfaces are already in place, most of the basic system routines are in place (timing/delays/string handling), etc. So the "glue" is pretty much all that's needed. And I got it about halfway done before the fire started, I'm writing the code that actually takes actions for each mode, or simply hands over the necessary info to user apps running on the system.
So, if I can get time away from deck repairs on my house this weekend (now that it looks like it's unlikely to burn down or that I get evacuated), I'll be trying to wrap up and test that code.
Small Thing, Big Obstacle
The other thing I'm looking forward to is replacing some of the switches I put on the MAG-85. I put in switches for various interrupts about two years ago, and the switches themselves turned out to bounce and make so much noise that I've given up on them. No amount of debouncing, hardware or software, within reason has made them reliable. I'd hate to have someone else construct a MAG-85 and have to deal with this. It's been a thorn in my side ever since I added them, and took a lot of the fun out of the permanent hardware project for me (on the breadboard version, I used some old keyswitches out of a knackered Mac Plus keyboard, they worked great with only the most minimal hardware debounce. But I figured I could hardly specify 25 year old keyswitches in a project that others might want to build.
I'm expecting a shipment of a bunch of different switches tomorrow that I can test and select from to replace the awful switches I have now. So I can put that behind me (and probably re-simplify the circuit to take out a bunch of the extra parts I put in to try to deal with the noise on these switches.)
Frankly, the old switches are something I'd about hesitate to use in a doorbell circuit, never mind real electronics.
Tweet
I've been documenting the thing since it moved to the Logic Lab on my web site, posting how-to articles on building both versions (the hardware is identical, only the construction method is different), as well as software to control the hardware.
Where I've come up short is putting together a sort of unified OS for the system online that allows software to be developed right on the system itself, as well as any high level languages. I've been writing lots of software for my own use with the system, mostly hand-coded using my assembly coding forms and my 8085 Pocket Reference Card. But I keep either getting distracted from or otherwise dodging the job of integrating all the software bits I've already got into a simple "monitor" program (sort of a mini-OS for machine language) for the system.
Part of it is the usual life distractions. I've been sitting next to a wild fire this past week, for example. And then I've got lots of other electronic toys I like to spend some time with. Each one has its own appeal.
Before the fire, and a bit during (when I was taking a break from cutting ever more brush around my property) I've gotten back to work on putting it together. The biggest part is the part that reads the keyboard, determines the current system state, and dispatches keystrokes and execution to the right place. All the hardware interfaces are already in place, most of the basic system routines are in place (timing/delays/string handling), etc. So the "glue" is pretty much all that's needed. And I got it about halfway done before the fire started, I'm writing the code that actually takes actions for each mode, or simply hands over the necessary info to user apps running on the system.
So, if I can get time away from deck repairs on my house this weekend (now that it looks like it's unlikely to burn down or that I get evacuated), I'll be trying to wrap up and test that code.
Small Thing, Big Obstacle
The other thing I'm looking forward to is replacing some of the switches I put on the MAG-85. I put in switches for various interrupts about two years ago, and the switches themselves turned out to bounce and make so much noise that I've given up on them. No amount of debouncing, hardware or software, within reason has made them reliable. I'd hate to have someone else construct a MAG-85 and have to deal with this. It's been a thorn in my side ever since I added them, and took a lot of the fun out of the permanent hardware project for me (on the breadboard version, I used some old keyswitches out of a knackered Mac Plus keyboard, they worked great with only the most minimal hardware debounce. But I figured I could hardly specify 25 year old keyswitches in a project that others might want to build.
I'm expecting a shipment of a bunch of different switches tomorrow that I can test and select from to replace the awful switches I have now. So I can put that behind me (and probably re-simplify the circuit to take out a bunch of the extra parts I put in to try to deal with the noise on these switches.)
Frankly, the old switches are something I'd about hesitate to use in a doorbell circuit, never mind real electronics.
Monday, July 16, 2012
Robbers Fire Day 6
My home is southeast of the town of Colfax, near the current Robber's Fire. Since the fire started last Thursday (we saw the plume within a few minutes of its start.) Needless to say, I think, is that the fire and its progress have been an object of intense personal interest ever since.
We Want Infomation...Information...Information.
Getting specific, up to date information was the first concern. The twice a day updates from CalFire's PIO is nice, but when you're nearby not knowing if you're going to be called on to evacuate, you want something with a bit more granularity. Looking out the window and watching plumes helps, but without a direct view into the canyons it's hard to interpret for yourself.
The local radio stations have mostly been repeating the CalFire announcements, so no help there.
We don't have any TV reception from the Sacramento stations in our location. The TV antenna in a tree over the house has never worked, and I haven't been in a position to spend the money on it to pay for someone to go 150 feet up there and help me test the cable, replace it if necessary, etc. We've had satellite TV at times, but overall it isn't valuable enough for the monthly fees required, and a few years ago they made it a lot harder to just start and stop the service as we want it, so we've not had that for several years now.
That left us with internet. Fortunately I was able to use Twitter to good effect once I figured out the hashtag I wanted was #RobbersFire. Also, the Wild Land Fire Hotlist and YubaNet have been valuable sources of information. On Friday, KCRA TV put up a live feed from their helicopter that I was able to catch much of, which let me see the landscape and the fire directly.
Roller Coaster Ride
On Wednesday the fire spread rapidly after it started at about 3:30pm. I saw it about 15 minutes after it started while headed out for errands. By the time we came home just over an hour later, the road to our house was closed. There were barriers and a highway patrolman directing traffic away. We'd seen plenty of activity while out, several firefighter units and a trailer with a dozer on the highway between Colfax and Auburn.
One of my daughters was with me, we'd cut our errand run short so that she could get to a youth activity on time. So I just took her there (fortunately we'd brought her swimsuit and all with us), then tried to figure out what to do with myself. I picked up some strawberries and chocolate milk for dinner from the local market, then parked at our church and tried to find some news on the radio.
After a while I decided to see if I could get home through an indirect route. It worked, and I called my other daughter at college to let her know how to get home that evening. Finally, at 7:30 that evening there was a sense of relief once we had all the members of the family home together.
The fire had spread rapidly, sending up several smoke headers. As night set in, we hoped that the fire fighters would be able to make a lot of progress on the fire during the relatively cool night hours. But the terrain was practically impassable in the area of the fire, so we pretty well knew they wouldn't get it completely contained.
We spent that first evening in immediate evacuation preparations. By the time I was able to find a way back to our house, my wife got together pet carriers, medicine, and immediate necessities and had them ready to go by the door.
After that, we collected and packed irreplaceable stuff like family photos and such. Through the evening, my wife worked on that while I prepared the house for evacuation and tried to get current information on exactly where the fire was when taking breaks.
Finally at the end of the evening I was able to determine how far it was to the fire, as well as the fact that it was still on the far side of the American river. Prior to that all we had was the smoke to go by, but couldn't tell if it had jumped the river, and whether it was 3-4 miles away or just a mile or so. Learning that it was about 3 to 3.5 miles away and still on the far side of the river was relieving enough we were able to get some sleep that night. But we still had all the evacuation stuff stacked in the hall by the front door.
The next day it was still burning, but didn't seem to be taking off rapidly. Until about 3:30 or 4pm. Then, as on the prior day, the fire spread rapidly in the late, dry afternoon heat. I had been trying to concentrate on some programming while trying to stay up to date on the fire conditions. I also took breaks to continue preparing the house for evacuation. As it happened, I was making another trip out of the house about the time it took off and the sky started looking ugly.
Fortunately our slightly roundabout route to and from the house remained open.
As the sun set we had S-2s going over the house at a prodigious rate and the fire looked like it had settled down a lot by the time nightfall came.
That night we went through more of our personal possessions and did more evacuation preparation. We were thankful that we had more time to do so. I had spent the afternoon outside doing some pick up and clean up and trying to get the property in better shape.
If I Were a Fire, Where Would I Go?
We keep our property in pretty good shape with respect to fire safety as a matter of course. We were at the edge of the Cleveland Fire at our prior home, and we've been evacuated twice before from this property for fires. One started in the River valley near us, and it threatened not only us, but many of our friends in the Weimar area.
But even though we try to maintain our defensible space, when you go outside and think of that tree burning like a torch, or fire approaching from that direction, you inevitably see more work that can be done.
So piecemeal over Thursday and Friday, then, as a full day activity on Saturday, we went outside and extended and cleaned up the defensible space around our property. On Sunday we attended an hour of church, then came home and got back to work on the property.
Further preparations to assist firefighters were made during that time. I filled a couple of barrels with water, and got buckets ready to position near them. I moved and cleared flammable items within the house to get them away from the windows.
Today my daughter and I rounded up everything that had been set aside for a dump run during the other cleanup and took it down there. A bunch of things we decided we didn't need any more, but which was still in good shape, went to the thrift store.
Tonight some friends are coming over, I've got a fallen tree and some other cleanup to do at the outer edge of our current cleared zone, so that will get a bit wider on one side of the house.
Last Friday, and Saturday, the fire got much worse at this end (the northern end) each night between 6 and 7pm. It was very frightening to see the increased activity each night. The fire got closer each time.
Last night (Sunday) was encouraging, however. The fire threatened to flare up again, but the work of the firefighters kept it from another major round of activity like we'd had the prior two nights. We had a regular airshow over our heads. Not only did we have the usual S-2s over our heads (both S-2A and S-2T models) but a P-2 Neptune tanker had joined the party during the day, and as we were winding down and coming inside to collapse we had a DC-10 tanker come over!
The aerial firefighting is easiest for us to see, but certainly both the airborne and ground-based fire fighting contributed to make things a lot less scary. The weather reports, however, were filled with the fact that the next day would be windy, possibly driving the fire into new areas.
Hopeful
Today the day was cooler and more humid. When we went to the dump there were clouds over the fire, with virga falling from them. The smoke was limited to light drift smoke.
We're all beat, physically, and hoping that these signs show that things are going better with the fire. Wednesday is the predicted day for containment of the fire if all goes well. We certainly hope it does. One home has been lost, and as bad as that is we were glad to hear it was a vacation home rather than a primary residence. Still, our hearts go out to those who lost it, and to those who've lost their outbuildings. Better than your main home, but still painful.
And thanks to the firefighters, whatever happens from here on out. They are working miracles considering the conditions they have for fighting the fire. Hopefully the cooler weather is making their lives easier.
It's certainly still possible for things to go poorly from this point. We're not able to relax yet. I'll be back out this evening (hopefully I can get a brief nap in the next hour or so), doing what I can to make things even better in case the fire breaks out this way.
But we're hoping that things will go methodically from here to full containment then to full control of the fire. And that the firefighters stay safe, and those injured so far reach full recovery soon if that's at all possible (I haven't had any info on the injuries yet except for a brief mention of heat prostration or something like in one case.)
And best wishes to our neighbors who are living the nightmare we're preparing for still--having to leave your home and just wait and hope that you'll be able to return without knowing if that will be the case.
Tweet
We Want Infomation...Information...Information.
Getting specific, up to date information was the first concern. The twice a day updates from CalFire's PIO is nice, but when you're nearby not knowing if you're going to be called on to evacuate, you want something with a bit more granularity. Looking out the window and watching plumes helps, but without a direct view into the canyons it's hard to interpret for yourself.
The local radio stations have mostly been repeating the CalFire announcements, so no help there.
We don't have any TV reception from the Sacramento stations in our location. The TV antenna in a tree over the house has never worked, and I haven't been in a position to spend the money on it to pay for someone to go 150 feet up there and help me test the cable, replace it if necessary, etc. We've had satellite TV at times, but overall it isn't valuable enough for the monthly fees required, and a few years ago they made it a lot harder to just start and stop the service as we want it, so we've not had that for several years now.
That left us with internet. Fortunately I was able to use Twitter to good effect once I figured out the hashtag I wanted was #RobbersFire. Also, the Wild Land Fire Hotlist and YubaNet have been valuable sources of information. On Friday, KCRA TV put up a live feed from their helicopter that I was able to catch much of, which let me see the landscape and the fire directly.
Roller Coaster Ride
On Wednesday the fire spread rapidly after it started at about 3:30pm. I saw it about 15 minutes after it started while headed out for errands. By the time we came home just over an hour later, the road to our house was closed. There were barriers and a highway patrolman directing traffic away. We'd seen plenty of activity while out, several firefighter units and a trailer with a dozer on the highway between Colfax and Auburn.
One of my daughters was with me, we'd cut our errand run short so that she could get to a youth activity on time. So I just took her there (fortunately we'd brought her swimsuit and all with us), then tried to figure out what to do with myself. I picked up some strawberries and chocolate milk for dinner from the local market, then parked at our church and tried to find some news on the radio.
After a while I decided to see if I could get home through an indirect route. It worked, and I called my other daughter at college to let her know how to get home that evening. Finally, at 7:30 that evening there was a sense of relief once we had all the members of the family home together.
The fire had spread rapidly, sending up several smoke headers. As night set in, we hoped that the fire fighters would be able to make a lot of progress on the fire during the relatively cool night hours. But the terrain was practically impassable in the area of the fire, so we pretty well knew they wouldn't get it completely contained.
We spent that first evening in immediate evacuation preparations. By the time I was able to find a way back to our house, my wife got together pet carriers, medicine, and immediate necessities and had them ready to go by the door.
After that, we collected and packed irreplaceable stuff like family photos and such. Through the evening, my wife worked on that while I prepared the house for evacuation and tried to get current information on exactly where the fire was when taking breaks.
Finally at the end of the evening I was able to determine how far it was to the fire, as well as the fact that it was still on the far side of the American river. Prior to that all we had was the smoke to go by, but couldn't tell if it had jumped the river, and whether it was 3-4 miles away or just a mile or so. Learning that it was about 3 to 3.5 miles away and still on the far side of the river was relieving enough we were able to get some sleep that night. But we still had all the evacuation stuff stacked in the hall by the front door.
The next day it was still burning, but didn't seem to be taking off rapidly. Until about 3:30 or 4pm. Then, as on the prior day, the fire spread rapidly in the late, dry afternoon heat. I had been trying to concentrate on some programming while trying to stay up to date on the fire conditions. I also took breaks to continue preparing the house for evacuation. As it happened, I was making another trip out of the house about the time it took off and the sky started looking ugly.
Fortunately our slightly roundabout route to and from the house remained open.
As the sun set we had S-2s going over the house at a prodigious rate and the fire looked like it had settled down a lot by the time nightfall came.
That night we went through more of our personal possessions and did more evacuation preparation. We were thankful that we had more time to do so. I had spent the afternoon outside doing some pick up and clean up and trying to get the property in better shape.
If I Were a Fire, Where Would I Go?
We keep our property in pretty good shape with respect to fire safety as a matter of course. We were at the edge of the Cleveland Fire at our prior home, and we've been evacuated twice before from this property for fires. One started in the River valley near us, and it threatened not only us, but many of our friends in the Weimar area.
But even though we try to maintain our defensible space, when you go outside and think of that tree burning like a torch, or fire approaching from that direction, you inevitably see more work that can be done.
So piecemeal over Thursday and Friday, then, as a full day activity on Saturday, we went outside and extended and cleaned up the defensible space around our property. On Sunday we attended an hour of church, then came home and got back to work on the property.
Further preparations to assist firefighters were made during that time. I filled a couple of barrels with water, and got buckets ready to position near them. I moved and cleared flammable items within the house to get them away from the windows.
Today my daughter and I rounded up everything that had been set aside for a dump run during the other cleanup and took it down there. A bunch of things we decided we didn't need any more, but which was still in good shape, went to the thrift store.
Tonight some friends are coming over, I've got a fallen tree and some other cleanup to do at the outer edge of our current cleared zone, so that will get a bit wider on one side of the house.
Last Friday, and Saturday, the fire got much worse at this end (the northern end) each night between 6 and 7pm. It was very frightening to see the increased activity each night. The fire got closer each time.
Last night (Sunday) was encouraging, however. The fire threatened to flare up again, but the work of the firefighters kept it from another major round of activity like we'd had the prior two nights. We had a regular airshow over our heads. Not only did we have the usual S-2s over our heads (both S-2A and S-2T models) but a P-2 Neptune tanker had joined the party during the day, and as we were winding down and coming inside to collapse we had a DC-10 tanker come over!
The aerial firefighting is easiest for us to see, but certainly both the airborne and ground-based fire fighting contributed to make things a lot less scary. The weather reports, however, were filled with the fact that the next day would be windy, possibly driving the fire into new areas.
Hopeful
Today the day was cooler and more humid. When we went to the dump there were clouds over the fire, with virga falling from them. The smoke was limited to light drift smoke.
We're all beat, physically, and hoping that these signs show that things are going better with the fire. Wednesday is the predicted day for containment of the fire if all goes well. We certainly hope it does. One home has been lost, and as bad as that is we were glad to hear it was a vacation home rather than a primary residence. Still, our hearts go out to those who lost it, and to those who've lost their outbuildings. Better than your main home, but still painful.
And thanks to the firefighters, whatever happens from here on out. They are working miracles considering the conditions they have for fighting the fire. Hopefully the cooler weather is making their lives easier.
It's certainly still possible for things to go poorly from this point. We're not able to relax yet. I'll be back out this evening (hopefully I can get a brief nap in the next hour or so), doing what I can to make things even better in case the fire breaks out this way.
But we're hoping that things will go methodically from here to full containment then to full control of the fire. And that the firefighters stay safe, and those injured so far reach full recovery soon if that's at all possible (I haven't had any info on the injuries yet except for a brief mention of heat prostration or something like in one case.)
And best wishes to our neighbors who are living the nightmare we're preparing for still--having to leave your home and just wait and hope that you'll be able to return without knowing if that will be the case.
Friday, July 13, 2012
Propeller: Things That Make You Go Hmmmmm...
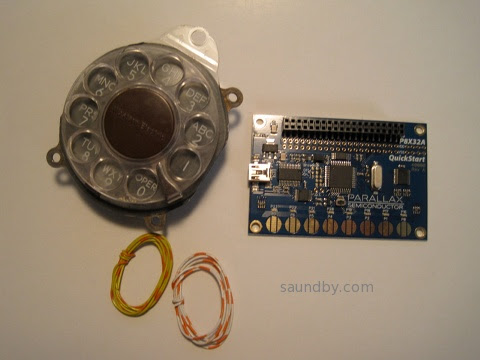
P8X32A Propeller Quickstart Board...Telephone Rotary Dial....Hmmmmmmmm.
Robbers Fire Day 3
We've got a wildfire going near our home right now. It started day before yesterday at about 3:30 in the afternoon. On day 1, it was about 3 to 3.5 miles from us, and not spreading in our direction. Even though it was in some really rough territory, it looked like we were close enough to monitor the situation but far enough that it wouldn't threaten us.
Yesterday started out well. I spent time in the yard and around the house with my daughter doing some additional clean-up. Things were in pretty good shape, I've been improving the property with an eye to fire safety for years now, since our prior run-in with a fire that came close. Plus I'd already done the hard work for this year back in April. But there's always more you can do.
When the heat of the day grew to within spitting range of 100 degrees, though, we could see the fire plumes suddenly spread and go vertical with lots of heat. Prior to that, there'd just been white drifts of smoke. The new plumes were coming our way.
From Mildly Concerned to Biting Nails
The fire spread rapidly, and got very hot. Reports are that it jumped two fire control lines. It spread up several fingers of the canyon complex near us, it wasn't confined to a single area any more. And it was a lot closer, and in an area where it could reach us far more readily.
Now, there are a lot of houses between us and it. We're in a location that we'rre not likely to be right on the line without things getting really bad for a lot of people. We're not one of the houses with a fire engine parked in front and firefighters on the roof. My heart goes out to those that are.
But we are close enough that we're keeping right on top of the evacuation situation. On day 1, I wasn't able to get home from errands for a couple of hours because our street was closed to all traffic. Finally, they moved the roadblock down two streets and I was able to get home. We had to get there through a roundabout way, the direct route was still closed off--we have a California Department of Forestry station that needs the space for marshalling vehicles--but we could get home. I was able to contact my two daughters, who were also out and about, and let them know how to get home.
Finally at about 8:30pm we were all together at home again.
We've had prior experience with fires here, as I mentioned, and we've lived in the Sierra Foothills prior to moving here about 15 years ago. We've been evacuated from this house once before--the fire got within 1/2 a mile--and been on alert for evacuation several times. The past two years have actually been a bit unusual in being relatively calm and fire-free. We were hoping this year would be, too.
Keeping Up
Fortunately we've got uninterrupted internet service and electricity to this point. We were warned by the power company last night that we may lose power in the night, with no known time for it being cut off or of restoration. One line in the area has been de-energized for the sake of the firefighting. There's a 100KVA line in the area that's threatened.
But so far I've been able to keep in touch.
The internet has been a huge boon. The reporting through ordinary media outlets hasn't been of much value. They finally got excited about the event yesterday after the fire went wild and tripled the number of houses threatened. Prior to that, even the most local outlets couldn't be bothered to tell me more than I could learn by looking out my back window--less, in fact.
Fortunately Twitter (#RobbersFire) and wlfhotlist.com, as well as a number of other places, have had more info for me. Sacramento's KCRA TV station brought their helicopter into the area yesterday afternoon, I was able to watch the feed on the internet and get a look at the fire from a viewpoint I don't have at home for the first time.
Fire Crews Doing Excellent Job
After the outbreak yesterday, as the day began to come off its high point of temperature, the air crews did an excellent job of suppressing the fires here at the north end. There were several hot plumes when they started, by the time they had to close up air operations for lack of light, it was white drifts with no apparent hot spots.
Crews have come in from all over the state. This morning, so far as I can tell, things are hugely improved. There are still a lot of structures threatened, and a lot of operations that have been waiting on daylight. The briefings this morning were at the other end of the fire area (Forest Hill) and apparently in Auburn at the Fair Grounds, too, but not close enough for me to be able to attend. So I'm relying on what comes in over the wire.
Today promises to stay a bit cooler than yesterday, in the low 90s, temperature-wise. Hopefully we won't have any more breakouts like yesterday. The numbber of firefighters has grown by at least 3x since yesterday. There's no telling what's going to happen, but things always look cautiously optimistic at this time of day.
Fingers crossed.
Update at 1pm local time:
We're into the nail-biting time of the day. The winds are picking up a bit, and there's been increased activity on the side of the fire that's away from us. The winds are blowing northeast, from the fire toward the town of Iowa Hill. We're only getting light smoke here so far. It's nowhere near as close or frightening as yesterday.
There are a =lot= more firefighting resources on the fire today than yesterday. It looks like they're really doing a great job. Their work is very much appreciated by everyone in the area.
Of course, we're still earlier in the day than when most of the trouble has come over the past two days. Yesterday's flareup came at about 3 or 3:30.
Tweet
Yesterday started out well. I spent time in the yard and around the house with my daughter doing some additional clean-up. Things were in pretty good shape, I've been improving the property with an eye to fire safety for years now, since our prior run-in with a fire that came close. Plus I'd already done the hard work for this year back in April. But there's always more you can do.
When the heat of the day grew to within spitting range of 100 degrees, though, we could see the fire plumes suddenly spread and go vertical with lots of heat. Prior to that, there'd just been white drifts of smoke. The new plumes were coming our way.
From Mildly Concerned to Biting Nails
The fire spread rapidly, and got very hot. Reports are that it jumped two fire control lines. It spread up several fingers of the canyon complex near us, it wasn't confined to a single area any more. And it was a lot closer, and in an area where it could reach us far more readily.
Now, there are a lot of houses between us and it. We're in a location that we'rre not likely to be right on the line without things getting really bad for a lot of people. We're not one of the houses with a fire engine parked in front and firefighters on the roof. My heart goes out to those that are.
But we are close enough that we're keeping right on top of the evacuation situation. On day 1, I wasn't able to get home from errands for a couple of hours because our street was closed to all traffic. Finally, they moved the roadblock down two streets and I was able to get home. We had to get there through a roundabout way, the direct route was still closed off--we have a California Department of Forestry station that needs the space for marshalling vehicles--but we could get home. I was able to contact my two daughters, who were also out and about, and let them know how to get home.
Finally at about 8:30pm we were all together at home again.
We've had prior experience with fires here, as I mentioned, and we've lived in the Sierra Foothills prior to moving here about 15 years ago. We've been evacuated from this house once before--the fire got within 1/2 a mile--and been on alert for evacuation several times. The past two years have actually been a bit unusual in being relatively calm and fire-free. We were hoping this year would be, too.
Keeping Up
Fortunately we've got uninterrupted internet service and electricity to this point. We were warned by the power company last night that we may lose power in the night, with no known time for it being cut off or of restoration. One line in the area has been de-energized for the sake of the firefighting. There's a 100KVA line in the area that's threatened.
But so far I've been able to keep in touch.
The internet has been a huge boon. The reporting through ordinary media outlets hasn't been of much value. They finally got excited about the event yesterday after the fire went wild and tripled the number of houses threatened. Prior to that, even the most local outlets couldn't be bothered to tell me more than I could learn by looking out my back window--less, in fact.
Fortunately Twitter (#RobbersFire) and wlfhotlist.com, as well as a number of other places, have had more info for me. Sacramento's KCRA TV station brought their helicopter into the area yesterday afternoon, I was able to watch the feed on the internet and get a look at the fire from a viewpoint I don't have at home for the first time.
Fire Crews Doing Excellent Job
After the outbreak yesterday, as the day began to come off its high point of temperature, the air crews did an excellent job of suppressing the fires here at the north end. There were several hot plumes when they started, by the time they had to close up air operations for lack of light, it was white drifts with no apparent hot spots.
Crews have come in from all over the state. This morning, so far as I can tell, things are hugely improved. There are still a lot of structures threatened, and a lot of operations that have been waiting on daylight. The briefings this morning were at the other end of the fire area (Forest Hill) and apparently in Auburn at the Fair Grounds, too, but not close enough for me to be able to attend. So I'm relying on what comes in over the wire.
Today promises to stay a bit cooler than yesterday, in the low 90s, temperature-wise. Hopefully we won't have any more breakouts like yesterday. The numbber of firefighters has grown by at least 3x since yesterday. There's no telling what's going to happen, but things always look cautiously optimistic at this time of day.
Fingers crossed.
Update at 1pm local time:
We're into the nail-biting time of the day. The winds are picking up a bit, and there's been increased activity on the side of the fire that's away from us. The winds are blowing northeast, from the fire toward the town of Iowa Hill. We're only getting light smoke here so far. It's nowhere near as close or frightening as yesterday.
There are a =lot= more firefighting resources on the fire today than yesterday. It looks like they're really doing a great job. Their work is very much appreciated by everyone in the area.
Of course, we're still earlier in the day than when most of the trouble has come over the past two days. Yesterday's flareup came at about 3 or 3:30.
Tuesday, July 10, 2012
Gadget Gangster QuickVGA+ for Parallax Propellor

Propeller Quickstart Add-Ons Galore
I mentioned that I picked up a Parallax Propeller Quickstart Board a while ago, and finally got around to playing with it.
Well, I've played with it a lot more now, in part thanks to a cool add-on board from an outfit called Gadget Gangster. I bought a Quickstart VGA+ board from them. It adds a nice VGA port (duh) as well a a PS/2 keyboard port (that's PS/2 as in the old IBM "Personal System/2", not Playstation 2), a stereo audio output, and a Wii Nunchuck port (or the classic controller can go here.) All on one little business card sized board, that fits right on top of the Parallax Quickstart board.
It's a nice combination of features. It's also got places for adding an SD card connector (which I've done), an IR port, and a composite video port.
There's a Pocket Mini Computer project built around this board, that's sort of a C-64 retro-clone kind of system. I look forward to trying that out some time when I get tired of playing with the Wii nunchuck as a raw sensor in software.
One note about that...
The nunchuck software that Gadget Gangster recommended didn't work right out of the box. I've posted na updated version of the nunchuck demo software at the Parallax Propeller Object Exchange, the place where Propeller users post their software for others to modify and use. I modified the demo to use the correct I/O lines for the QuickVGA+ board, and I added a bit of code to make it more clear what's going on with the accelerometers in the nunchuck.
Next, I'll be building up my Gadget Gangster QuickProto board, which came in a bundle deal with a QuickStart board (so, yes, I now have two Quickstart boards. And I ordered one for my daughter, too.
Pennies from Heaven
That's not all the Propellers running around the house, as it happens. While we were at the Parallax Robot Expo, my daughter and I picked up some stuff off the Free table. Among those items were a pair of slightly used Propeller Proto USB boards and one one-off PCB Propeller board that appears to mainly for servos. My daughter has one of the Proto boards and I have the other, as well as the one-off PCB.
I've already added PS/2 mouse and keyboard ports to my Prop Proto board, as well as a composite audio/video adapter. I have plans for this board...
I also found an early rev of the Parallax QuickStart Proto board in my bag of goodies, which I'm planning to use to put a sort of Elf II I/O interface on a Quickstart board. A hex keyboard, a pair of hex displays, some control switches, and hey-ho it's 1977 all over again. :)
Bottom line on the Propeller: It's heaps of fun to play with. Quick and easy. I keep thinking I ought to stop and read the documentation, but it hasn't been necessary, yet.
Monday, June 4, 2012
Parallax Propellor Quickstart Board
When I was at the Parallax Robotics Expo back in April, I picked up a P8X32A Quickstart Board. I've had my eye on the Propeller chip for a long time, I first heard of it before release. But to date, time spent on other things kept me from getting started with it.

The Time Window Opens
Finally, last Friday afternoon, I had a chunk of time open up as a result of being too ill to make a prior commitment. (I can't help but think of how many important things in my life have happened because of time made available through being too sick to do what I was supposed to do, or because I was stranded somewhere without transportation.) The tiny box for the Quickstart board had been living next to one of my computer keyboards for over a month, so I didn't even have to go looking for it. There was a USB cable of the correct type sitting in the drawer next to me. So I started in.
To keep it simple I decided to start out with the Parallax programming environment, Propeller Tool on my Windows 7 machine. I expect to try out Brad's Spin Tool, the other major development tool for Propeller, on my Mac and Linux machines a bit later.
I was pleased to see that it installed everything, the driver for the USB interface chip on the Quickstart board, the IDE, and the serial terminal tool for the Propellor. It says it does that before you download and install, but I was a bit unsure of whether the Terminal program would actually be in there before I actually installed the program.
Once the software was installed, I started it up then plugged in the Quickstart board. I got a ding-dong from Windows telling me it saw the hardware. I was able to find a menu item to report what chip version the software saw, and it saw my chip. I didn't get the message I expected from the documentation at first, a dialog pop-up. That appeared later, the first time I tried to send a program to the board.
About that...
Parallax has a tutorial that runs you through the initial steps of programming the Quickstart board. Aside from the fact that to get to each of the several pages you follow a link from the product page (the pages aren't linked together--that is, when you get to the bottom of one page there's no link to the next one) there's another oversight on these pages as well.
The page gives a short, simple program, describes what it does, then goes on to a slightly more sophisticated program. It tells you about how the editor behaves. But it doesn't tell you how to actually get the code on the chip.
Now, I'm not exactly a first timer here. I looked at the menu and saw "Run" at the top of the screen. But when I chose that I got a list of items, none of which were clearly "compile and run". So I started selecting things at random. I also didn't know whether to expect a simulation environment to start, or how to select between a simulator and the real hardware. I scanned the tutorial web page up to the third program in it, and found no specific instructions.
This is one of those things of which Sherlock Holmes remarked, "the answer is perfectly obvious, once you know it." There is no simulation environment in the free tool, that costs extra (I wish Parallax could follow Atmel's example in providing it with the free tool, the first job I applied an AVR to happened because I was able to use the simulation tool to verify the software timings I needed). And the Run=>Compile Current=>Load EEPROM or Run=>Compile Current=>Load RAM would either have done enough to let me get what I wanted--the sample code running on the target hardware.
But that wasn't clear. I was doing a quick try it and see, so I hadn't spent time with the chip's datasheet yet to learn about how it loads and runs software, what facilities it has for storage, what the implications are of loading EEPROM vs. loading RAM (I didn't even know if they were both program storage, for all I knew one was program storage and the other was for loading an initial state for testing.)
So I was a bit stymied until I just decided to try things at random and see what happened.
At the bottom of the tutorial page is a short table describing the shortcut keys and what they do. Below the actual step-by-step examples that omit instructions for how to compile and run the code. There they describe F10 and F11, for example, and the implications of each choice (RAM or EEPROM).
I managed to get the short initial program (which lights an LED) loaded and running. The LED lit up. There was much rejoicing.
Demo, Demo, Who's Got the Demo?
The next thing I started to wonder about was the demo that showed off the touchpads by lighting up the LEDs when the pads are touched. This hadn't appeared to be pre-loaded like demos often are on other processors. Nor did there appear to be anything obvious among the Propeller code that came with the IDE (another thing I fouond by spelunking, rather than as a result of documentation.) There were no projects with names like "Quickstart Board Demo" or "Touchpad Demo" or whatever. Nearly all the demos appeared to be for hardware I didn't have.
At first I went back to the Quickstart tutorials on the web. I did searches for the demo on the Parallax website and through Google, but the closest I came up with was modified versions of the demo listed in a forum thread. I did find the demo later, but it was only by going back and looking for it time after time that I finally located it today, my fourth day trying, here, on the Parallax Semiconductor Quickstart product page, not on the Propeller downloads page or the Parallax store product page, where there are lots of other downloads but not this one. The location is so subtle, that even after I found it earlier today it just took me five minutes of backtracking to find the right page over again. It's on the linked page, at the end of the list of downloads at the bottom. Direct Link to P8X32A Quickstart LED-Touchpad Demo Software Download
Well, back to last Friday. The demo was interesting to me, but while I was looking for it I came across information about the video capabilities of the Propeller. Frankly, while I'd heard the Propeller did video I just figured it was something along the lines of bit-bashed video like what I've done with several other microcontrollers. I've even generated video from a little Atmel AVR ATTiny12 with nothing more than a software loop and a resistor divider-no fancy shift registers or anything.
Needless to say, it was pretty simple video. No colorburst, no color. But it got some data out of the chip on a two-pin interface nicely (three levels are needed for even black and white video to get the sync signals for timing in addition to the black and white pixel data.)
The Propeller goes way, way beyond this. It's got both NTSC and VGA signal generation hardware on board. And it's not just single bit video, either. It can generate full color at a number of resolutions. This I had to try. But my little Quickstart board doesn't have a video output on it. I looked at the Propeller Demo Board and saw that it had a video interface. It was just a 3-resistor DAC and an RCA jack, so I decided to make one.

At first, the video was pretty wonky. Then I realized I had the resistor that's supposed to go to P13 going to P15. Once I fixed that, it was better, but still not good. The graphics demo ran OK, but one of the text demos wouldn't even sync properly, the other had poor contrast. The thought crossed my mind that either the timing in the Propeller wasn't much better than my old Atari Pong or that the provided 5MHz crystal meant that the timing wasn't right on. But I've learned the hard way, time and time again, to suspect user error first.
I took another look at my too-quick and too-dirty video interface and found that the resistors that were supposed to go between P12 and P13 were swapped. A moment later I had pulled the pins from the plastic IDC header and moved them to the correct positions. This is why doing electronics when you're under the weather is not always a good idea. Fortunately this wasn't a mistake that'd let the smoke out.
Once that was done, the video looked great on all the demos. I then had to make a batter adapter so that I could try it out on the big screen TV in my living room. A quad-AA battery pack came to hand quickly enough, one of the ones with the 9V snap connector on the end. Then I soldered a 9V snap connector pigtail to another IDC header and spliced in an IDC socket pigtail. That way I'd still have a place to put my ground pin from the Q&D video interface without soldering it to the battery connector. As a final refinement, I put a slider switch in line on the positive battery wire to act as a power switch.
Once that and the video adapter were plugged into the Quickstart board, I took it out to the living room and hooked up to a free composite video input. It looked great.
I spent the rest of my time mucking around with the code of the various NTSC video demos. Spin is a really easy language to learn, if you've got any programming experience it'll come easily. It's even simple enough I could easily see teaching it as a first language to new programmers (with a Propellor board on hand, of course, to get the full hardware + software experience!)
Cleaning Up Shop
As mentioned, I have now been playing with my new board for four days. In spite of a couple of minor snags (figuring out what to choose to compile and run my programs, finding the demo for the Quickstart board itself) it's been a very rewarding use of my time. I can see now why people who've been raving about this controller for five or six years are excited about it.
After my first night playing with the board, I learned while reading the Parallax forums that the Propeller could also do RF-modulated video. That's what I spent mid-day Saturday playing with. I put rabbit ears on my big screen (talk about incongruity!) and a pair of jumpers on the RCA jack and managed to receive video from the Propeller from about 25 feet away. What worked even better was an LCD handheld television left over from the analog TV transmission days. I was able to get as far as 10 feet from my back door, a total distance of about 50 feet, and still get good reception. I don't think it's making it as far as the neighbor's house, though (fortunately.)
Yesterday I buckled down to some more structured learning of the Spin language, reading the Propeller Manual and Datasheet, and so on. Today I'm continuing that, working my way through tutorials and such. I also took a look in the goodie bag I filled at the Free tables at the Robotics Expo--there are a couple of Propeller boards in there that I can't wait to find a use for now.
Tweet
The P8X32A Quickstart Board, in the obligatory Altoids tin for scale.
The Time Window Opens
Finally, last Friday afternoon, I had a chunk of time open up as a result of being too ill to make a prior commitment. (I can't help but think of how many important things in my life have happened because of time made available through being too sick to do what I was supposed to do, or because I was stranded somewhere without transportation.) The tiny box for the Quickstart board had been living next to one of my computer keyboards for over a month, so I didn't even have to go looking for it. There was a USB cable of the correct type sitting in the drawer next to me. So I started in.
To keep it simple I decided to start out with the Parallax programming environment, Propeller Tool on my Windows 7 machine. I expect to try out Brad's Spin Tool, the other major development tool for Propeller, on my Mac and Linux machines a bit later.
I was pleased to see that it installed everything, the driver for the USB interface chip on the Quickstart board, the IDE, and the serial terminal tool for the Propellor. It says it does that before you download and install, but I was a bit unsure of whether the Terminal program would actually be in there before I actually installed the program.
Once the software was installed, I started it up then plugged in the Quickstart board. I got a ding-dong from Windows telling me it saw the hardware. I was able to find a menu item to report what chip version the software saw, and it saw my chip. I didn't get the message I expected from the documentation at first, a dialog pop-up. That appeared later, the first time I tried to send a program to the board.
About that...
Parallax has a tutorial that runs you through the initial steps of programming the Quickstart board. Aside from the fact that to get to each of the several pages you follow a link from the product page (the pages aren't linked together--that is, when you get to the bottom of one page there's no link to the next one) there's another oversight on these pages as well.
The page gives a short, simple program, describes what it does, then goes on to a slightly more sophisticated program. It tells you about how the editor behaves. But it doesn't tell you how to actually get the code on the chip.
Now, I'm not exactly a first timer here. I looked at the menu and saw "Run" at the top of the screen. But when I chose that I got a list of items, none of which were clearly "compile and run". So I started selecting things at random. I also didn't know whether to expect a simulation environment to start, or how to select between a simulator and the real hardware. I scanned the tutorial web page up to the third program in it, and found no specific instructions.
This is one of those things of which Sherlock Holmes remarked, "the answer is perfectly obvious, once you know it." There is no simulation environment in the free tool, that costs extra (I wish Parallax could follow Atmel's example in providing it with the free tool, the first job I applied an AVR to happened because I was able to use the simulation tool to verify the software timings I needed). And the Run=>Compile Current=>Load EEPROM or Run=>Compile Current=>Load RAM would either have done enough to let me get what I wanted--the sample code running on the target hardware.
But that wasn't clear. I was doing a quick try it and see, so I hadn't spent time with the chip's datasheet yet to learn about how it loads and runs software, what facilities it has for storage, what the implications are of loading EEPROM vs. loading RAM (I didn't even know if they were both program storage, for all I knew one was program storage and the other was for loading an initial state for testing.)
So I was a bit stymied until I just decided to try things at random and see what happened.
At the bottom of the tutorial page is a short table describing the shortcut keys and what they do. Below the actual step-by-step examples that omit instructions for how to compile and run the code. There they describe F10 and F11, for example, and the implications of each choice (RAM or EEPROM).
I managed to get the short initial program (which lights an LED) loaded and running. The LED lit up. There was much rejoicing.
Demo, Demo, Who's Got the Demo?
The next thing I started to wonder about was the demo that showed off the touchpads by lighting up the LEDs when the pads are touched. This hadn't appeared to be pre-loaded like demos often are on other processors. Nor did there appear to be anything obvious among the Propeller code that came with the IDE (another thing I fouond by spelunking, rather than as a result of documentation.) There were no projects with names like "Quickstart Board Demo" or "Touchpad Demo" or whatever. Nearly all the demos appeared to be for hardware I didn't have.
At first I went back to the Quickstart tutorials on the web. I did searches for the demo on the Parallax website and through Google, but the closest I came up with was modified versions of the demo listed in a forum thread. I did find the demo later, but it was only by going back and looking for it time after time that I finally located it today, my fourth day trying, here, on the Parallax Semiconductor Quickstart product page, not on the Propeller downloads page or the Parallax store product page, where there are lots of other downloads but not this one. The location is so subtle, that even after I found it earlier today it just took me five minutes of backtracking to find the right page over again. It's on the linked page, at the end of the list of downloads at the bottom. Direct Link to P8X32A Quickstart LED-Touchpad Demo Software Download
Well, back to last Friday. The demo was interesting to me, but while I was looking for it I came across information about the video capabilities of the Propeller. Frankly, while I'd heard the Propeller did video I just figured it was something along the lines of bit-bashed video like what I've done with several other microcontrollers. I've even generated video from a little Atmel AVR ATTiny12 with nothing more than a software loop and a resistor divider-no fancy shift registers or anything.
Needless to say, it was pretty simple video. No colorburst, no color. But it got some data out of the chip on a two-pin interface nicely (three levels are needed for even black and white video to get the sync signals for timing in addition to the black and white pixel data.)
The Propeller goes way, way beyond this. It's got both NTSC and VGA signal generation hardware on board. And it's not just single bit video, either. It can generate full color at a number of resolutions. This I had to try. But my little Quickstart board doesn't have a video output on it. I looked at the Propeller Demo Board and saw that it had a video interface. It was just a 3-resistor DAC and an RCA jack, so I decided to make one.
It doesn't get much quicker and dirtier. It took longer to pull the parts than to assemble.
At first, the video was pretty wonky. Then I realized I had the resistor that's supposed to go to P13 going to P15. Once I fixed that, it was better, but still not good. The graphics demo ran OK, but one of the text demos wouldn't even sync properly, the other had poor contrast. The thought crossed my mind that either the timing in the Propeller wasn't much better than my old Atari Pong or that the provided 5MHz crystal meant that the timing wasn't right on. But I've learned the hard way, time and time again, to suspect user error first.
I took another look at my too-quick and too-dirty video interface and found that the resistors that were supposed to go between P12 and P13 were swapped. A moment later I had pulled the pins from the plastic IDC header and moved them to the correct positions. This is why doing electronics when you're under the weather is not always a good idea. Fortunately this wasn't a mistake that'd let the smoke out.
Once that was done, the video looked great on all the demos. I then had to make a batter adapter so that I could try it out on the big screen TV in my living room. A quad-AA battery pack came to hand quickly enough, one of the ones with the 9V snap connector on the end. Then I soldered a 9V snap connector pigtail to another IDC header and spliced in an IDC socket pigtail. That way I'd still have a place to put my ground pin from the Q&D video interface without soldering it to the battery connector. As a final refinement, I put a slider switch in line on the positive battery wire to act as a power switch.
Once that and the video adapter were plugged into the Quickstart board, I took it out to the living room and hooked up to a free composite video input. It looked great.
I spent the rest of my time mucking around with the code of the various NTSC video demos. Spin is a really easy language to learn, if you've got any programming experience it'll come easily. It's even simple enough I could easily see teaching it as a first language to new programmers (with a Propellor board on hand, of course, to get the full hardware + software experience!)
Cleaning Up Shop
As mentioned, I have now been playing with my new board for four days. In spite of a couple of minor snags (figuring out what to choose to compile and run my programs, finding the demo for the Quickstart board itself) it's been a very rewarding use of my time. I can see now why people who've been raving about this controller for five or six years are excited about it.
After my first night playing with the board, I learned while reading the Parallax forums that the Propeller could also do RF-modulated video. That's what I spent mid-day Saturday playing with. I put rabbit ears on my big screen (talk about incongruity!) and a pair of jumpers on the RCA jack and managed to receive video from the Propeller from about 25 feet away. What worked even better was an LCD handheld television left over from the analog TV transmission days. I was able to get as far as 10 feet from my back door, a total distance of about 50 feet, and still get good reception. I don't think it's making it as far as the neighbor's house, though (fortunately.)
Yesterday I buckled down to some more structured learning of the Spin language, reading the Propeller Manual and Datasheet, and so on. Today I'm continuing that, working my way through tutorials and such. I also took a look in the goodie bag I filled at the Free tables at the Robotics Expo--there are a couple of Propeller boards in there that I can't wait to find a use for now.
Monday, May 14, 2012
Paizo Pathfinder Lite PDFs
Paizo has regularly released inexpensive PDFs of the Pathfinder rule books as a convenient addition to their hardcopy versions. Of the various major game companies, Paizo has my favorite pricing policy on PDFs. They're cheap. Which makes it a lot easier to do what I like, which is have both the hard copy and the PDF. (Even better is the practice of some smaller publishers, like Jon Brazer Enterprises, where you get both hardcopy and PDF in one package deal!)

The PDFs for the Pathfinder books from Paizo had a problem that limited their utility, though. They have multiple layers with lots of vector art. This is great for getting the best image on any display or from any printer. It's a huge load of computation, though, if you just want to read the rule book on an e-reader or a laptop.
I originally bought the PDF of the Core Rulebook to be able to cut and paste items into my own adventures--little reminders for rules that I may not use often that would crop up, and other such things. The PDF did that job great. But when I went to put it on my Sony PRS-950 e-reader, so as to have a small, light copy of the rules where ever I went, it buried the poor e-reader's processor. Page turns took forever. It was nothing but frustration.

Even the version of the rule book that has the chapters as separate files didn't help. The files are smaller, but the computational overhead was still just too much for my e-reader. Even when I threw it on my Eee PC (a "netbook" style laptop computer), it was just too slow to use. I was reduced to extracting the text from the PDF to rather ugly text files.
Lite PDFs
Fortunately, Paizo has now released Lite PDFs of the Pathfinder books.
I downloaded them this weekend, then tried them out on my e-reader and Eee PCs this morning. What a difference! They read smoothly and well, even on the Sony PRS-950's little processor (little by current standards--it's got far more power than my primary software development workstation from the '90s!)
I'm not the only one loving these new streamlined PDFs. Have a look:
The Iron Tavern Mini Review: Pathfinder Lite PDFs
The Earthen Ring comments on Pathfinder Lite PDFs
Paizo Messageboards: PFRPG Lite PDFs

Tweet
The PDFs for the Pathfinder books from Paizo had a problem that limited their utility, though. They have multiple layers with lots of vector art. This is great for getting the best image on any display or from any printer. It's a huge load of computation, though, if you just want to read the rule book on an e-reader or a laptop.
I originally bought the PDF of the Core Rulebook to be able to cut and paste items into my own adventures--little reminders for rules that I may not use often that would crop up, and other such things. The PDF did that job great. But when I went to put it on my Sony PRS-950 e-reader, so as to have a small, light copy of the rules where ever I went, it buried the poor e-reader's processor. Page turns took forever. It was nothing but frustration.
Even the version of the rule book that has the chapters as separate files didn't help. The files are smaller, but the computational overhead was still just too much for my e-reader. Even when I threw it on my Eee PC (a "netbook" style laptop computer), it was just too slow to use. I was reduced to extracting the text from the PDF to rather ugly text files.
Lite PDFs
Fortunately, Paizo has now released Lite PDFs of the Pathfinder books.
I downloaded them this weekend, then tried them out on my e-reader and Eee PCs this morning. What a difference! They read smoothly and well, even on the Sony PRS-950's little processor (little by current standards--it's got far more power than my primary software development workstation from the '90s!)
I'm not the only one loving these new streamlined PDFs. Have a look:
The Iron Tavern Mini Review: Pathfinder Lite PDFs
The Earthen Ring comments on Pathfinder Lite PDFs
Paizo Messageboards: PFRPG Lite PDFs
Subscribe to:
Posts (Atom)


 Webomator.com: Backward into the