My current work is to convert an old UPS into the power supply and motor driver enclosure for my CNC mill.
I started with this:

And cut the back panel to hold my Gecko G540 motor controller like this:

I go into more detail on these steps in an earlier article.
One of the problems with this enclosure is the airflow. I want to make sure there's plenty of it for the current electronics. I got another metal nibbler and made some cut outs this morning for the power supply:

I didn't worry about cosmetics here, I just wanted to get on with the job. As long as I won't cut myself, I don't care how the cutouts look.

You can see that the cutouts line up well with the power supply vents.

There's room for some airflow around the power supply inside the cabinet.
I wanted to take advantage of the big red power switch the original UPS had, so I chopped of the section of the original PCB with the switch, then mounted it on the original mounting hardware with some minor mods to make it stay in place without the rest of the board.


The original switch's specs are good enough to wire it directly into the AC power line for the new circuit.
I thought I might have to use the switch to pull a relay on the AC line for the power supply, but as it turns out it's adequate for passing the AC directly. Whew! That saved some work.

Finished AC Wiring

Power On, Looking Good!
Then I wanted to have a power indication LED. I made up a resistor divider both to feed a lower voltage to the LED than the power supply's 48V nominal output, and to limit current to the LED. I planned on 6V at about 10mA, and made a divider. The original two-color LED didn't light up very bright at 10mA (I should have built the divider for 20mA), so I put in a red LED that's daylight visible at 10mA.
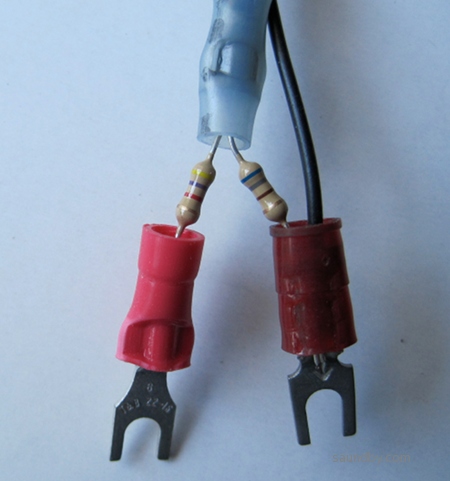
The divider/current limiter.

The new red LED, held up to the light pipe with shrink wrap so I can see how bright it'll be. I later removed the unshrunken shrink wrap, hot-glued the LED to the PCB, and it fits up to the light pipe inside the cabinet perfectly.
My last item on this cabinet will be finished tomorrow. Since the power supply puts out 48V and all my available fans are 12V, I put four fans in series. I'll have two fans drawing air in from the sides of the cabinet across the back of the G540. A third fan will exhaust air out the front of the cabinet. The fourth will try to stay out of the way. I marked out a place for the last fan to draw air into the cabinet from below the Gecko, but didn't cut it. If it gets warm inside the case while I'm testing it with motors attached and driving a CNC table around, I'll put in the hole for the fourth fan.
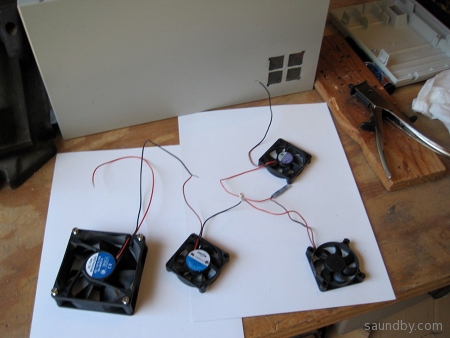
The fans, and an enlarged air vent for one of the fans in the side of the cabinet cover.
When I'm not working out in the shop, I'm personalizing my microCarve A4's paint job a little:


 Webomator.com: Backward into the
No comments:
Post a Comment