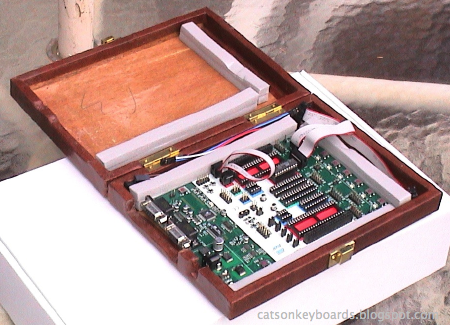
One of my new STK-500 boards inside the case I modded for it.
I recently bought two new STK-500 development boards from Atmel. I've had one for years, and it's been very useful to me when working with AVR microcontrollers. There are a few faults with the STK-500 however. One is that it doesn't provide for mounting in a case. There are no mounting holes, and the components on the board run out to within a millimeter or so of the edge, so there's not even room to put the board on rails.

The components don't provide enough clearance at the edge of the board for mounting rails, and there are no mounting holes on the STK-500 board.
My old STK-500 lives in a cardboard box for a 5-1/4" hard disk drive. It's worked out well, even if it's not very attractive. It lets me keep dust off the board, and it keeps people's fingers away when I take it out in the living room to program chips while I'm in my easy chair. It also lets me put it on a shelf safely when I'm not using it.

My old STK-500 inside its box. The markings on the side keep me from thinking it's an empty box that belongs in the trash.

Here are the cutouts at the end of the box to let me get at the connectors on the STK-500.

The STK-500 inside the box.
I have to open up the box to turn the STK-500 on and off, but that hasn't been a problem. It usually only happens a couple of times a session.
When I got two new STK-500s recently, I originally figured I'd do the same thing with them. When I went looking for boxes, though, I couldn't find anything of the correct size. I haven't bought any hard disks this large for long enough that I've either used or thrown out the boxes of this size.
A trip to the local thrift store turned up a travelling backgammon game set that was just the right size. The plastic moldings for the game pieces and the metallic game boards came out easily. If the STK-500 had fit in alongside the game piece holders I probably would have left them as storage space for cables, but they were a bit too wide.
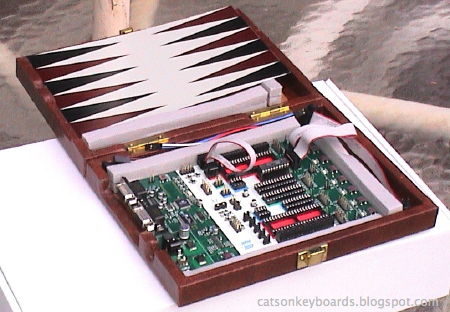
The case started life as a backgammon set.
The adhesive on the vinyl covering was pretty dried out, so it wasn't hard to pull it up and away from the wood underneath. I set the STK-500 inside and marked the power and RS-232 connector locations on the wood with a pencil. A couple of sessions with a Dremel milling bit and test-fits later, I had the connector cutouts where I wanted them in the wood. The next step was fitting the vinyl to the new shape of the wood.

The connector cutouts.
I started by cutting the vinyl for the big cutout first, with yielded a sizable scrap of left over vinyl to use to cover up gaps and mistakes elsewhere. To attach the vinyl back to the box, I used the tail end of a can of spray-on contact cement that was sitting on the shelf going to waste. Brush-on contact cement would have worked just as well. I cut and folded the vinyl pretty much the same way as I would gift wrap around the wood. The results aren't perfect, but they're good enough for someone who's looking for something more classy than a cardboard box.
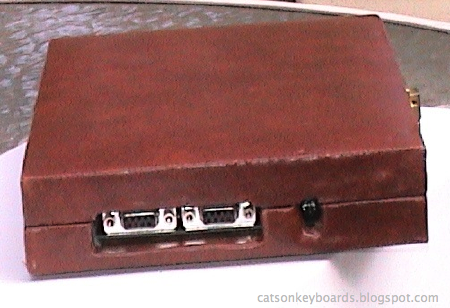
The business end of the case. If I plug cables into the connectors I can cover up any flaws in my work before the guests arrive.
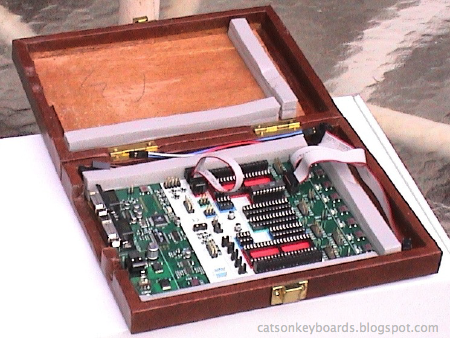
The board safely held by the foam strips, with extra jumper cables stored safely along the sides.
Now I'm going to have to hit some more thrift stores. I've still got one more board to house, and I think my old one will get jealous if I don't find it a nicer home, too.


 Webomator.com: Backward into the