Wednesday, June 30, 2010

Retrocomputing Summer

Aside from some astronomy, I've been spending a lot of my free time this summer on some retrocomputing projects. In particular, I've been working on my homebrew 8085 single board computer and my Ampro Little Board Plus Z-80 systems. Alongside that, I've been trying to fit a new computer that's similar to a COSMAC Elf into an Altoids tin.


Lee Hart's 1802-Based Mini-Microcomputer: The Membership Card.


Lee Hart's Membership Card computer. A COSMAC Elf in an Altoids tin...almost.
Retrocomputing in Your Pocket.
Lee Hart's Membership Card computer. It's based on the RCA 1802 microprocessor, and it's a close cousin to the COSMAC Elf computer (Google it, if you don't know about it!)
Lee Hart gave me a set of printed circuit boards for his new Membership Card computer last fall. It's a really neat design. In essence, it's a COSMAC Elf that fits in those handy little enclosures, Altoids tins. It can take up to 32KB of memory, in either a ROM or a RAM, and includes a full front panel with toggle switches and LEDs displaying binary. If you don't want to go quite so hairshirt, you can connect to a PC over a serial port, or build your own front panel card. I'm thinking of going with a hex display and hexadecimal keypad in a future build.

Meanwhile, I'm trying to fit my Membership Card into its tin. I think my switches are too tall, so I'm going to have to make some other accomodations.


Lee Hart's Membership Card. The tin doesn't quite close with the switches I'm using.
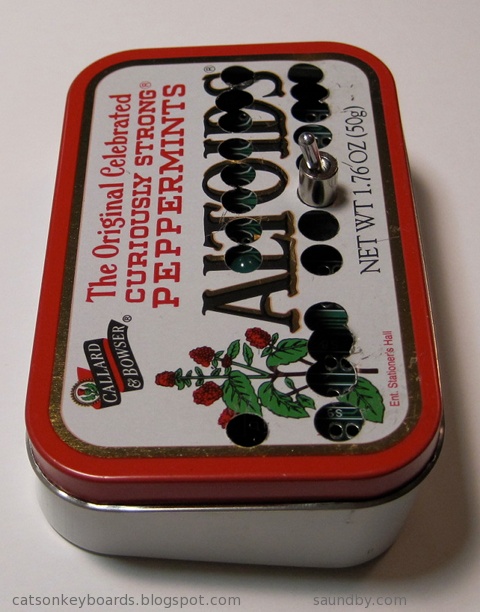
The tin doesn't quite close up. My interconnect between the PCBs may be too tall, or my switches aren't laying as low as Lee's did. It's only about 1.5mm, but it's enough. I'm working on Plan B now.


My 8085 Handheld Single Board Computer Project


Rev. 1 of my 8085 computer's front panel, laid out on acrylic sheet.
My first shot at a front panel layout for my 8085 computer, laid out on acrylic sheet to make it easy to see what's where.
I've been working on my new 8085 computer project for a few months now. It's a new-design retrocomputer that's easy to build. I have the project designed so that a builder can put it together a little bit at a time, and test it thoroughly at each stage. That way you don't need to put together a bunch of parts then see if it all works at the end, and then wonder what's wrong when it doesn't all work together.

Each step of the project adds just one to three new pieces to the computer. The complete computer is only twelve integrated circuits, plus resistors, capacitors, and other small parts. It can be built with only eight ICs, if you want a simpler version that gives up a couple of extras. These can always be added in later, if desired. The real key to the project is that it provides a complete, functional 8085 system similar to the SDK-85 development system that can be built up from simple parts that are easy to understand and use in programs.

Most of my work lately, other than playing with software and deciding how I want the programmer's interface to work in its operating system, has been on the front panel of the computer and its enclosure. I want it to be something that someone with minimal tools, and even without power tools, can build from common materials available at an ordinary hardware store. I also want it to be attractive enough to show off after it's built, not something that looks like it belongs in a junkpile.


The 8085's new Masonite (hardboard) face panel, partially complete in this image.
The partially-complete Masonite face panel of my 8085 computer.
I've nearly finished the third and final version of the face panel. I learned some things while making the first two that made me keep trying again. Fortunately, nobody else will have to go through three tries to get it right. I'll soon be posting the instructions for constructing the nice version of the front panel, and the enclosure, on my website. After trying acrylic and metal, I decided to go with Masonite (hardboard) as a material that anyone should be able to work and that can be made to look professional, even with hand tools. Masonite is an old friend of mine, I've been building enclosures out of it since the 60's, when I had nothing but unpowered hand tools, and very few of those, to work with (Back then I cut my panels with steak knives!)

Since posting details on the 8085 construction project takes about 3 times as long as doing it, I've been holding off on doing an update of the project on its site until I have the enclosure complete. Now I'm almost done, so an update will probably occupy the later part of my summer.


Ampro Little Board Plus Z-80


Ampro Little Board Plus on my kitchen table during initial fire-up.
My Ampro Little Board Plus, in its original incarnation. A pile of parts on a kitchen table.
I first constructed my Ampro system as a mass of loose parts and cables on my kitchen table. The Ampro is a single board computer based on the Z-80 processor that includes serial and parallel I/O, 64K of memory, and a SCSI controller all on a board that's sized to piggyback on a 5-1/4" floppy disk drive. They were the original "bookshelf" computer, long before today's Mini and Micro-ETX systems appeared.

I got a pair of system boards for these from Dave Baldwin when he was cleaning out some old computers prior to a move. One night, I really wanted to get one of the many systems up and running that Dave had given me, and since these seemed like they'd be the easiest to get running I grabbed one and got it going.


The Ampro Little Board Plus Z-80 PCB
A complete computer, with Z-80 CPU at 4MHz, Floppy Disk Drive Controller, Serial and Parallel I/O, and SCSI all on one small card--in 1984!
Since then, I've been using it as a pretty maxed-out CP/M system. I put a 2GB SCSI hard disk on it, of which I'm only actually using 88MB (which is plenty, I never filled the 10MB of disk space on my old Kaypro 10 CP/M system, after all.) First, I played with it using just CP/M and its utilities. Since then, I've installed a couple of development systems--Turbo Pascal 3.02 and Workman's FTL Modula-2--as well as WordStar 3.0.


The Ampro LB+, covering my dinner table.
Honey, how about we eat dinner on the patio tonight?
I did move it off the dinner table! It's been living on an "occasional table" in our living room for the past several months (occasional tables seem to happen more than occasionally in our house.) I've been wanting to move it into my computer room in the house. But there wasn't room on my desk.

Then Vic Maris of StellarVue Telescopes offered me an old desk he didn't need at his offices any more. He said it was large. It is. I had to do some major work to get it into my office. But once there, I put my usual computers on it (an iMac 20" and a Beige G3 PowerPC Mac), and had enough room for one more computer!


My PowerPC Mac, iMac, and the Ampro's terminal all happily living together on my new desk.
My new desk, with Three full size computers.

I put the Ampro's current box (a PC's beige box) under the desk. I've got another enclosure for it that'll be much more attractive and interesting--but that's another project yet to come. On top, I had plenty of room for my ADDS 2020 terminal, which is the user interface for the Ampro. Unlike the original Big Board computer (the "Ferguson"), the Ampro uses a terminal, whereas the Big Board has a built in CRT and keyboard interface.

Once I got everything in place, I started working with my ADDS terminal to try to get the best image out of it. I originally used this terminal with the Ampro because it's the smallest full terminal I've got. I took a look at all the space on my new desk, and realized...I could use a better terminal. So I pulled out my VT-102, which has a very nice white on black character display and is very sharp.


The new desk with the Beige G3, aluminum iMac, and VT-102 on it.
The Beige G3 runs Lemmings and Warcraft, the iMac is my interwebs machine, it's desktop background is an image of the Big Board computer PCB, and to the right is my Ampro's terminal, here showing the utilities menu.

The VT-102 wasn't perfect, though. So, thanks to some help from fellow retrocomputerists I was able to find the technical info I needed to adjust the character height on the display (it was a little taller in one part than another when it came out of the garage.) Now it's perfect.

Now I'm happily writing games in Turbo Pascal at my desk, and the space next to my easy chair is waiting for another project to move in while my wife's back is turned.


The mess of displaced stuff from the desk swap.
Getting the new desk in meant moving some stuff out.
Here is my electronic workbench, covered in clutter. You can see my breadboard 8085 on the left, the new 8085 on the bench, with the face panel parts on top of the oscilloscope. The computer system is a 486 that I still use for burning ROMs and transferring data between newer systems and older ones. In front on the desk is the plastic tub that holds the Membership Card's parts. Doesn't everyone have a beef jerky jar filled with capacitors on their desk? Mine is on the right, with the blue and red things in it that aren't candy. On top of and beside the monitor are my three STK-500 development boards for my AVR projects. I have three so that I can have each set up for a different chip at the same time.

Since this picture was taken I've cleaned up. Really.

The breadboard version of my 8085 computer, the MAG-85 is still in use, by the way. That's where I've been doing my OS development while I finish the permanent version of the hardware. That way I don't have to worry if I've got the permanent one's keyboard and display off for work on the face panel if I want to sit down and code some 8080/8085 assembly.

Friday, June 18, 2010

Another Semester with Greenfoot

Greenfoot continues to be a productive tool for my high school computer classes. This year we had two students with a strong programming background in the class. This turned out to be both good and bad for the teams. In both cases, the experienced programmers tended to dominate the teams and their work. They became a bottleneck in both teams to one degree or another.

I spent more time in class on project management than I have in prior classes to help deal with this. It worked well, but it didn't relieve all the problems the teams had.

In my classes, I do as much as I can to allow the students to organize themselves and run their own projects. At the high school level, I feel the students are ready for more autonomy as well as the opportunity to struggle with their assignments. I still put up some "guard rails", but as much as possible I let them run their own project teams.

Each team had a unique set of problems to overcome. In both cases, they managed to produce a playable game in spite of the problems. I managed to get every student to spend some time hands-on with their project's code and gain confidence in their ability to code on their own. And in spite of the groups' problems, both teams managed to stick to the class schedule. I build in a small amount of slop time at the end of the project schedule, but for the first time since I've taught this class, the teams had complete working code at the end of the scheduled time.

The high school team projects for the semester are online. We had two development teams:
"Bubbles" was developed by Ryan, Keeghan, and Coleton.
Team blog at: http://anysomething.com/blog/
Finished game is online at: http://www.greenfootgallery.org/scenarios/1416

"Qake" was developed by Eva, Caroline, Ian, and Jeremiah
Team blog is at: http://qakedevelopment.blogspot.com/
Finished game is online at: http://greenfootgallery.org/scenarios/1417

These links are also available on the class web page at: http://acedev.com/education/hscomp.html