Thursday, July 23, 2009

A Bit of Retrocomputing: Bringing Up an Ampro Little Board Plus with CP/M and ZCPR

Computer Terminal, bare PCBs and unhoused floppy drives running rampant on the kitchen table.
The thing with the screen on it is NOT the computer, it's the terminal. The computer is the little printed circuit board laying to the right of the terminal.
Tonight I managed to bring up a really neat little computer for the first time since I obtained it. The computer is an Ampro Little Board Plus. It's a Z-80 based single board computer from back in the 1980s. I've been working off and on at getting this computer up and running over the past three days. Tonight I actually managed it.

Back in the day I lusted heavily after one of these systems. I guess it just goes to show, if you're patient enough you can get what you want! First there was the Ferguson Big Board, a full system on a single printed circuit board, conveniently sized to attach to an 8" floppy drive. Then there was the Ampro Little Board. It was sized to attach to the bottom of a 5-1/4" floppy disk drive. I don't know why, but slick little things like that sell me.

The Ampro Little Board is a 4MHz Z-80 computer. Yes, four megahertz. It has 64K of memory. Once again, sixty-four kilobytes of RAM. That's not cache, that's main memory. It also has an on-board floppy disk drive controller, two serial ports, and a parallel port. That's a complete computer system. Unlike the Ferguson, the Ampro didn't include circuitry to drive a video display or talk directly to the keyboard. It uses a serial terminal.

The Ampro Little Board Plus PCB, hanging out in the breeze.
My Ampro Little Board Plus, Sitting Out in the Open
The board I've got is a Little Board Plus, which is the same as an original Little Board with the addition of a SCSI interface. This board is part of a treasure trove that was given to me by Dave Baldwin, former editor of The Computer Journal. I've been working with several of the other systems he gave me, and I've only just started to get to the ones that came as circuit boards rather than as built-up systems.

While just getting started, seeing if the board is even functional, I kept the extras to a minimum. To start up the LB+ you need:
  • a terminal,
  • a 5-1/4" floppy disk drive,
  • a power supply,
  • the right cables to hook it all together,
  • all the jumpers set properly
  • and a system disk for this particular system.

I got started on this a few days ago, by pulling out the documentation for the system and reading it. Then I read it again with the LB+ on hand so that I could go along and check the jumper settings as I read. Then I started to make up the special cable the Ampro needs for a serial port connector to go to a terminal. I found a connector of the right type, with just one extra pin position that wouldn't cause trouble so long as I was careful how I plugged it in. I halfway through wiring it up to a DB-25 connector when I took a break and found a finished cable sitting in another box.

A reused PC power supply, with lots of dangerous loose wires.
Not OSHA Compliant.
For a power supply I used an old PC power supply pulled out of a system that got scrapped out a long time ago. The supply was the third one I tried. Two others didn't work. The first was an old XT power supply with an actual switch on the side that I planned to use so that I wouldn't have to jumper the Power On line on a newer supply. It just sat there, so I'll have to open it up and see what the matter is another day. The second was a sweet little ATX supply, more compact than most I've got around. It put out the standby 5 volts, but wouldn't come up when I pulled the Power On line down to ground. But the third one worked. I feel a bit like the guy who built his castle in a swamp in Monty Python and the Holy Grail.

Ugly cabling and bare electronics all over the place.
Guess what? We're not eating dinner on the table tonight.
Since this was a quick and dirty setup, everything was out in the breeze. I drummed up an old 48TPI floppy drive and hooked it up to the board. The serial cable I used between the Little Board and the terminal was my trusty old "Smart Cable." I remember buying it years ago, fretting over the price. I paid a lot for it (I don't recall the amount, but it was probably something on the order of $50 in 1981 or so), but I knew it'd be worth it since there's nothing worse than wondering if the reason things don't appear to be working is that you've got a serial printer cable instead of a serial terminal cable, or a crossover cable when you want a straight-through, or vice versa.

You can see my Smart Cable in the upper left of the above image. I love that cable. It lets me get on with what I want to do and sweat the details later. A bargain at twice the price.

When I first applied power, the floppy drive motor came on, but it didn't try to seek. I wasn't sure of the health of the drive (it's only been laid by for about 25 years now), so I went and pulled another old 48TPI drive that I had on hand. This shows that I was prepared--I didn't have to look for the right box in the garage for two days then give up and pull one out of another system.

I set the drive select on it, double checked my cable and connections, and this one worked. I took another look at the original floppy. I discovered that I'd missed the jumper on the drive setting by one. I had it set to "Drive Select 1" rather than "Drive Select 0." The system expects to find its boot floppy at Drive Select 0, which is Drive A in CP/M by default.

So I modified the floppy cable to take out the twist that they put in for PCs so that you don't have to muck around with drive select jumpers, and hooked up the second drive. Now I had a two drive system. Woo hoo! Now we're cookin' with gas!

The whole system, working like a champ. Now to find a box to stick it in.
The Ampro Little Board Plus with Two Drives, Running CP/M and ZCPR3. Welcome to the Future.
Once I saw that things were working, I called my kids away from their multi-gigahertz Intel Core 2 Duo Macintoshes to come have a look at a "real computer." I'm always curious how this stuff looks to kids who've grown up in the modern day and age. Their first computers were HP9000 Unix workstations purchased surplus from a local university about 10 years ago. They each had one, they used the command line to play a MUD, and their favorite X11 app was Neko. A few years later they got upgraded to Apple Macintosh G3s, old at the time but new and exciting to them. The catchphrase was "Yay, we've got iTunes!" Now they're on Mac minis. The older one was playing with Blender doing 3D animations while I was figuring out my floppy drive problems, the younger one was uploading a website she created about pandas using ftp.

They thought the system was pretty cool. I told them what each IC on the Ampro board did (try that on your current system!) and how the system worked with the terminal. Then I ran a disk format and let them watch the floppy drives move their heads and spin the disks.

They asked me how the disk worked, and I explained how the data gets laid down, why the head moves far enough that you can actually see it move from track to track, and so on. They were amazed when I pulled the disk out. "It's all mechanical!" They were expecting me to type something and have the disk spit out of the drive automatically. When I reached over, flipped the handle, and pulled the disk out by hand they were amazed.*

The younger one thought the drives would take both 5-1/4" and 3-1/2" disks. I realized she thought the cutouts for the finger relief were cutouts to allow a different size disk to be inserted, and showed her that it was just for fingers, I'd need a different disk drive for a different size disk.

They then got to watch me make a copy of my system disk. Tick-tick-tick-tick went the head. I called off the sides and tracks to them as the drives worked.

Then I put them both on the spot.

"How much data do you think is on this disk?" I asked.

The younger one bit first. "About half a gigabyte?" she said.

The older one's face showed that she didn't think much of her sister's guess. "...or less?" said the younger, looking for a save.

"How much do you think?" I asked the older one.

"About a hundred megabytes," she said. I managed not to laugh. It reminded me of the time I pulled out a turntable and put on a 45 several years ago when they were younger. While the song was playing they asked me, "How many songs does it hold?"

When I said the floppy disk holds 360 kilobytes tonight, they had me verify for them what order of magnitude a kilobyte was. Then they looked very thoughtful.

We wrapped up with me showing them some utilities and giving some demonstrations of how a terminal differs from a keyboard and display directly on the computer.

I'm really pleased to have this system up and running. Next steps are to find it a temporary box to live in so that a 50,000 volt cat doesn't fry things (and so that we can go back to eating dinner on the dinner table.) Then I'm going to see about getting a hard disk on it and load up the hard disk with all my favorite stuff (Wordstar, FTL Modula-2, Trek, and so on.)

*This just goes to show how it's novelty that makes things seem special, not what it actually does. I'll never forget the Mac and converted Lisas spitting out 3.5" disks automatically and how cool it looked back then (as well as how stupid it seemed from a practical standpoint of someone who was going to be damned if he was ever going to ask a computer to pretty please give the disk back.)

Tuesday, July 7, 2009

Bluetooth Headset for the Sciphone G2: Round 2

I had a little trouble getting my new Bluetooth headset to charge up, but now it's charged and ready to go.

Samsung WEP200 Bluetooth Headset
Blue Light=Good
It paired up with the Sciphone G2 just fine, the only hiccup was getting the correct menu (I'll post a step-by-step on my website soon, but it's not difficult.) Once paired, the phone switches automatically between the Bluetooth profile and General profile automatically depending on whether the headset is powered up or not.

Note: You'll want to make sure that you've got a reasonable ring tone set up for the Bluetooth profile, it won't default to the same one as your General profile.

Once on Bluetooth, everything worked great. The sound is good, there is no noise in the background as there is with the included wired headset. I'm still working on that problem, but Bluetooth is certainly a reasonable work-around.

Upshot is, if you're a frequent headset user (while driving or whatever), expect to purchase a Bluetooth headset to use with this phone.

I looked at the headsets at retail outlets, and choked at the prices I saw. Fortunately, I found that online prices are far more reasonable. I've linked the unit I bought here:


It's a pretty basic unit, no stereo but inexpensive, comfortable to wear, and it has good sound. The buttons are large enough to use easily while you're wearing it. Some headsets I've seen have volume controls that are impossible to use without pulling the headset out.

I'm still new enough to wireless headsets that I feel like I ought to be quoting Lieutenant Uhura while I'm wearing one, but nonetheless I'm happy with the one I got.

Also, the charging problem is easy to overcome once you realize it's there. If the light is flickering when you set the headset in its charger, take an extra moment to seat it properly. It's obvious once you know.

My Articles on the Sciphone G2:

Bluetooth Headset for the Sciphone G2: 1st Lesson

I picked up a Samsung WEP 200 Bluetooth headset to use with my Sciphone G2. I got it online at a great price. There were other headsets, but I wanted something with usable buttons, not something miniturized to the point of uselessness. The WEP200 looks like it'll fill do what I want, from the reviews I've read.

It arrived yesterday. I haven't used it yet, though. Step 1 in the instructions is to charge the headset in its little carrying case charger module.

The instructions say it'll take 2 hours to charge. So I tucked it in, and got a red LED which it is supposed to display until it charges, at which point a blue LED lights up. Well, after waiting overnight the red LED is still on. Sort of.

It's actually flickering a bit. Just a little, barely noticeably. I opened the case just now and fiddled with the headset. Now the light is on solid red.

Lesson 1: If the little red LED on the Samsung WEP 200 headset is flickering, it's not going to charge in two hours. It's not even going to charge overnight. Fiddle with it until it doesn't flicker.

More later, as events transpire...

Once the LED turns blue.

My Articles on the Sciphone G2:

Thursday, July 2, 2009

Sciphone G2 Headset

There's one problem I haven't managed to solve with my SciPhone G2. When I'm on a call, I get noise on the included headset.

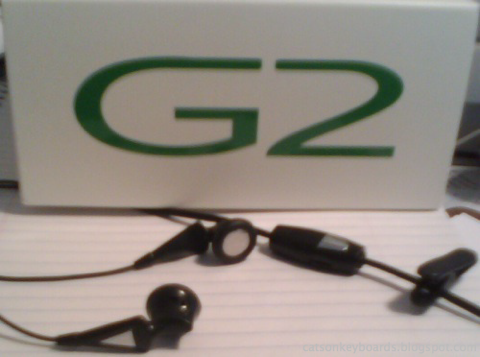
Sciphone G2 Headset Ear Plugs and Control image

When I'm listening to music through the headset, it works great. When I pick up a call, the G2 pauses the music. Perfect. However, noise then appears while I'm on a call on the headset. It sounds like radio interference.

Handset Sound Quality: Excellent


The G2's sound quality from the handset is excellent. It's as good as my old Nokia 3650, which had excellent sound quality, even when compared against other top-notch mobiles. It does a great job of picking up my voice, rejecting ambient noise, and of playing the sound from the other end of the call. It also does a great job of picking up audio when in speakerphone mode, though the location of the microphone makes it more sensitive to direction than my old candy bar phone with its mike on its face panel.

Headset Sound: Not Good

When I'm using the included headset, however, I get noise. I've worked with SciPhone on this, but we haven't resolved it yet. I'm doing some more testing on my part to get back to them with more information at this point, because I strongly suspect it has to do with the fact that the headset cable doubles as an FM radio antenna for the G2. I was going to put a ferrite on the headset's cable to see if it cut the interference at all, but I've recently reorganized my electronics storage and I can't find my ferrites now (so much for being organized!)

The amplitude of the interference drops as I turn down the headset volume. But it doesn't go away until I turn it down to the point where I can't hear the call any more. Both sides of the call hear the interference.

Headset Plug

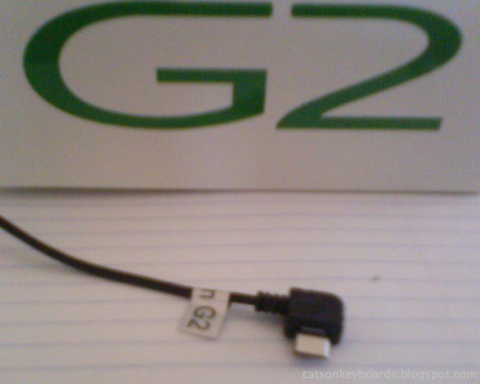
The non-standard plug end of the G2 cell phone.

The plug on the headset is non-standard, so I can't just plug in another headset and see what happens. There is said to be an adapter available from mysciphoneshop.com, you'll want to make sure you let them know you want it for a G2 to get the correct pinout if you go there to get one. I'm going to be trying something else, though.

The Workaround

I'm continuing to work on the problem. Meanwhile, I've ordered a Bluetooth headset to use with my G2. This will let me use the phone hands-free conveniently for the time being.

I suspect the problem with the included headset came about as a result of differences between the RF environment between here in the U.S. and China. I'm going to keep doing some testing, but I'm planning on being pretty conservative in how I do it. Once I find some ferrites I'll have a chance to see whether it's really coming from RF interference or not.

So far, this is the only real problem I've had with the G2. Everything else has worked well for me.

My Articles on the Sciphone G2:

Wednesday, July 1, 2009

Atari 7800 Video Modification

My website that details a modification to the Atari 7800 video game console to give it either composite or S-Video output has been moved!


Warning: Extreme Video Clarity for the Atari 7800!
Saundby's Atari 7800 Mods

I not only tell you what parts to use, where to get them, how to assemble and adjust the circuit but I also explain the electronic principles behind it all.

You can use it as an S-Video output by using the luma and chroma outputs separately, or as a standard composite video signal by tying the luma and chroma signals together on one line.